Index
- 7.1 Start the Authoring Tool
- 7.2 Overview of the Authoring Tool
- 7.3 Basic Operation Procedures
- 7.4 Adding Resources
- 7.5 Adding Action Buttons
- 7.6 Adding a Link to a Web Page
- 7.7 Adding a Link to an E-mail Address
- 7.8 Adding a Link to a Different Page
- 7.9 Setting Pictures
- 7.10 Setting Videos
- 7.11 Setting Audio Files
- 7.12 Adding a Link between Contents
- 7.13 Inserting a Text
- 7.14 Adding a 3D Animation
- 7.15 Setting HTML Content
- 7.16 Setting a questionnaire
- 7.17 Previewing Authored (Edited) Data
- 7.18 Copying Authoring (Ediitng) Data
- 7.19 Copying or Moving Authoring (Editing) Data at One Time
- 7.20 Saving Content
- 7.21 Finishing Authoring (Editing) of Content
7.1 Start the Authoring Tool
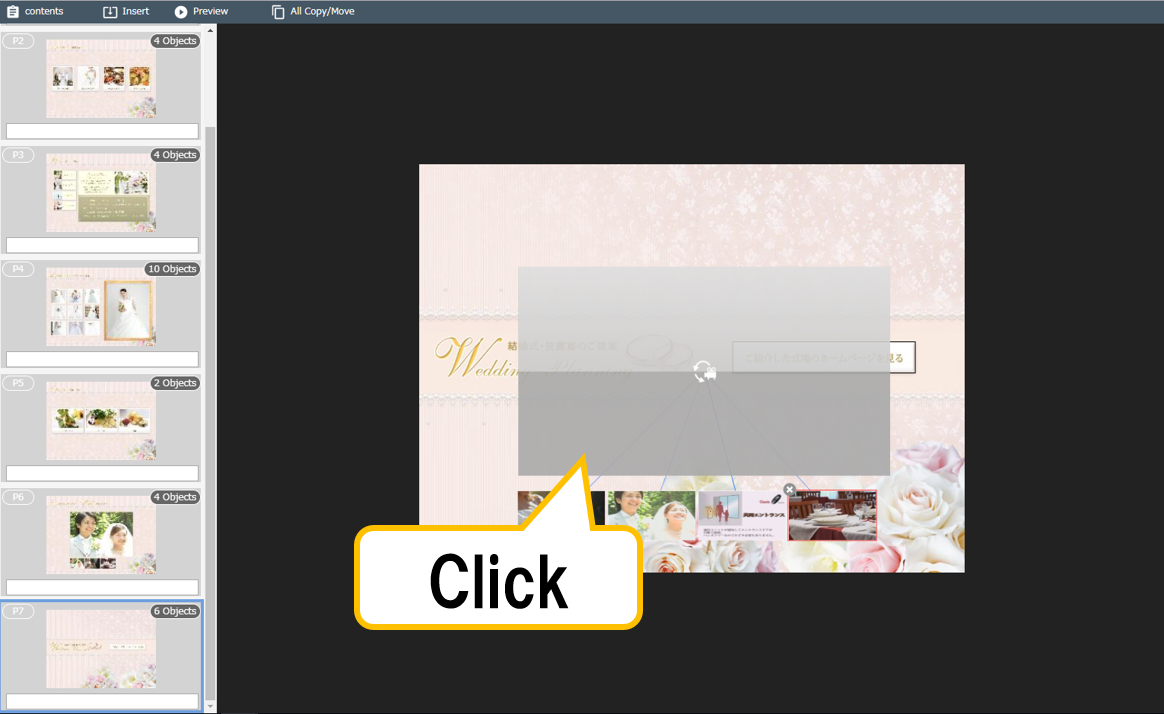
1 Click the  (Authoring)button in the [Content List] screen.
The Authoring tool (editing) screen is displayed.
7.2 Overview of the Authoring Tool
Using the authoring tool, you can add movies, sounds (music), images, HTML, and questionnaire as resources to contents already created. For added resources, you can set actions performed on the application using associated buttons.
●Notes for authoring (editing)
・You can add up to about 1,000 objects (buttons, movies, sounds (music), images, HTML, questionnaire) to PDF.
・If a certain time elapses without any operation during authoring (editing), a timeout occurs on the communication with the server system and information for which authoring (editing) is being performed is deleted. It is recommended that you mouse over the [Contents] tab on the top left and click the [Save] button often during authoring (editing).
●Screen and functions
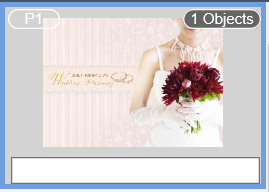
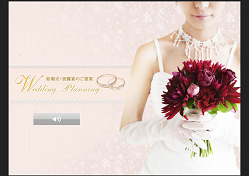
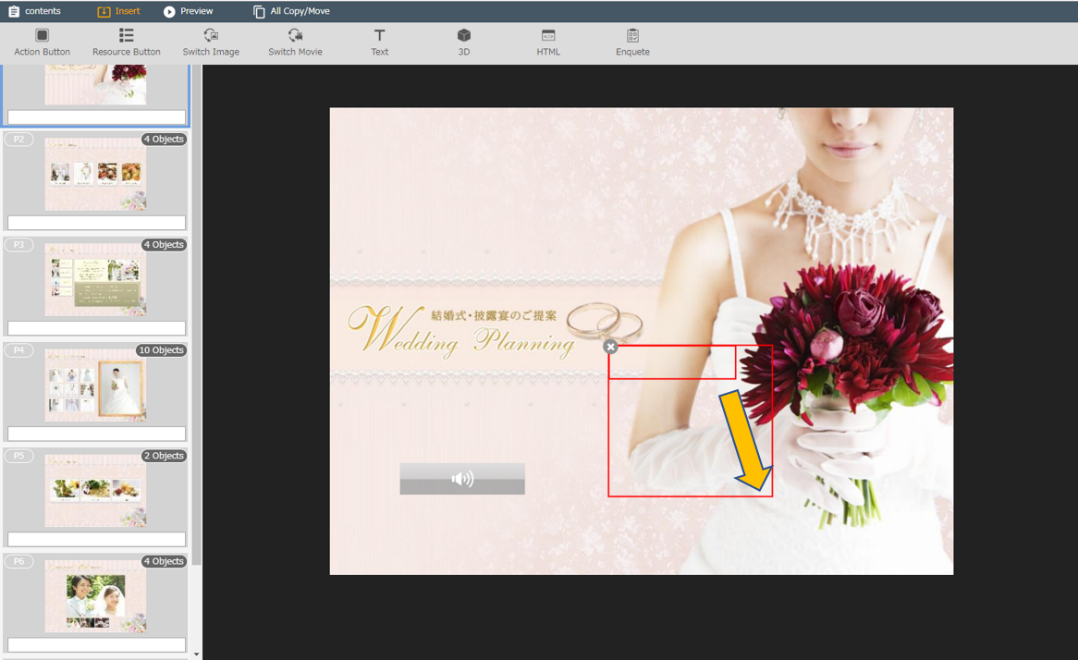
Below is the main screen of the authoring tool. When started, the 1st page of PDF is displayed.

| No | Name | Image | Explanation |
|---|---|---|---|
| ① | [Contents] tab |
 |
If you mouse over the tab, menus to save the authoring content and end the authoring tool are displayed. |
| ② | [Insert] tab |
  (When the display is fixed) |
If you mouse over the tab, the object selection menu is displayed to insert objects. If you click the [Insert] tab, the display of object selection menu is fixed and the character color of the [Insert] tab turns orange. You can release the fixed display by clicking the [Insert] tab once again. |
| ③ | [Preview] button |
 |
Edited data of the content can be previewed. |
| ④ | [All Copy/Move] button |
 |
It displays the menu to copy or move objects to other pages. |
| ⑤ | Button to move to the previous page |
 |
A button to move back to the previous page. |
| ⑥ | Button to move to the following page |
 |
A button to move to the following page. |
| ⑦ | Page entry box |
 |
It displays the page number of the page displayed in the main view area. Enter the page number you want to display. The corresponding page will be displayed in the main view area. |
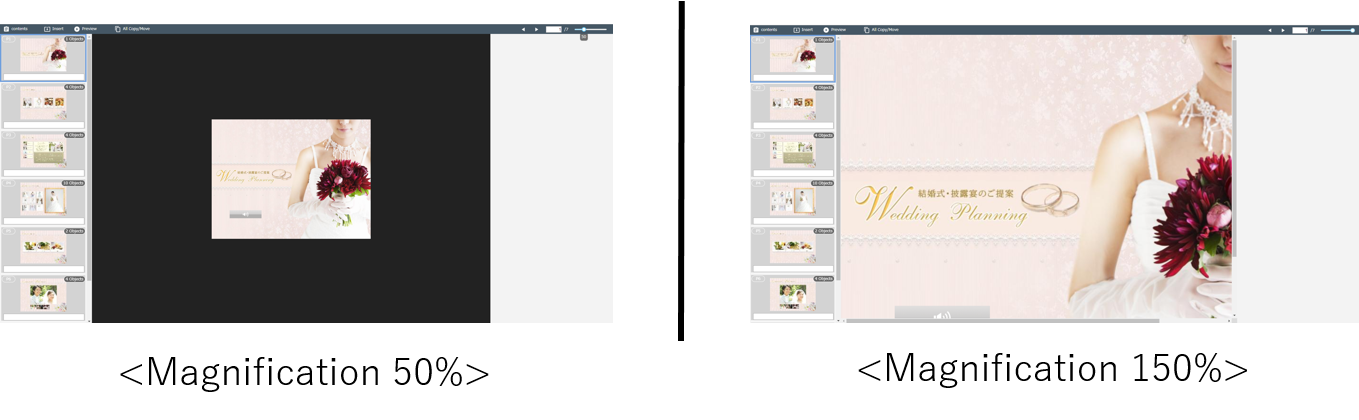
| ⑧ | Zooming button |
 |
It zooms in and out the main view display. |
| ⑨ | Thumbnail display area |
 |
Thumbnail on each page is displayed. You can see page number on the top left, the number of objects on the top right, memo entry box on the bottom. |
| ⑩ | Main view |
 |
It displays the page data of the PDF registered in the content. You can perform content authoring on this main view using various functions. |
7.3 Basic Operation Procedures
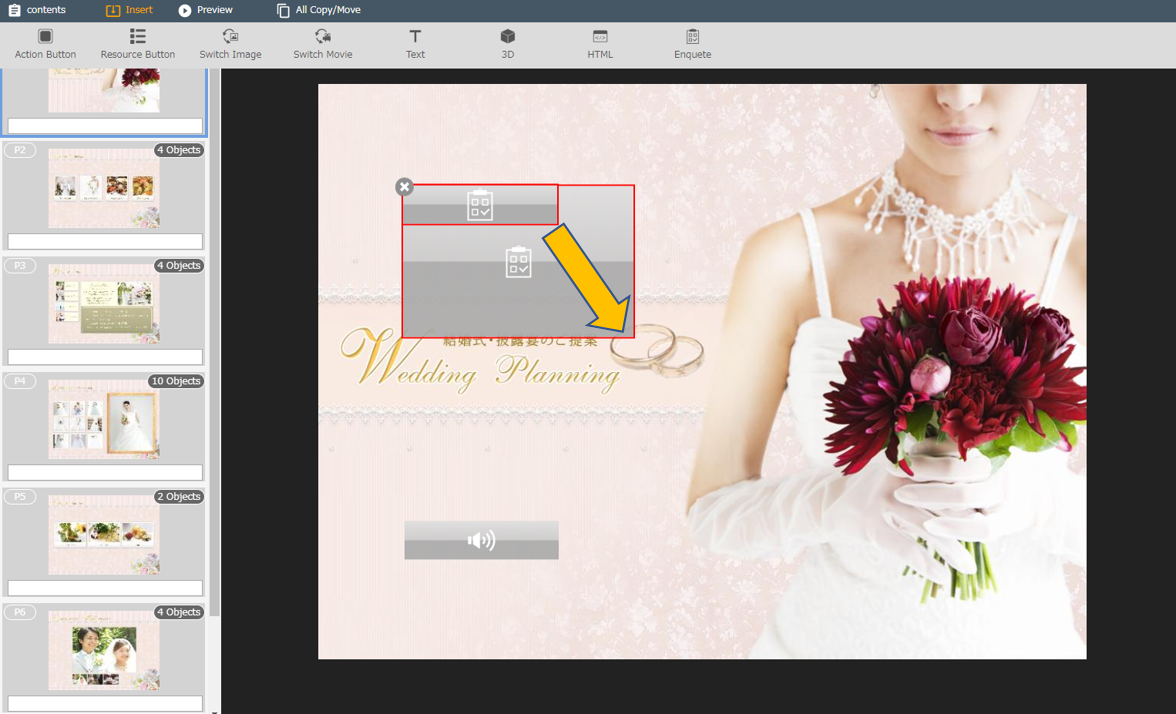
●Displaying the Object Selection Menu
Mouse over or click the  [Insert] tab on the top of the authoring tool to display the object selection menu.

| No | Name | Image | Explanation |
|---|---|---|---|
| ① | Action Button |
 |
Click this to place an action button. You can set the design of action and button. |
| ② | Resource Button |
 |
Click this to display the [Select Resource] screen. You can place resources such as movies and images. |
| ③ | Switch Image |
 |
Click this to place a switch image. Multiple images can be set to be displayed alternately. |
| ④ | Switch Movie |
 |
Click this to place a switch video. Multiple videos can be set to be displayed alternately. |
| ⑤ | Text |
 |
Click this to place a text box. A text can be entered/set in rich text format. |
| ⑥ | 3D |
 |
Click this to place a 3D content. Multiple images can be set to be displayed in three dimensions. |
| ⑦ | HTML |
 |
Click this to place a HTML button. HTML content can be set. |
| ⑧ | Enquete |
 |
Click this to place a questionnaire button. The registered questionnaire can be set. |
●Moving to a specified page
To move to a specified page, perform the operations below.
・ Click the  (move to the previous page) or
  (move to the following page) button.
・ Enter the page number in the page entry box  and press the Enter key.
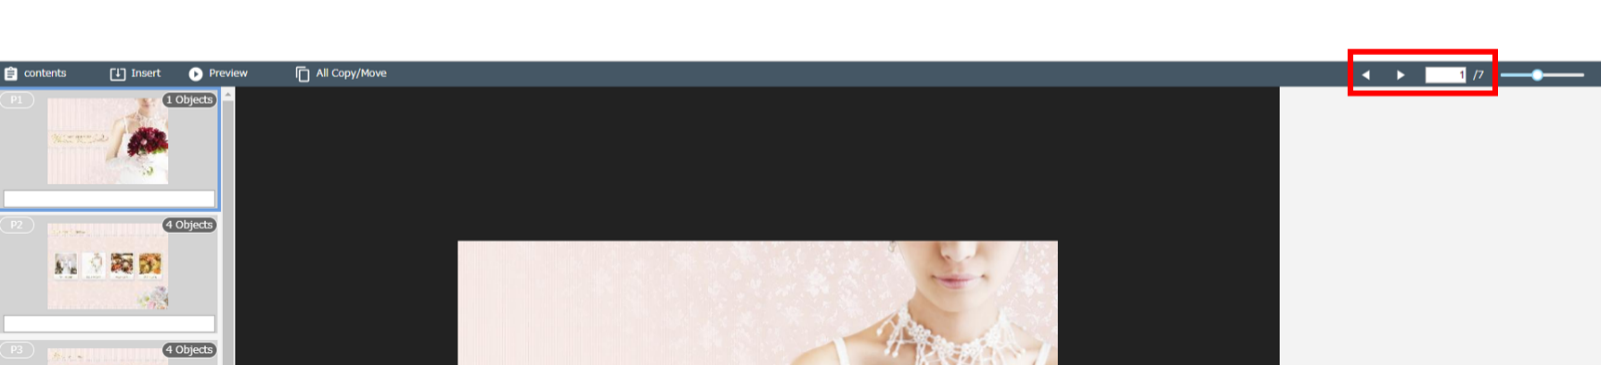
●Zooming in and out the main view display
Slide the zoom bar to zoom in or out the main view display.
・ Slide the zoom bar 
7.4 Adding Resources
1 Click the [Resource Button] in the  [Insert] tab.

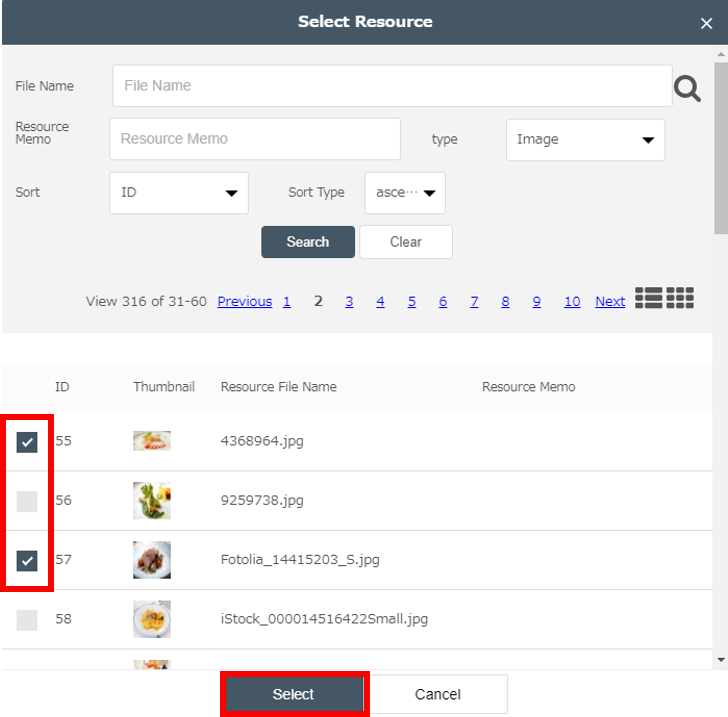
The [Select Resource] window is displayed.
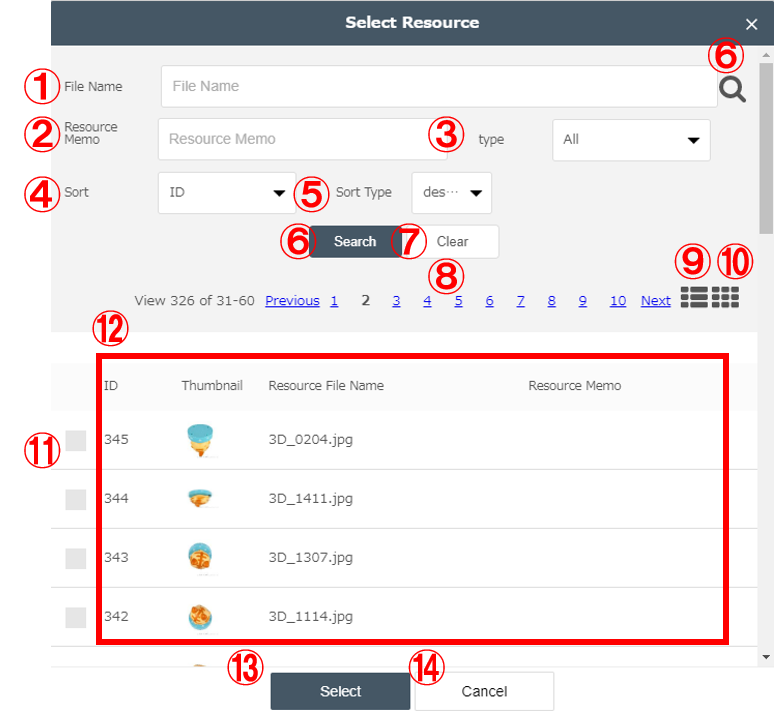
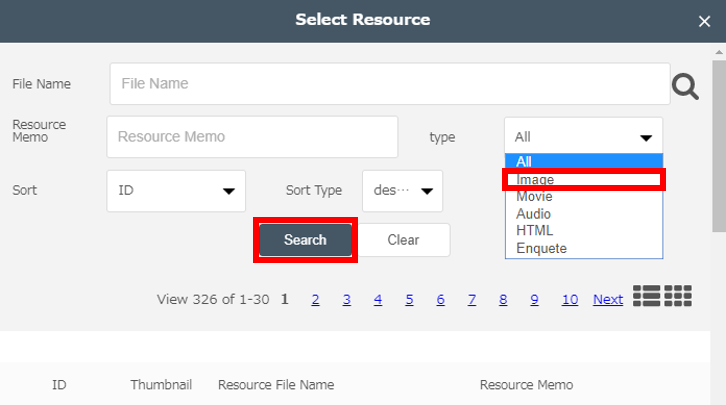
| No | Name | Explanation |
|---|---|---|
| ① | File Name | Enter the file name of the resource you want to search. |
| ② | Resource memo | Enter the resource memo of the resource you want to search. |
| ③ | Type | Select the type of the resource you want to search. |
| ④ | Sort | Resource list is displayed in the order of [ID] or [File Name]. |
| ⑤ | Sort Type | The items selected for “Sort” are displayed in [descending] or [ascending] order. |
| ⑥ | [Search] button | Search is performed based on the conditions entered/selected by ① -⑤. |
| ⑦ | [Clear] button | The conditions entered/selected by ① - ⑤ are cleared. |
| ⑧ | Page number | Click a page number to move to the corresponding page. Click [Next] to move to the next page. |
| ⑨ | List display | Resources are displayed in a list format. |
| ⑩ | Thumbnail display | Resources are displayed in a thumbnail format. |
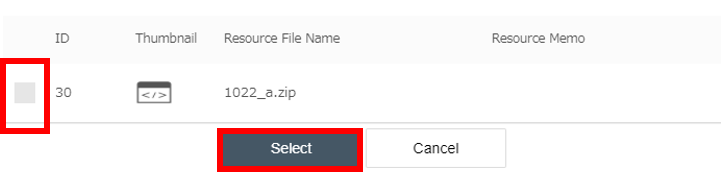
| ⑪ | Checkbox | If the checkbox of a resource is checked, the resource is selected. |
| ⑫ | Resource data | A variety of resource data is displayed. |
| ⑬ | [Select] button | The selected resource is placed in the content. |
| ⑭ | [Cancel] button | Quit the display of the [Resource Selection] screen. |
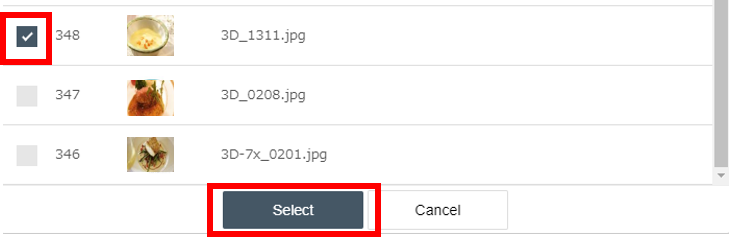
2 Select a registered resource file.
Search resources registered in Resource List and specify the target resource by checking the checkbox.
3 Click the [Select] button.
The selected resource is placed in the content.
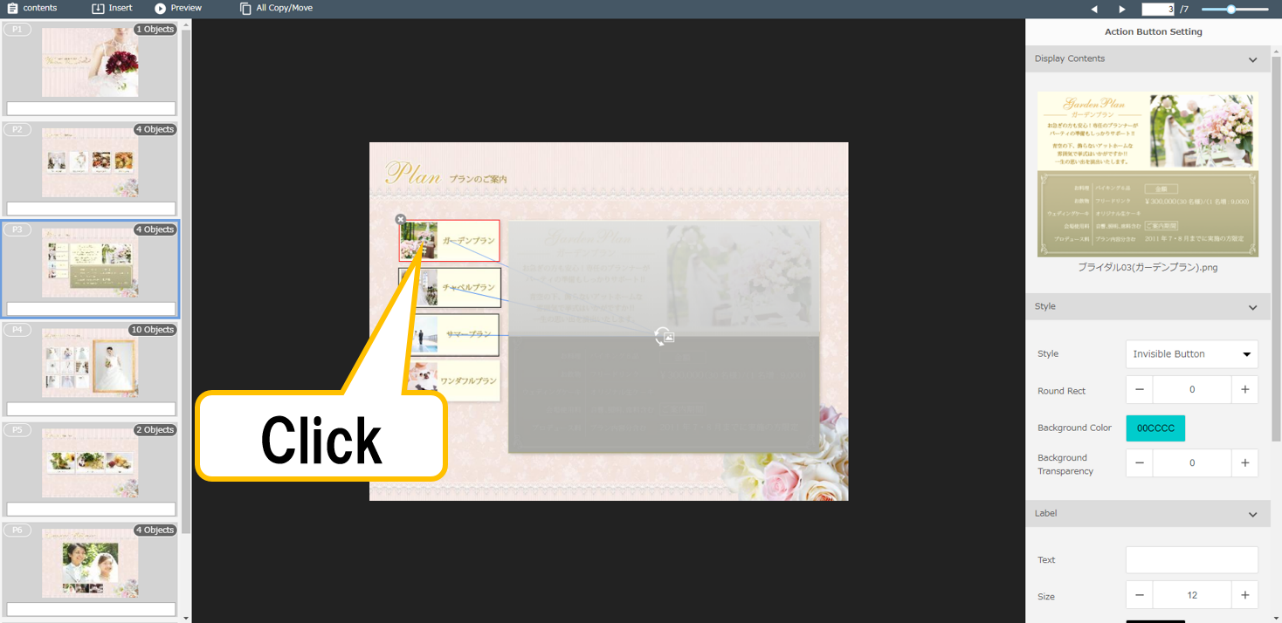
7.5 Adding Action Buttons
You can add buttons and set actions to be performed on the application. You can set actions such as linking to a website, moving to pages of PDF, sending emails, previewing images, playing videos and audio, and displaying a pop-up messages. You can select buttons from the following six types.
| Name | Image | Explanation |
|---|---|---|
| Simple Button |
|
Simply designed button |
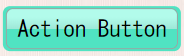
| Action Button |
|
Button with a three-dimensional design |
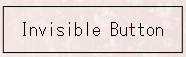
| Invisible Button |
|
Button to display transparent background *Even outlines are not displayed in the actual content. |
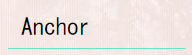
| Anchor |
|
Underlined characters are displayed. |
| Image | - | Any image registered in Resource Management can be set as a button. |
| Icon |
|
Only music /video/HTML /questionnaire actions can select these icon buttons. |

1 Click the [Action Button] in the  [Insert] tab.

An action button is placed in the main view.
2 Adjust the size of the action button.
You can adjust the size of the button by dragging its corner.

3 Click the created button.

The setting window is displayed to the right of the authoring tool.
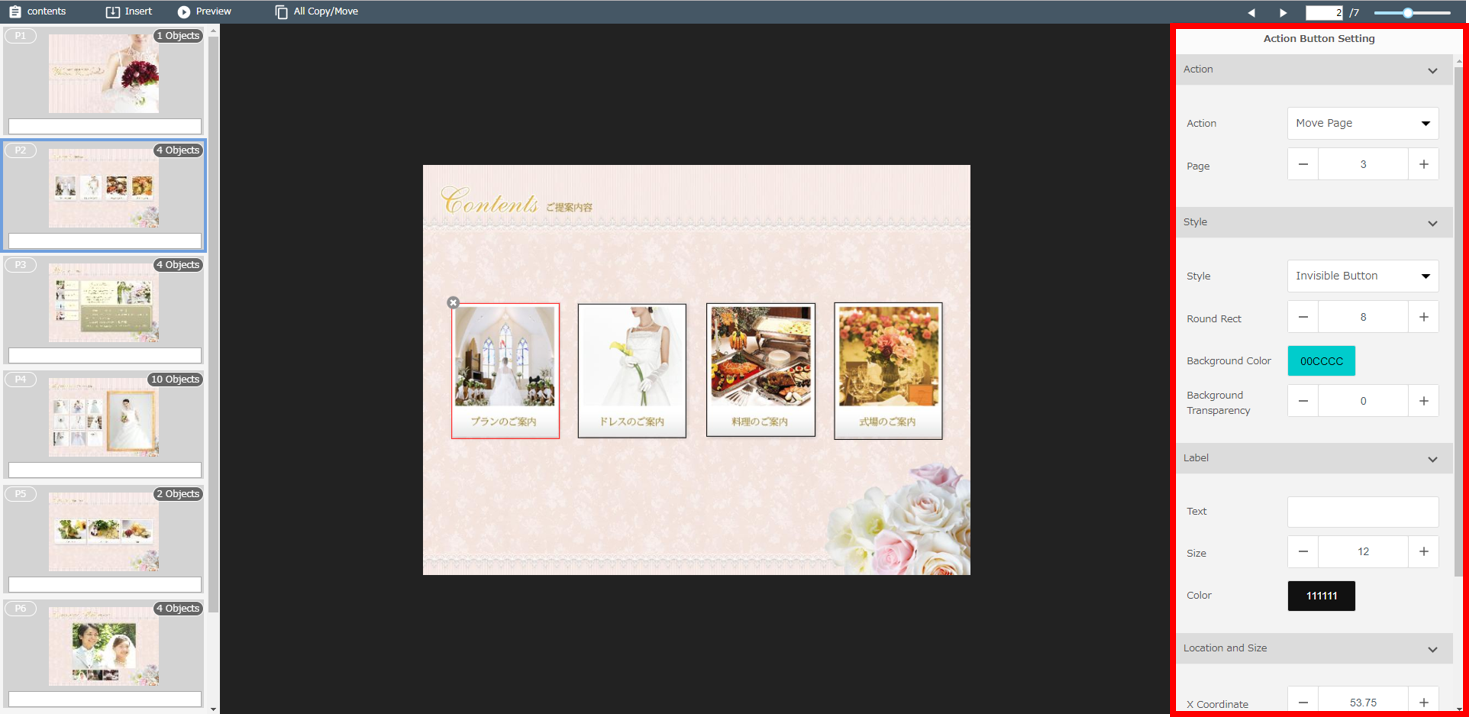
4 Set the action.
Set one of the following items for [Action].
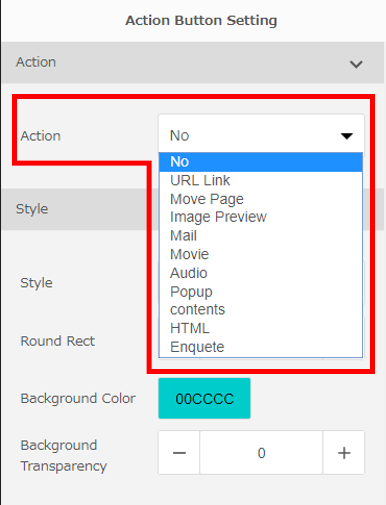
| Action | Explanation | *For operation on the application, refer to the following section of the Application User Manual (for iOS version) |
|---|---|---|
| No | Select when no action is set. | - |
| URL Link | Set a link to URL (Website). | 4.7 Linking to Website |
| Move Page | Move to a specified page within the same content. | - |
| Image Preview | Set preview display for multiple images. | 4.4 Displaying Preview Images |
| Set conditions for email. | - | |
| Movie | Set a video. | 4.5 Viewing Videos |
| Audio | Set music or BGM to play. | 4.6 Playing Music |
| Popup | Set a pop-up message. | - |
| Contents | Set a link to a different content. | 4.8 Displaying Different Content |
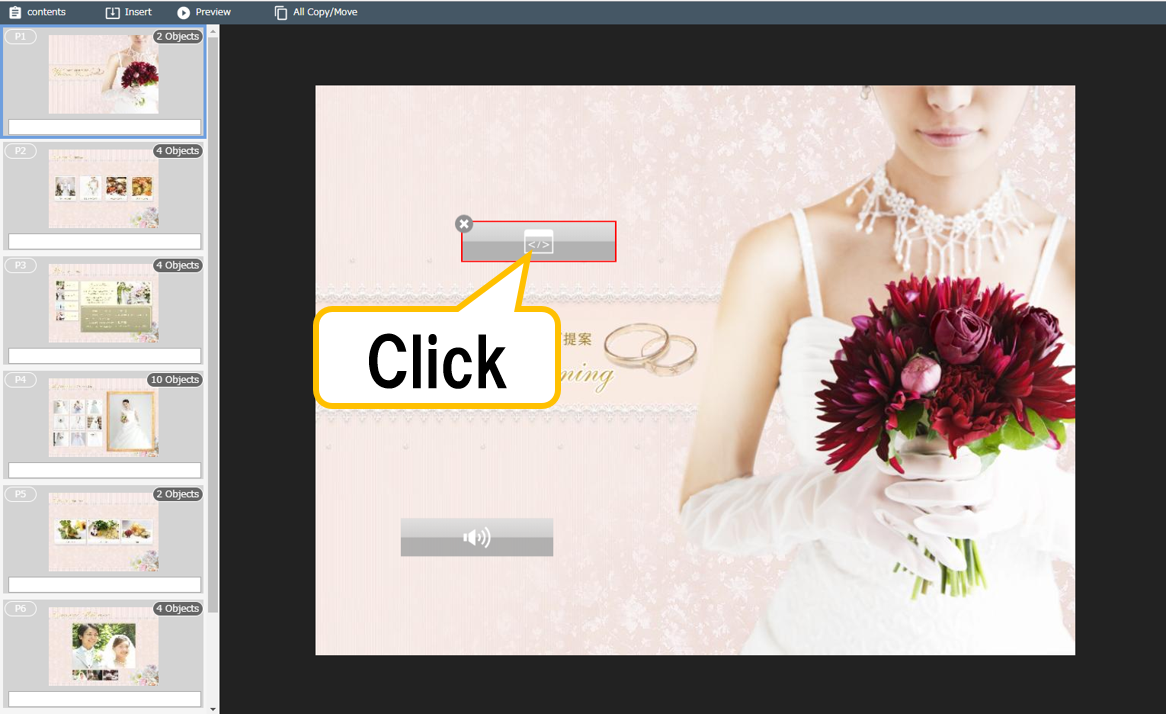
| HTML | Set HTML content. | 4.10 Displaying HTML Content |
| Enquete | Set a questionnaire. | 4.11 Answering a Questionnaire |
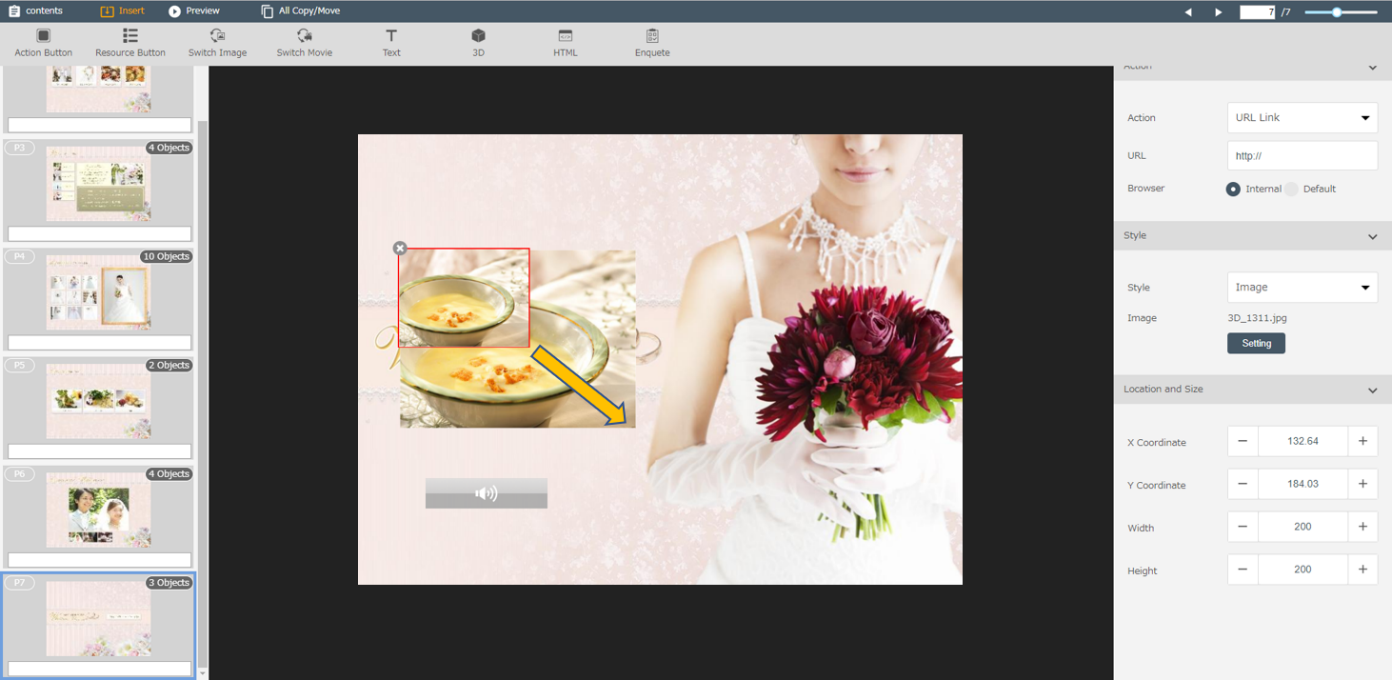
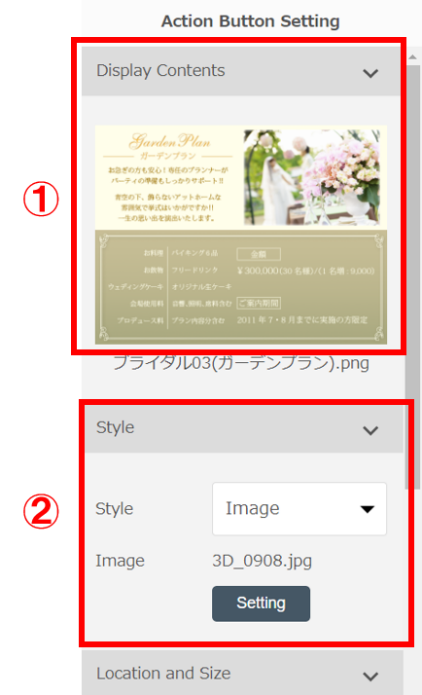
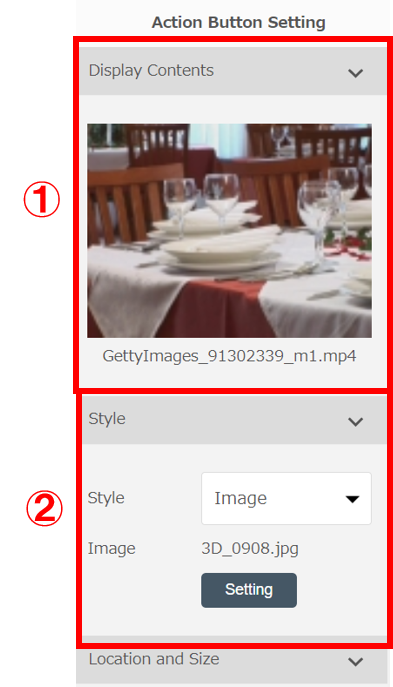
5 Set the style.
Set the following items in "style."
|
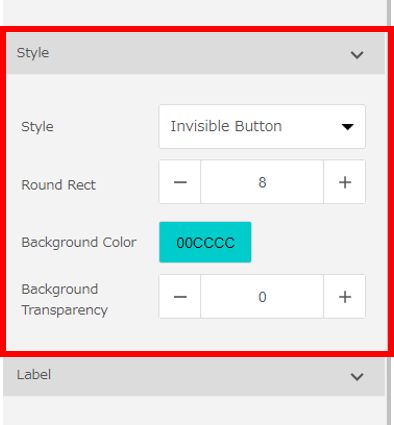 |
6 Set the label.
If you set the following items for “Label,” the name will be displayed on the button.
|
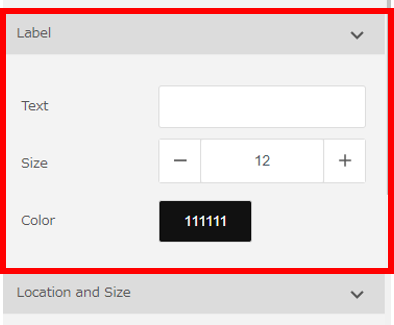 |
7 You can adjust the following items from "Location and Size" of the button.
Set the following items in "Location and Size.”
|
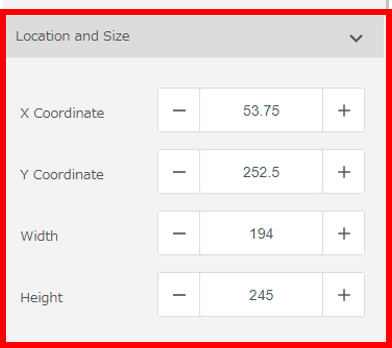 |
7.6 Adding a Link to a Web Page
You can set a link to a web page. The link can be used to access a website using a web browser or start an application that supports a custom URL.
1 Click the [Action Button] in the  [Insert] tab.

An action button is placed in the main view. An action button is placed in the main view.
2 Adjust the size of the action button.
You can adjust the size of the button by dragging its corner.

3 Click the created button.

The setting window is displayed to the right of the authoring tool.
4 Configure settings for the button.
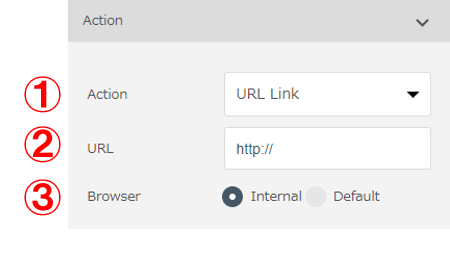 |
① Select "URL link" for “Action.” ② Enter the link destination in "URL.” ③ For "Browser," select the browser for displaying the link destination web page. If [Internal] has been selected, it is displayed by a dedicated application browser. If [Default] has been selected, it is displayed by a default browser of a device. For other items, see “7.5 Adding Action Buttons.” |
7.7 Adding a Link to an E-mail Address
You can set a link to an e-mail address.
1 Click the [Action Button] in the  [Insert] tab.

An action button is placed in the main view.
2 Adjust the size of the action button.
You can adjust the size of the button by dragging its corner.

3 Click the created button.
The setting window is displayed to the right of the authoring tool.
4 Configure settings for the button.
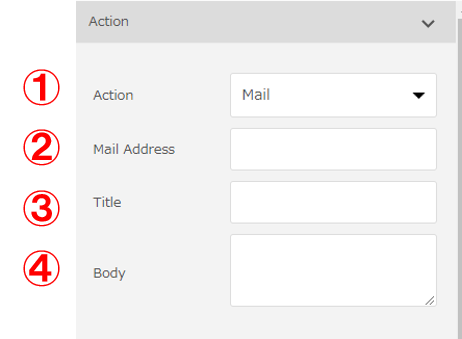 |
① Select "Mail" for "Action.” ② Enter the destination address in "Mail Address." ③ Enter a title for "Title." ④ Enter a body of the email for "Body." For other items, see “7.5 Adding Action Buttons.” |
7.8 Adding a Link to a Different Page
Configure the following settings to add a link button for linking to a different page.
1 Click the [Action Button] in the  [Insert] tab.

An action button is placed in the main view.
2 Adjust the size of the action button.
You can adjust the size of the button by dragging its corner.

3 Click the created button.

The setting window is displayed to the right of the authoring tool.
4 Configure settings for the button.
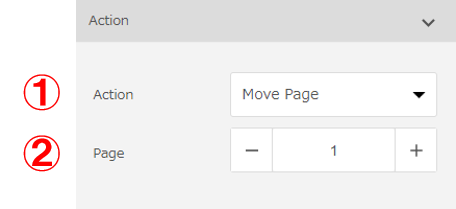 |
① Select "Move Page" for "Action.” ② Select the link destination page for "Move Page." For other items, see “7.5 Adding Action Buttons.” |
7.9 Setting Pictures
When setting pictures, register them as the Resources in advance. For the registering procedures, see "5. Uploading Resources." Pictures can be set in three ways.
●Setting Pictures
●Setting pictures by Preview (slide show)
●Setting pictures by Switch Image
●Setting Pictures
A picture is simply arranged on PDF without setting any action.
1 Click the [Action Button] in the  [Insert] tab.

The “Select Resource” window is displayed.
2 Select “Image” from Type on the “Select Resource” window and press the Search button.
Only picture (image) files are displayed.
3 Place a check mark for the picture you want to set and click the “Select” button.
The picture is added to PDF.
4 Adjust the size of the picture.
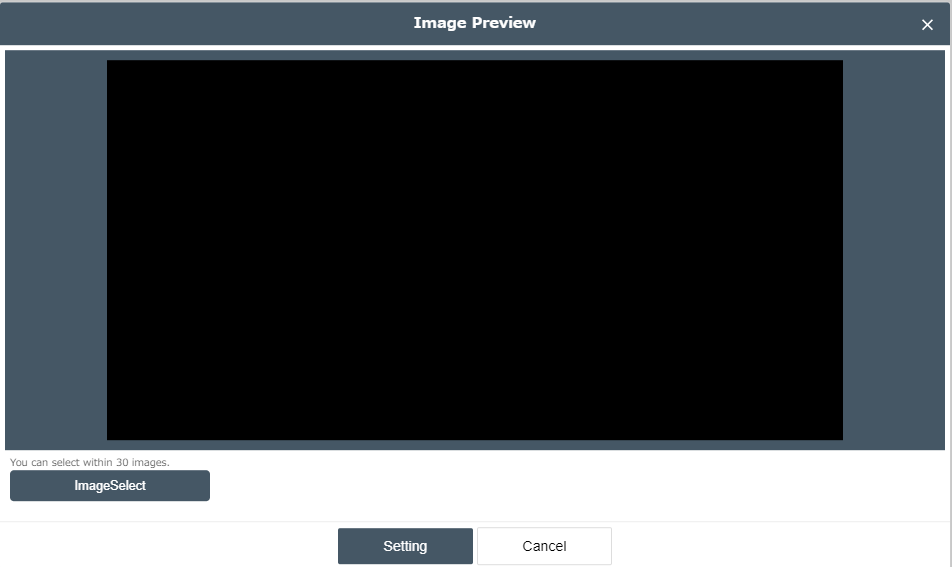
●Setting pictures by Image Preview (slide show)
By selecting the Action Button, multiple pictures can be displayed in a slide show.
1 Click the [Action Button] in the  [Insert] tab.

An action button is placed in the main view.
2 Adjust the size of the action button
You can adjust the size of the button by dragging its corner.

3 Click the created button.

The setting window is displayed to the right of the authoring tool.
4 Configure settings for the button.
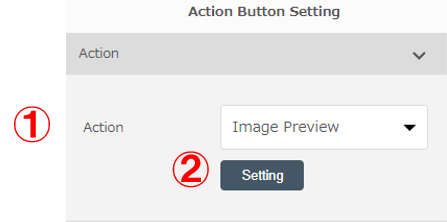 |
① Select “Image Preview” for “Action.” ② Click the “Setting” button. For other items, see "7.5 Adding Action Buttons." |
The selected image window is displayed.
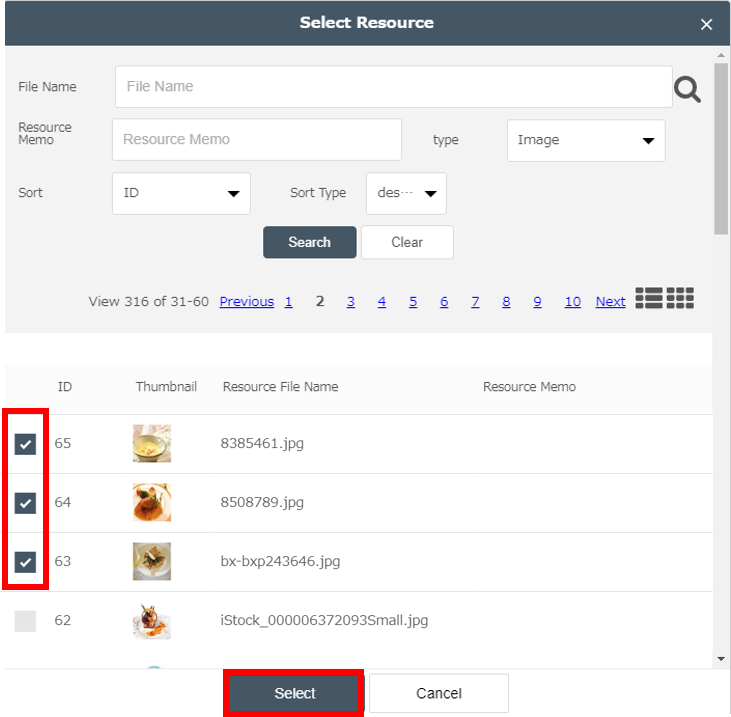
5 Click the “Image Select” button and select registered image files on the “Select Resource ” screen.
Place a check mark for multiple images to be displayed in a slide show and click the “Select” button.
6 Click the [Setting] button to quit setting.
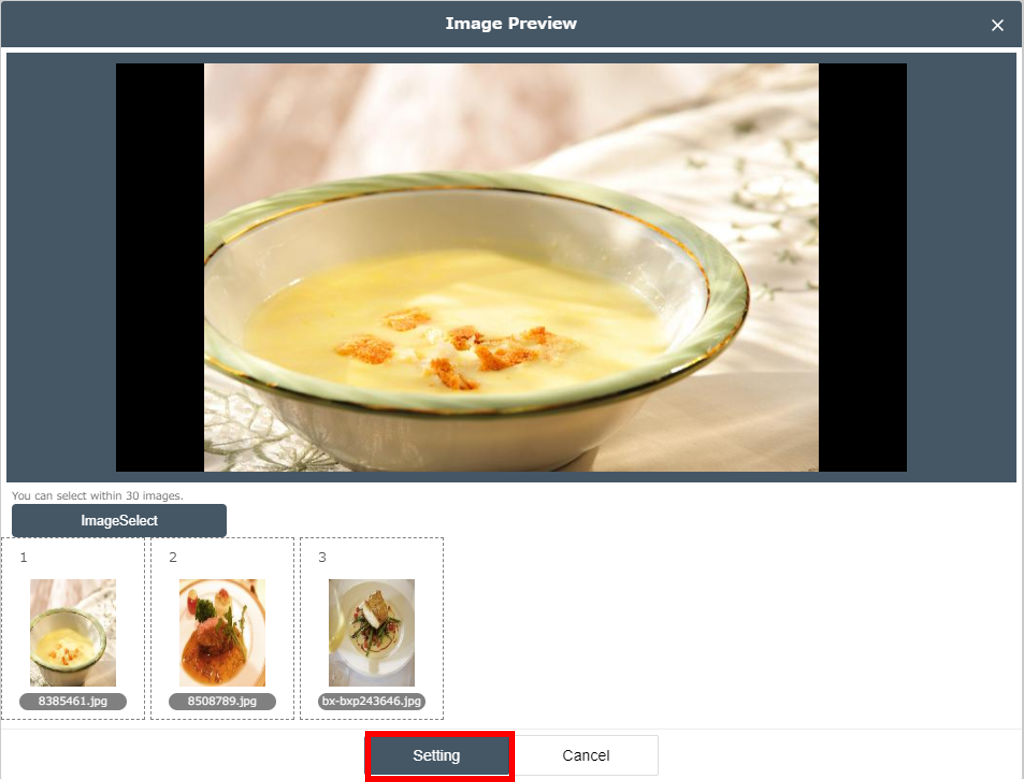
・You can select up to 30 images.
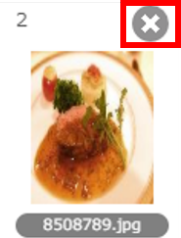
・The selected images are displayed on the lower part of the screen. You can change their order by dragging them. To delete an image, place the mouse pointer on "X" button and click it.
●Setting pictures by Switch Image
Set the [Switch Image] button to display multiple images while alternately switching them.
1 Click the [Switch Image] in the  [Insert] tab.

A switch image area is placed in the main view.
2 Adjust the size of the switch image area.

3 Click the switch image area.
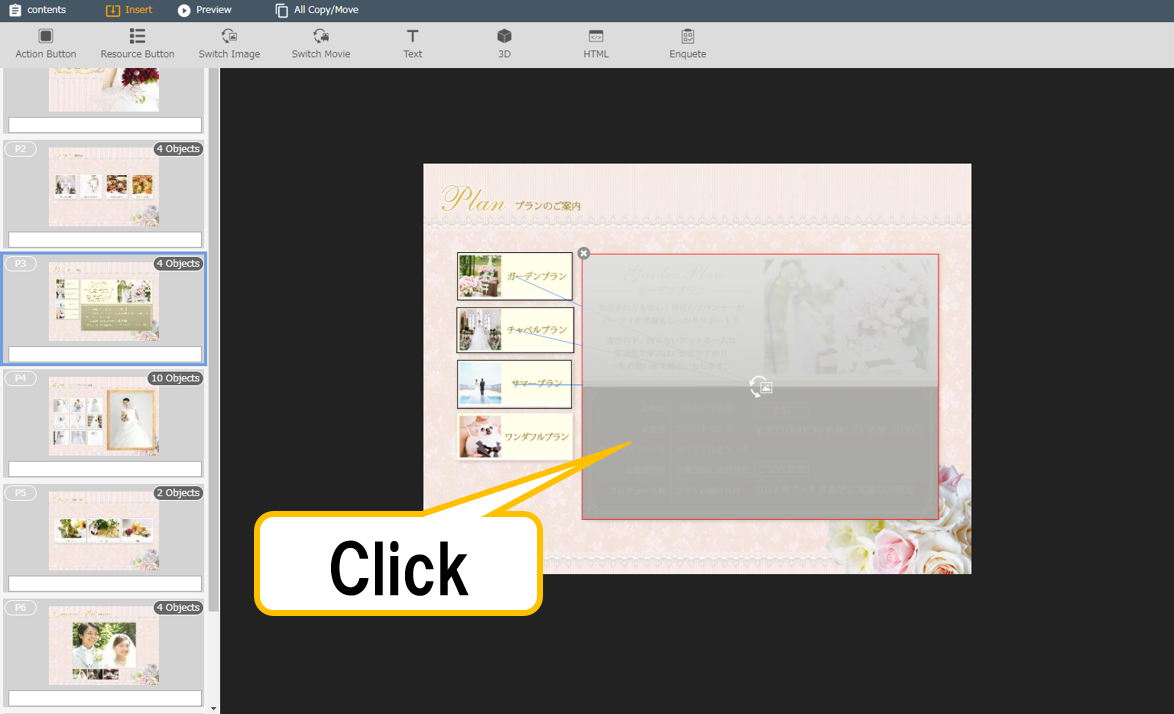
The setting window is displayed to the right of the authoring tool.
4 Set a switch image
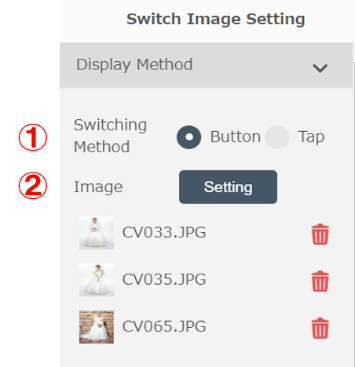 |
① Select a method to switch images. When "Button" is selected, images are switched when the switch button is selected. When "Tap" is selected, images are switched by tapping in the switch image area. In this case, switch button is not displayed. ② Press the “Setting” button. *To delete an image already set, select  . .For other items, see "7.5 Adding Action Buttons." |
The Select Resource window is displayed.
5 Select registered image files on the “Select Resource” window.
Place a check mark for multiple images to be displayed in the switch image area.
6 Click the “Select” button to quit setting.
When the switch method is “Tap”, you have completed the switch image setting.
When it is “Button”, a switch button is created to the right of the switch image area.
7 Adjust the position and size of the switch button by dragging it.
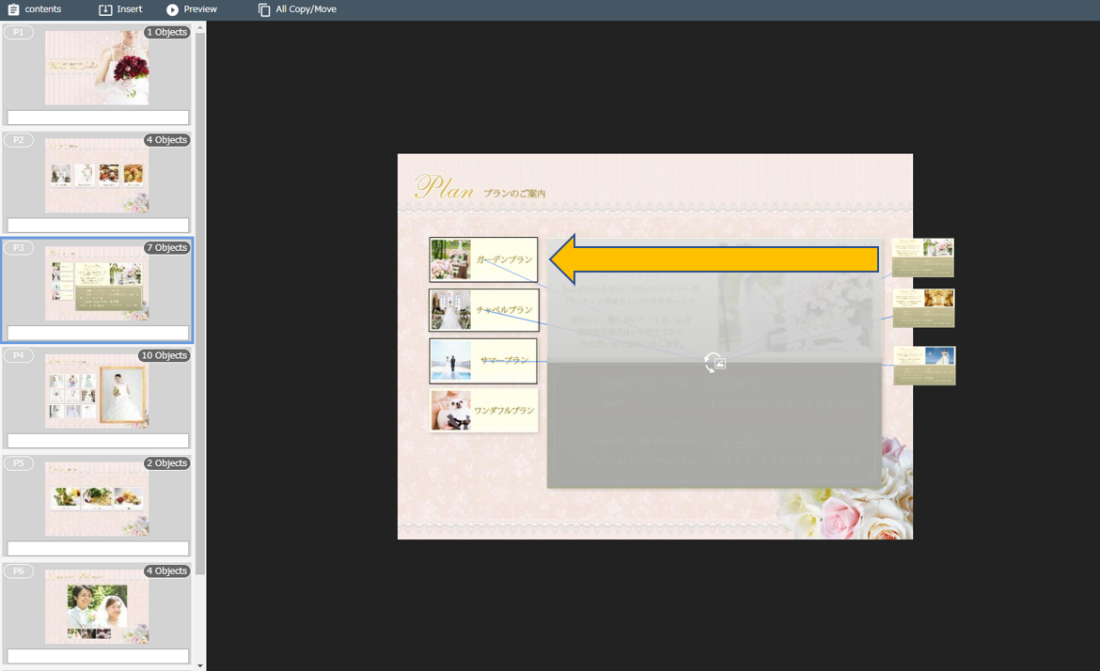
8 Click the switch button.
The setting window is displayed to the right of the authoring tool.
9 Configure settings for switch button.
 |
① Check the image displayed in the switch image area. ② To change the image and type of the switch button, use "Style." For other items, see "7.5 Adding Action Buttons." |
7.10 Setting Videos
When setting videos, register them as the Resources in advance.
For the registering procedures, see "5. Uploading Resources." Videos can be set in three ways.
●Setting a full-screen video
●Setting an embedded video
●Setting movies by switch video
●Setting a full-screen video
Set a full-screen video to play a video in a full-screen size on the application.
1 Click the [Resource Button] in the  [Insert] tab.

The “Select Resource” window is displayed.
2 Select “Movie” from “Type” on the [Select Resource] window and press the Search button.
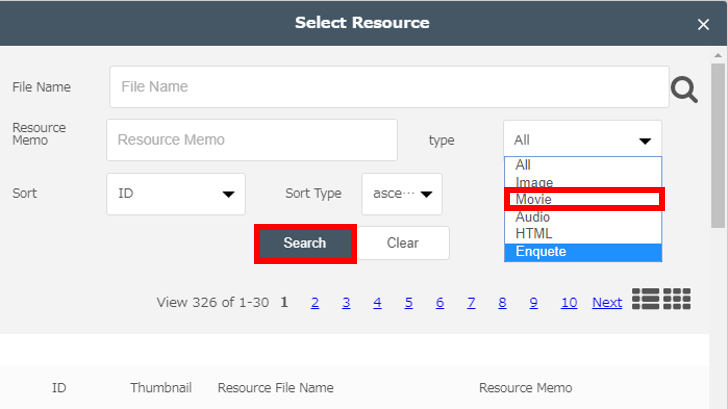
Only movie (video) files are displayed.
3 Place a check mark for the video to be set and click the “Select” button.
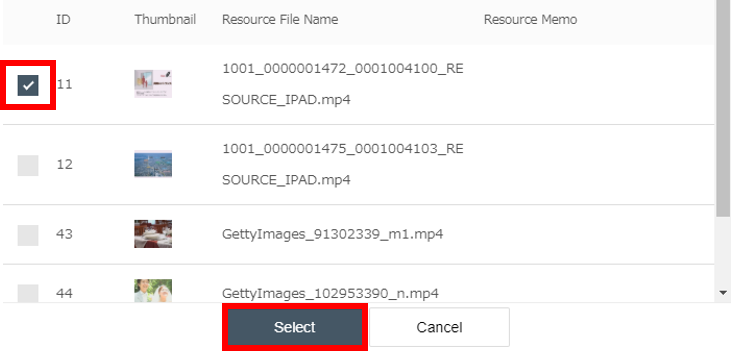
The video has been added to PDF.
4 Adjust the size of the video.
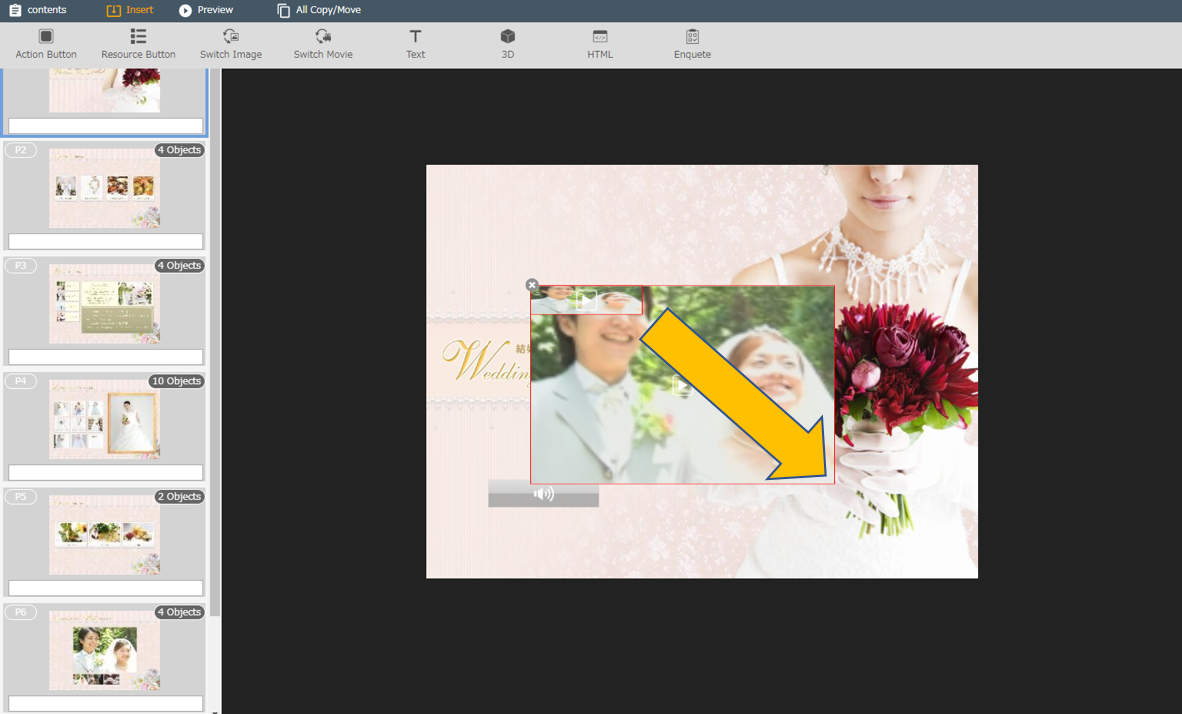
5 Click the button.
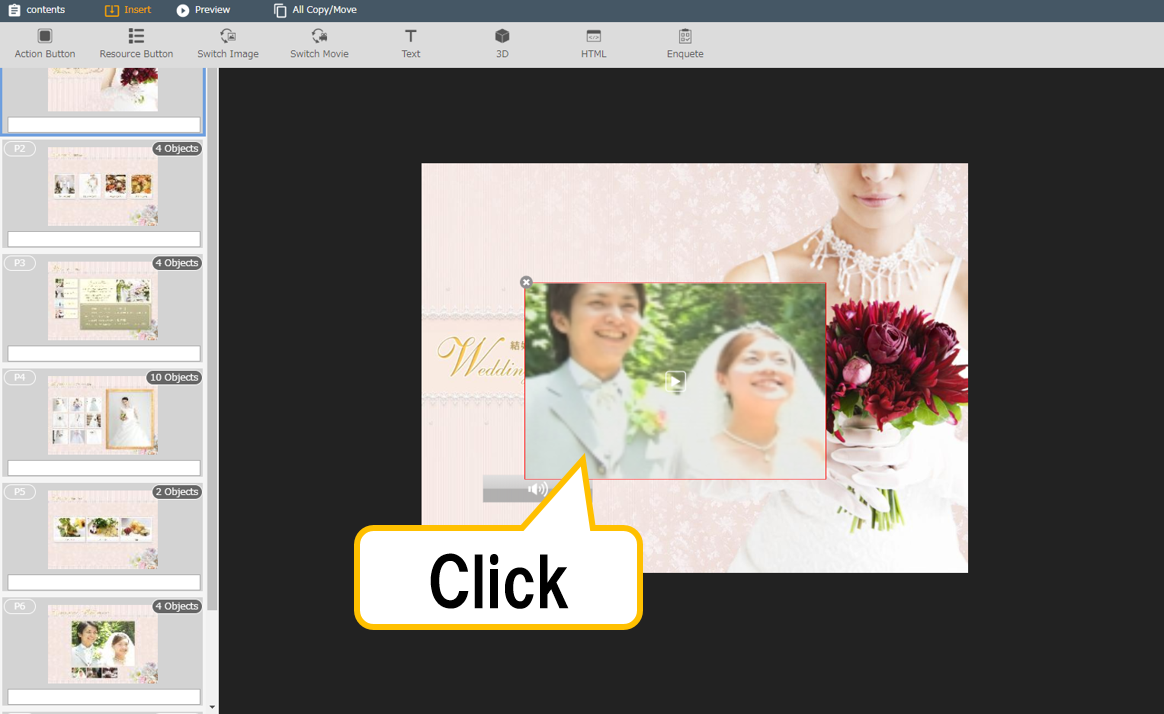
The setting window is displayed to the right of the authoring tool.
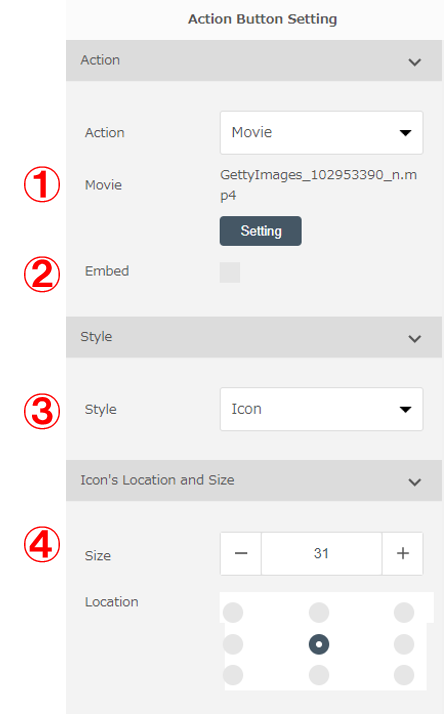 |
① Select a video file. ② Confirm that check mark is not placed for "Embed." ③ Select a style of the start button for video playing. ④ Select the “Icon’s Location and Size”. You can set the size and position of the  mark displayed on the button. mark displayed on the button. |
Memo
・If a video file has already been set, you do not need to select a video file.
・If you select a size different from the horizontal to vertical ratio of the resource, a black band is displayed when the video is played.
Hint
You can also set a movie file by selecting "Action Button," and set “Movie” for “Action”, to play a video.
●Setting an embedded video
Set an embedded video to play a video in a specified area of the content page.
1 Set a video referring to "Setting a full-screen video."
Select the “Embed” checkbox.
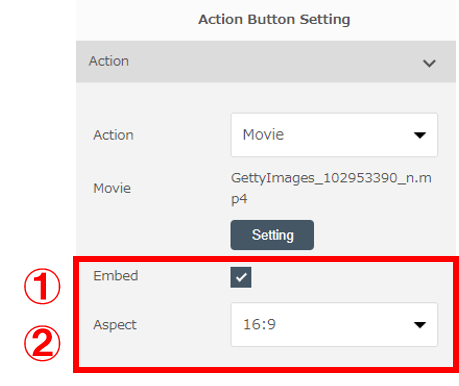 |
① Place a check mark for “Embed.” ② Select a horizontal to vertical ratio according to that of the video. |
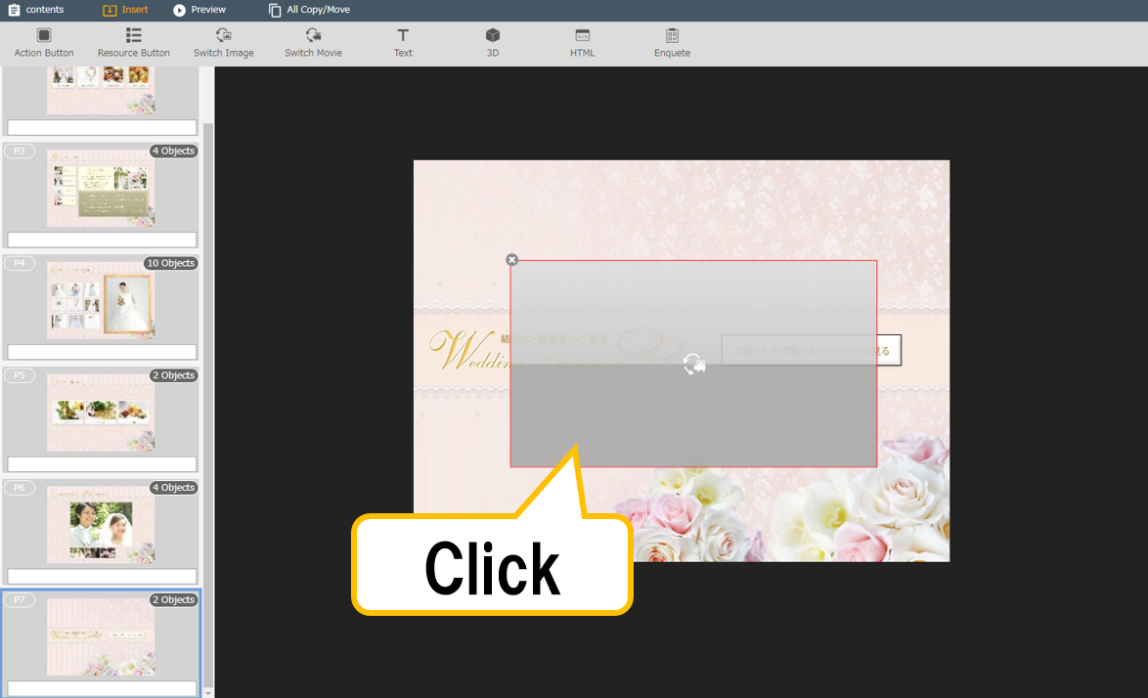
●Setting videos by switch video
1 Click the [Switch Movie] in the  [Insert] tab.

A switch video area is placed in the main view.
2 Adjust the size of the switch video area.

3 Click the switch video area.
The setting window is displayed to the right of the authoring tool.
4 Set a switch video.
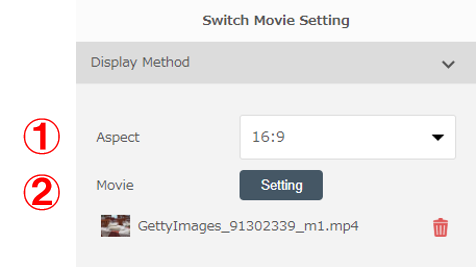 |
① Set a horizontal to vertical ratio according to that of the video. ② Press the “Setting” button. *To delete a video already set, select  . .For other items, see “7.5 Adding Action Buttons." |
5 Select registered video files on the “Select Resource” window.
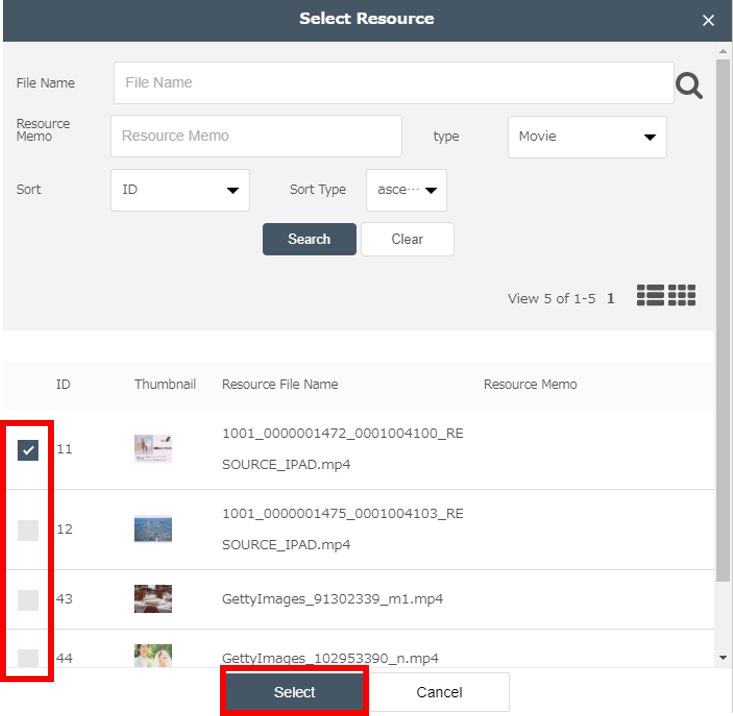
Place a check mark for multiple videos to be displayed in the switch video area and click the “Select” button.
6 Click the “Select” button to quit setting.
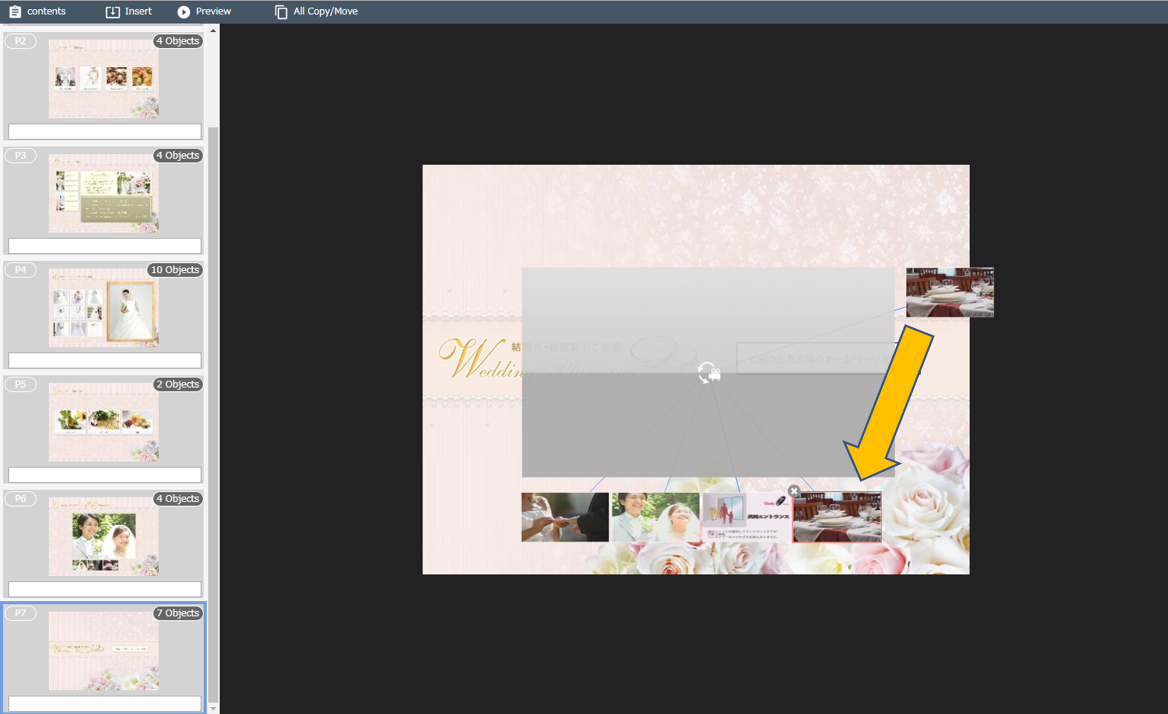
A switch button is created to the right of the switch video area.
7 Adjust the position and size of the switch button by dragging it.
8 Click the switch button.
The setting window is displayed to the right of the authoring tool.
9 Configure settings for the switch button.
 |
① Check the video displayed in the switch video area. ② The image and type of switch button can be changed using "Style”. For other items, see “7.5 Adding Action Buttons." |
Memo
If you select a size different from the horizontal to vertical ratio of the resource, a black band is displayed when the video is played.
7.11 Setting Audio Files
When setting audio files, register them as the “Resources” in advance.
For the adding procedures, see "5. Uploading Resources."
Audio files can be set in three ways.
●Setting an audio file using a button
●Setting a content BGM
●Setting a page BGM
●Setting an audio file using a button
1 Click the [Resource Button] in the  [Insert] tab.

The [Select Resource] window is displayed.
2 Select “Audio” from “Type” on the [Select Resource] window and press the Search button.
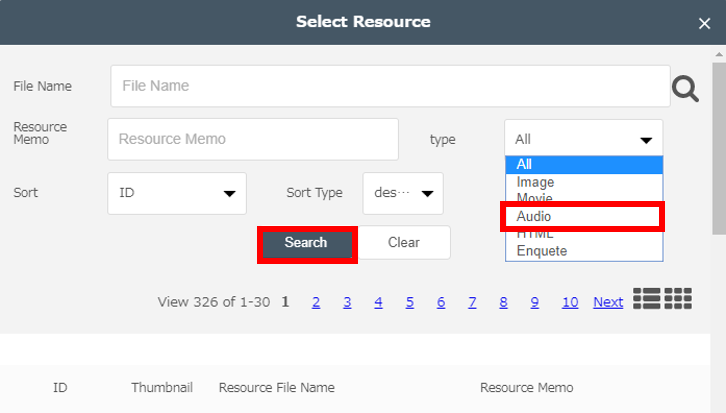
Only audio files are displayed.
3 Place a check mark for the music you want to set and click the “Select” button.
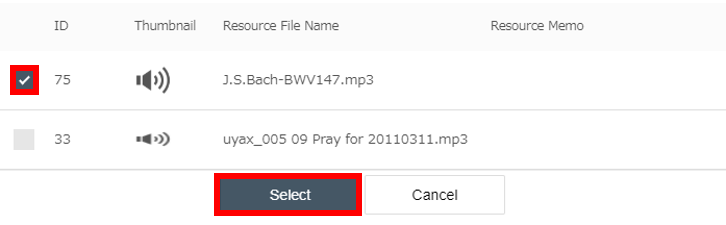
The music is added to PDF.
4 Adjust the size and position of the button.
5 Click the button.
The setting window is displayed to the right of the authoring tool.
6 Configure settings for the button.
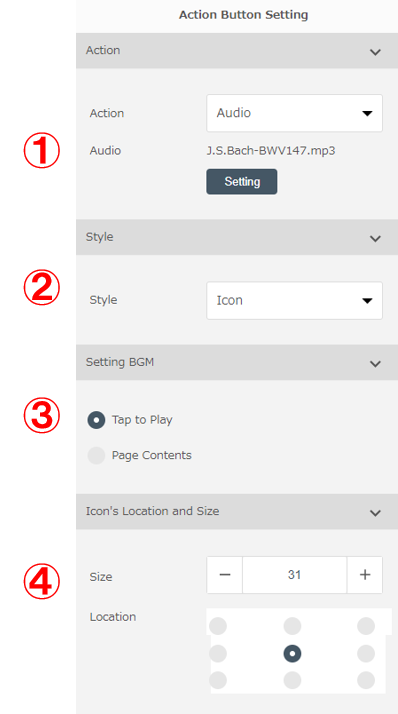 |
① Select a music file in "Settings." ② Select a style of the start button for playing music. ③ Select “Tap to Play” in “Setting BGM.” ④ Select “Icon’s Location and Size.” You can set the size and position of the  mark displayed on the button. mark displayed on the button. |
Memo
If you have already set a music file, you do not need to select a music file.
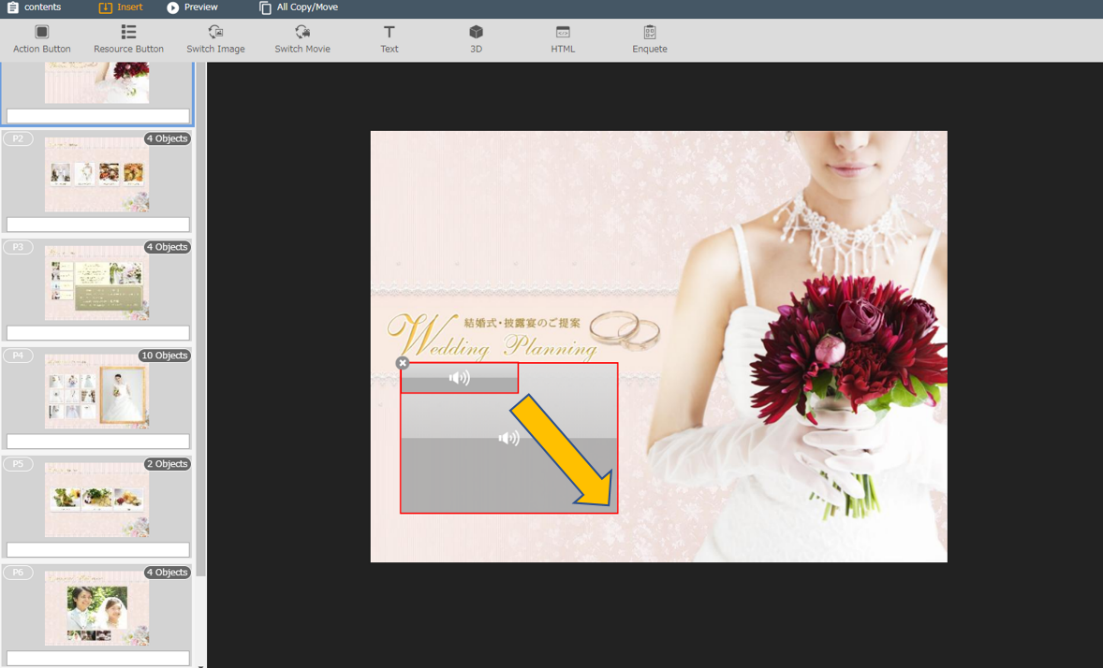
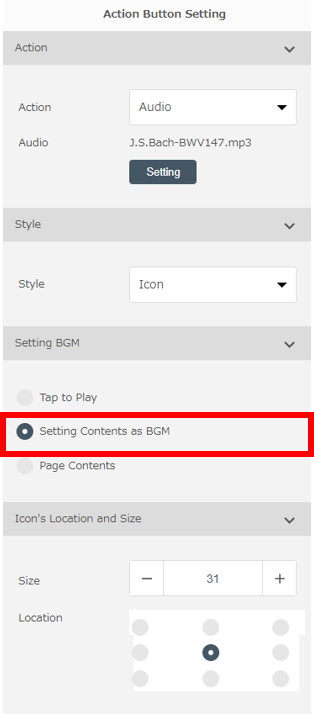
●Setting a content BGM
Set a content BGM on the first page of the content if you want it played when the content is opened.
"Setting Contents as BGM" is displayed only for the first page of the content.
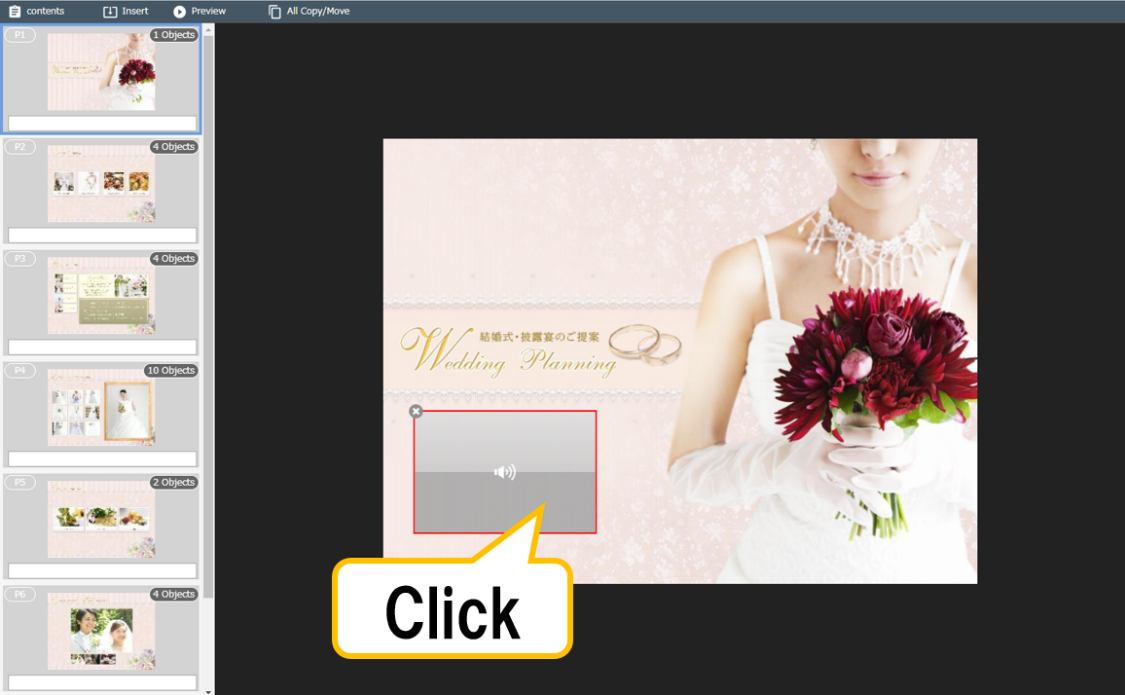
1 Set music referring to "Setting an audio file using a button."
Select " Setting Contents as BGM" in "Setting BGM."
●Setting a page BGM
Set a page BGM if you want it automatically played when a specific page of the content is opened.
1 Set music for the page you want to play it referring to "Setting an audio file using a button."
Select "Page Contents” in "Setting BGM."
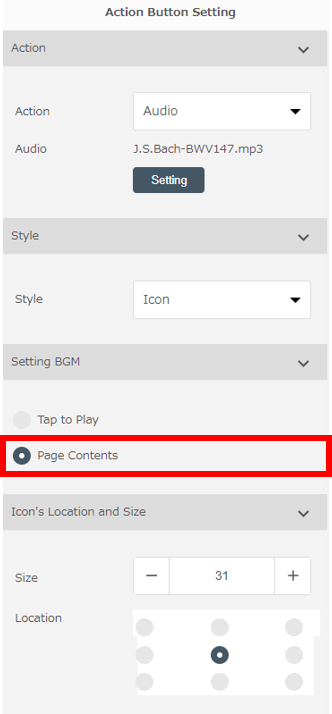
Hint
・You can also set an audio file by selecting "Action Button," and set "Audio" for "Action", to play an audio file.
・Content BGM and page BGM can be set only by selecting “Icon” for “Style” of “Action Button”. If you select other style, “Setting BGM” is not displayed
7.12 Adding a Link between Contents
Configure the following settings to add a link button for linking to a different content.
1 Click the [Action Button] in the  [Insert] tab.

An action button is placed in the main view.
2 Adjust the size of the action button.
You can adjust the size of the button by dragging its corner.
3 Click the created button.

The setting window is displayed to the right of the authoring tool.
4 Configure settings for the button.
 |
① Select "Contents" for "Action.” ② Select “Setting.” For other items, see “7.5 Adding Action Buttons." |
The [Select Content] screen is displayed.
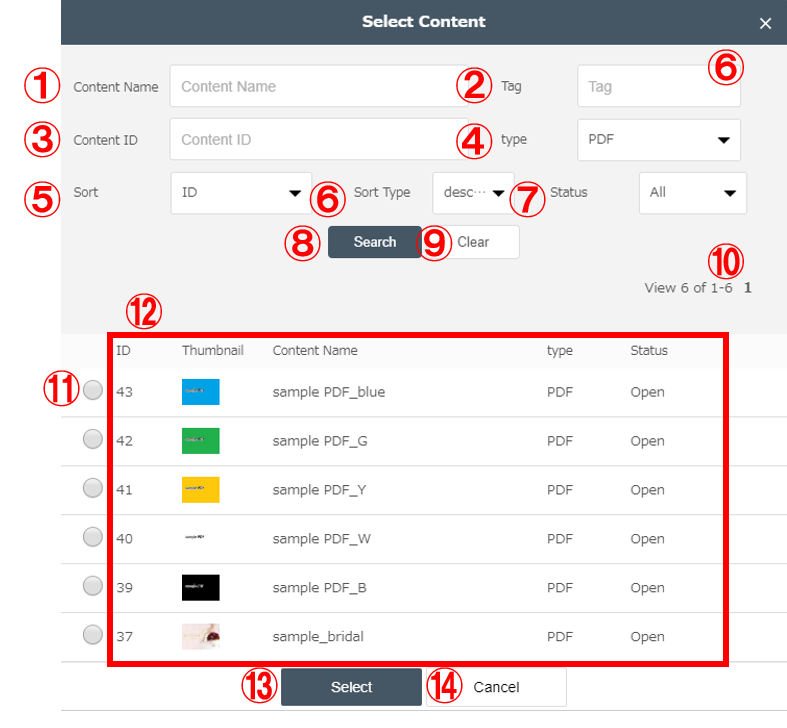
| No | Name | Explanation |
|---|---|---|
| ① | Content name | Enter the name of the content you want to search. |
| ② | Tag | Enter the tag of the content you want to search. |
| ③ | Content ID | Select the ID of the content you want to search. |
| ④ | Type | Select the type of the content you want to search. |
| ⑤ | Sort | Resource list is displayed in the order of “ID” or “Content name”. |
| ⑥ | Sort Type | Items selected for "Sort" are displayed in “Descending” or “Ascending” order. |
| ⑦ | Status | Select the status of the content. |
| ⑧ | “Search” button | It starts search based on the conditions entered /specified by ① - ⑦. |
| ⑨ | “Clear” button | Clear the conditions entered/specified by ① - ⑦. |
| ⑩ | Page number | Click a page number to move to the corresponding page. Click “Next” to move to the next page. |
| ⑪ | Radio button | If this button is checked, the corresponding content is selected. |
| ⑫ | Content data | Various data of the content is displayed. |
| ⑬ | “Select” button | The selected content is set as content for a link destination. |
| ⑭ | “Cancel” button | Quit displaying the “Select Content” screen. |
5 Check a radio button of a registered content and click the “Select” button.

The selected content is set as content for the link destination.
6 Set a link destination page.
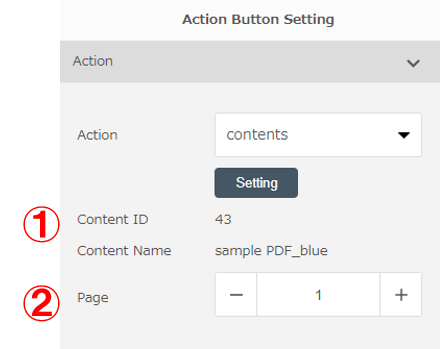 |
①Confirm the content data for the link destination. To set a different content, set it again by the ”Setting” button. ② Set a link destination page. For other items, see “7.5 Adding Action Buttons." |
Memo
If one of the following applies to the status of the set content, users cannot move between contents on the application.
・Private content
・Content with no access right
・Content not downloaded
7.13 Inserting a Text
You can insert a text into PDF.
Text can be inserted in two ways.
●Inserting a text
●Inserting a pop-up text
●Inserting a text
Set the [Text] button to insert a text into PDF.
1 Click the [Text] in the  [Insert] tab.

A text area is placed in the main view.
2 Adjust the size of the text area.
You can adjust the size of the button by dragging its corner.
3 Click the created text area.
The setting window is displayed to the right of the authoring tool.
4 Set text content.
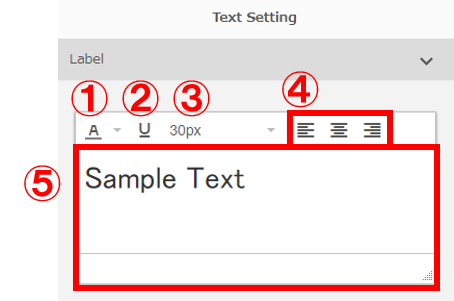 |
① Select text color. ② Underline text. ③ Select text font size. ④ Select text position. ⑤ Enter text. For other items, see “7.5 Adding Action Buttons." |
Hint
Even after entering a text, you can adjust the size of the text area. If a text cannot be displayed to its end because the text is too long, adjust the size of the text area according to the length of the text.
●Inserting a pop-up text
Set a pop-up text to add a button for displaying a pop-up text on the application.
1 Click the [Action Button] in the  [Insert] tab.

An action button is placed in the main view.
2 Adjust the size of the action button.
You can adjust the size of the button by dragging its corner.

3 Click the created button.

The setting window is displayed to the right of the authoring tool.
4 Configure settings for the button.
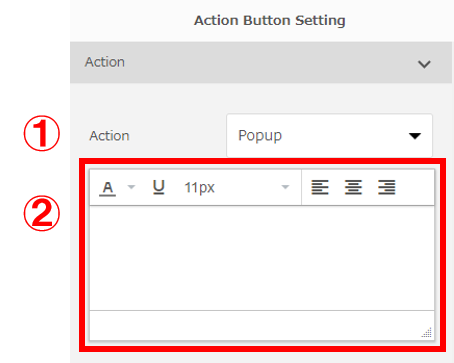 |
① Select "Popup" for "Action”. ② Enter text content. For details, see “Inserting a Text.” For other items, see “7.5 Adding Action Buttons." |
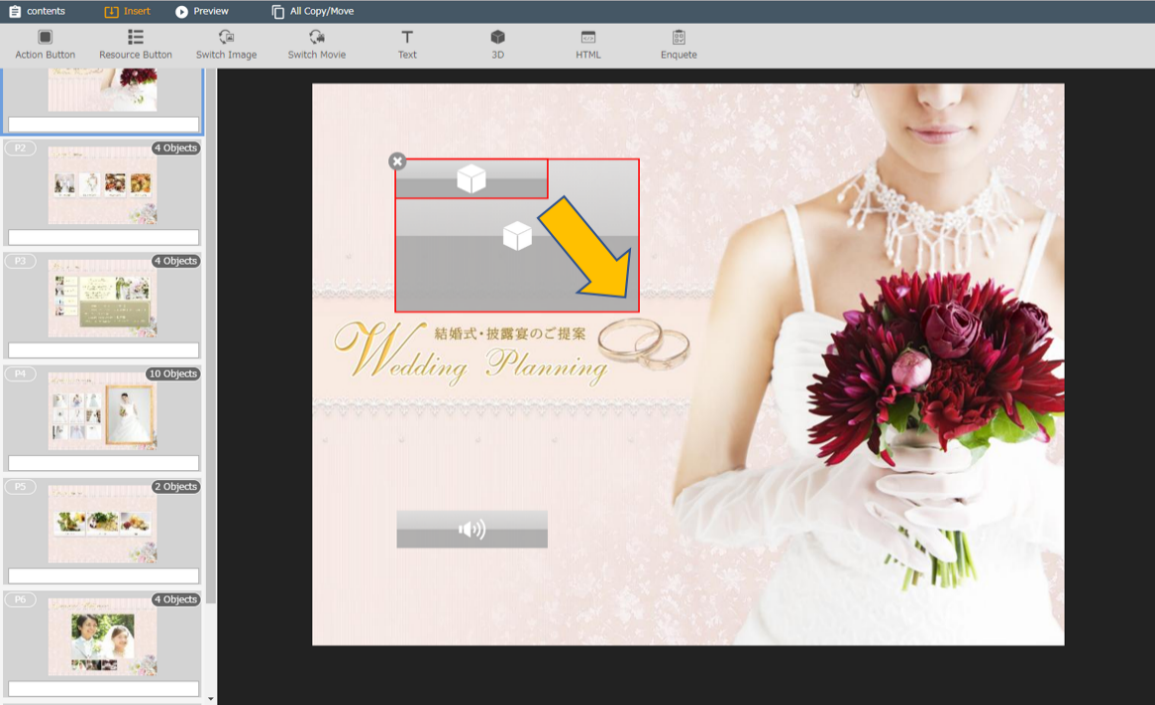
7.14 Adding a 3D Animation
Set the 3D button to display multiple images from different angles in three dimensions. You can set up to 15 images each horizontally and vertically starting from the front.
1 Click the [3D] in the  [Insert] tab.

A 3D button is placed in the main view. The placed button determines the 3D area.
2 Adjust the size of the 3D button.
You can adjust the size of the button by dragging its corner.
3 Click the created button.
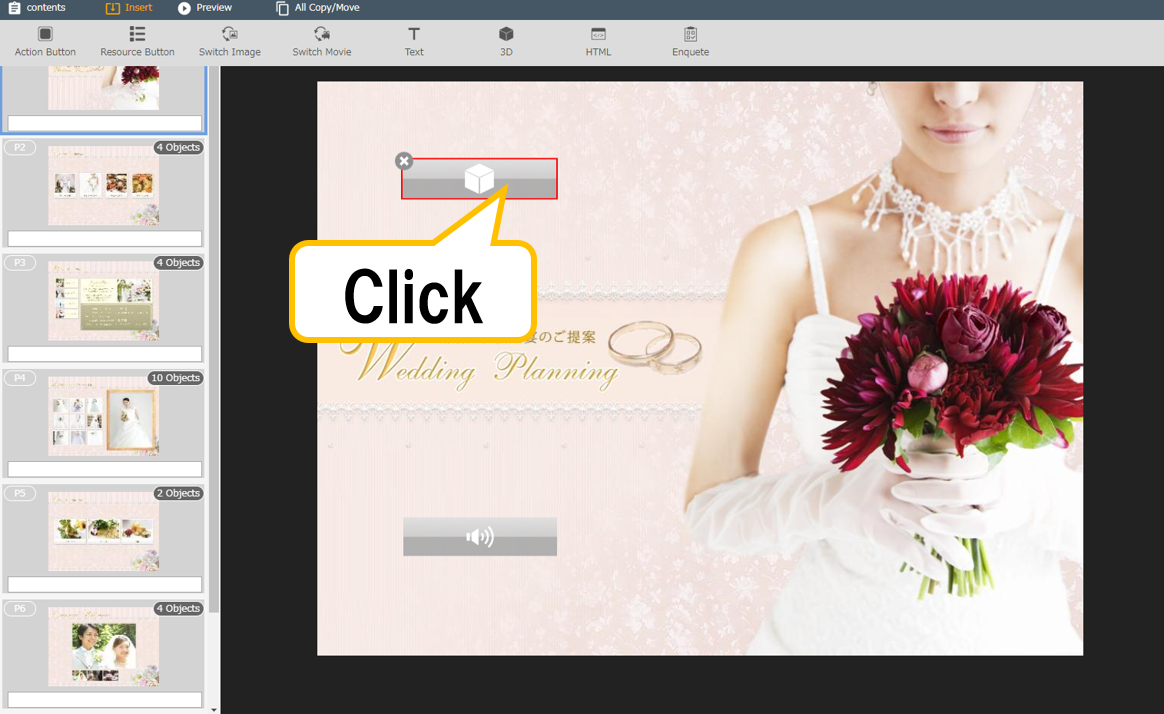
The setting window is displayed to the right of the authoring tool.
4 Configure settings for the button.
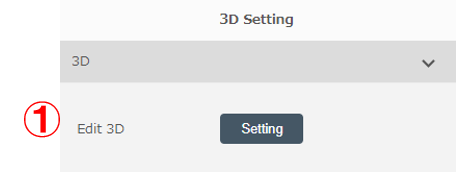 |
① Select “Setting” for “Edit 3D”. For other items, see “7.5 Adding Action Buttons." |
The [Set 3D Image] window is displayed.
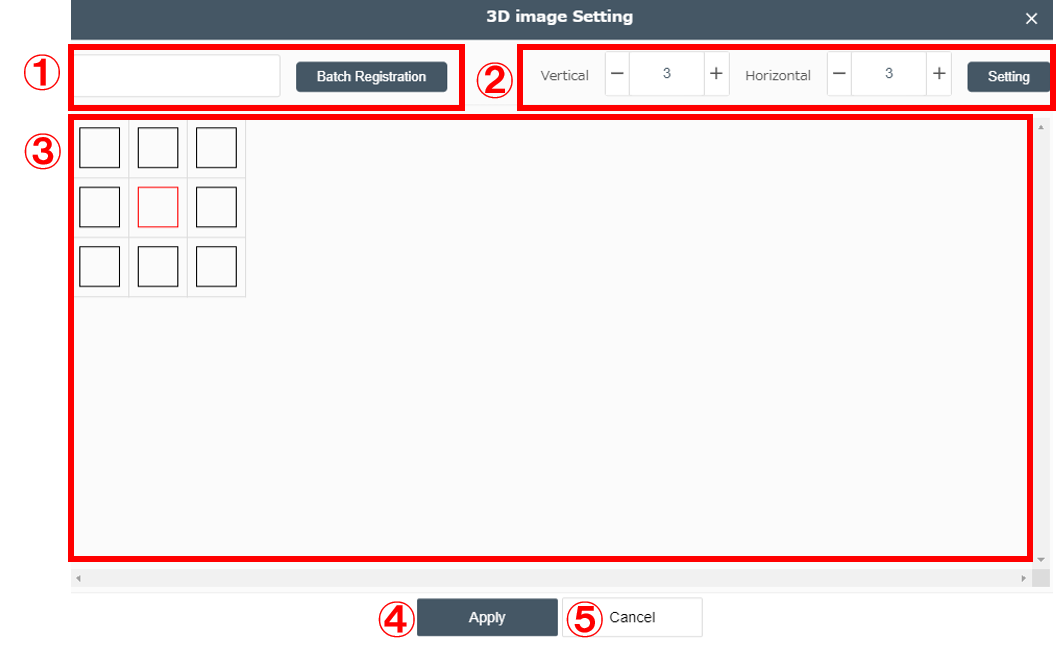
| No | Name | Explanation |
|---|---|---|
| ① | Batch Registration | You can register multiple 3D resources at the same time. For batch registration procedures, see “Hint.” |
| ② | Number of images | Select the number of images to be placed in horizontal and vertical directions. You can select an odd number between 1 and 15 for the number of images. |
| ③ | Image registration area | Click a frame to register an image selected from the “Select Resource” window. |
| ④ | Apply | Apply the content set by ① - ③. |
| ⑤ | Cancel | Go back to the authoring screen |
5 Click on the 3D frame in which you want to register the image.
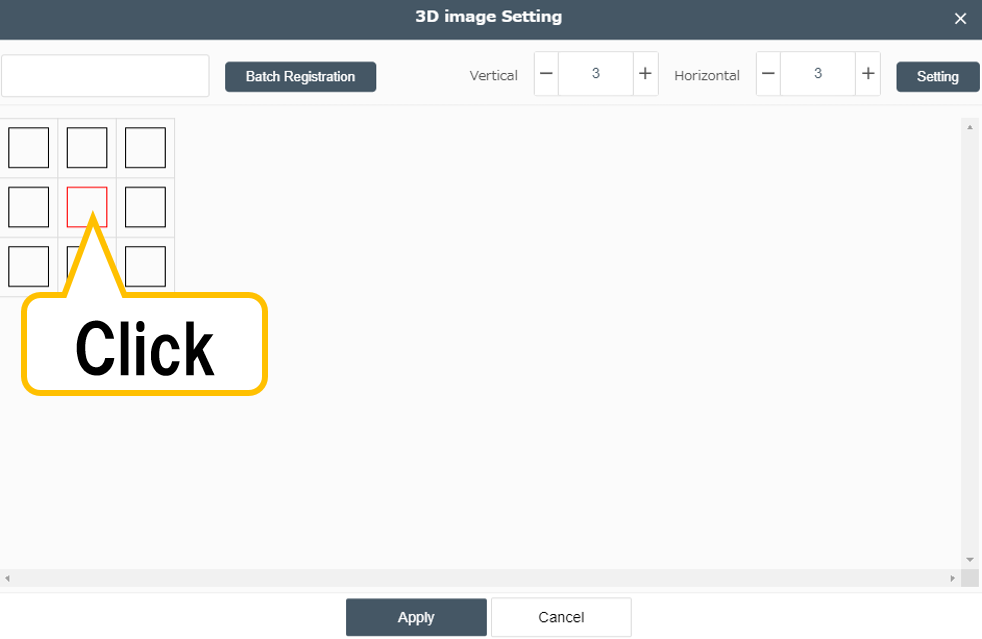
The [Select Resource] window is displayed.
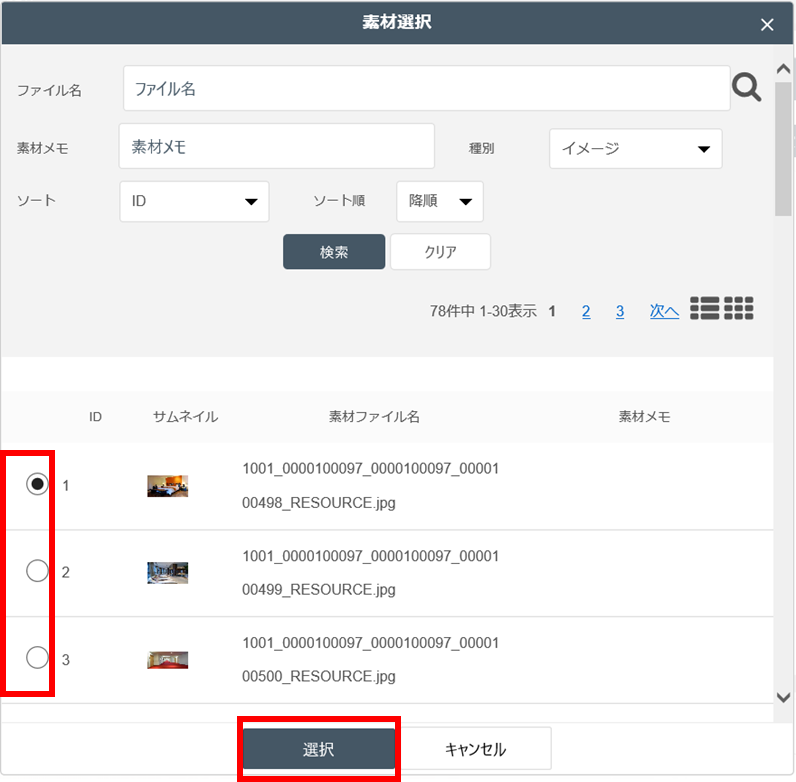
6 Select a registered image file on the [Select Resource] window.
Place a check mark for the image you want to register and click the “Select” button.
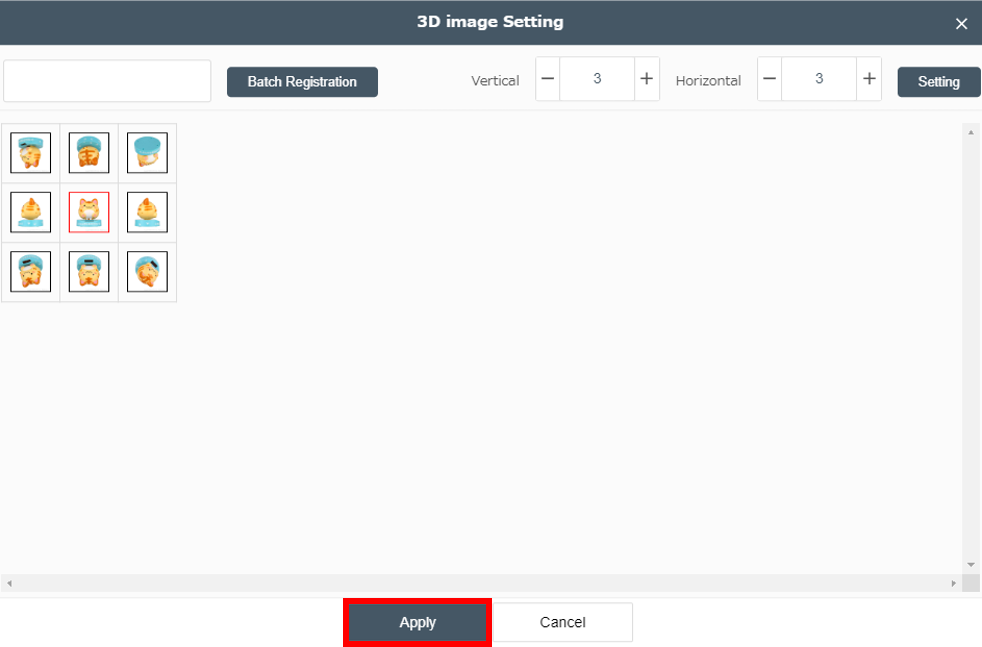
7 After registering the image, click the “Apply” button.
Hint
・If you register resources in the following file name format in advance, you can automatically assign all subject images to the subject frame by entering the initial character of the file name and clicking the [Batch Loading] button.
File name format: Same initial character_frame number (vertical) frame number
(horizontal).extension
Example: Registering 3x3 size

・When multiple sets of files are registered for batch loading, you can select files from among them to register.
7.15 Setting HTML Content
When setting HTML content, register it as the “Resources” in advance.
For the adding procedures, see "5.Uploading Resources." For HTML content, zip compressed files of a folder that satisfies the following conditions can be registered.
<HTML content that can be registered>
In a configuration where the opening page "index.html" is located just below the folder (first hierarchical level), and when the folder is zip-compressed, it can be registered.
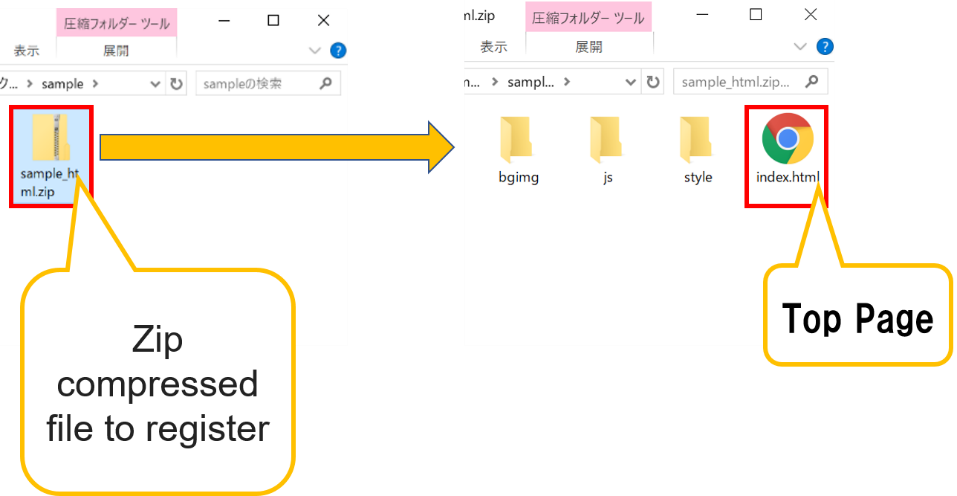
*Name the opening page file "index.html". Other file names are not recognized.
*Create HTML content using a logical path with the opening page as the starting point.
*If the file "thumbnail.png" or "t.png" is in the same hierarchy as "index.html," it can be assigned to an image for an action button automatically.
*There is no limit for the configuration or number of folders and files, except for the opening page.
*Japanese cannot be used for any folder or file name.
*The upper limit of zip file size is 200 MB. If you attempt to transfer a larger file using SFTP, an error occurs.
Memo
・If the opening page "index.html" is not located just below the folder to be zip-compressed (first hierarchical level), an error occurs while uploading.
・HTML content is displayed by using the browser function of the device. It is recommended that you check the operation and display by using the Web browser in advance.
・The operation or display of the set HTML content is not guaranteed.
●Setting HTML content using a button
On the content page, the  (HTML) button is displayed so that the content can be played.
To set the content, you can place the [HTML] button and select the HTML content later, or you can place the HTML content using the Resources button.
1 Add HTML content.
■Adding the [HTML] button
Click the [HTML] in the  [Insert] tab.

An HTML button is placed in the main view.
■Adding HTML content
Click the [Resource button] in the  [Insert] tab.

Select “HTML” from “Type” on the [Select Resource] window and press the Search button.]
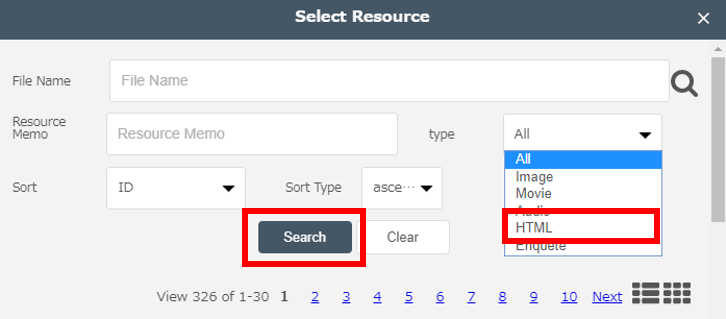
Only HTML (ZIP) files are displayed.
Place a check mark for the HTML file you want to set and click the “Select” button.
2 Adjust the size and the position of the button.
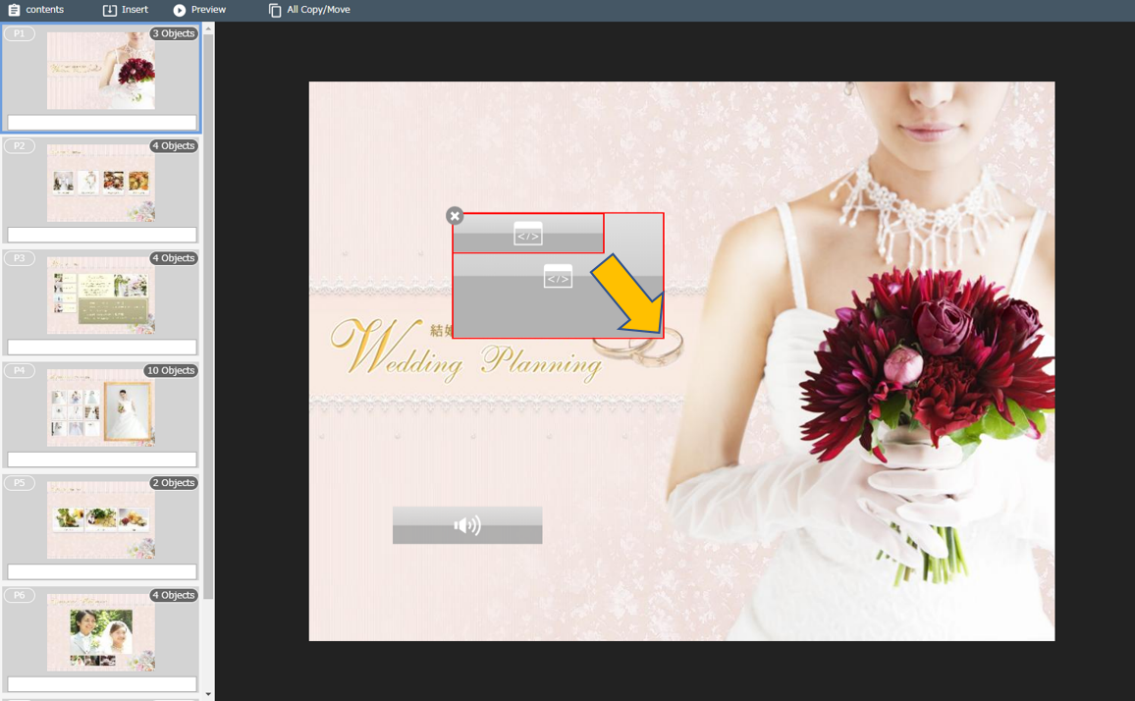
3 Click the added button.
4 Configure settings for the button.
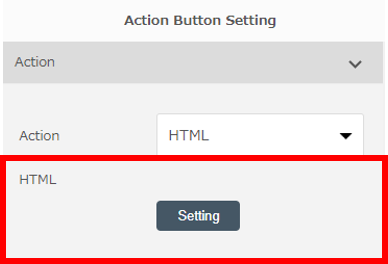 |
Click “Setting” to select an HTML resource from the registered Resources. |
Memo
・If you have registered HTML content using the Resource button, you do not need to select any HTML content.
・You can place multiple buttons on the same page.
・You can also set HTML content by selecting "Action Button," and select “HTML” for the "Action."
・HTML content is not supported by Web Browser application.
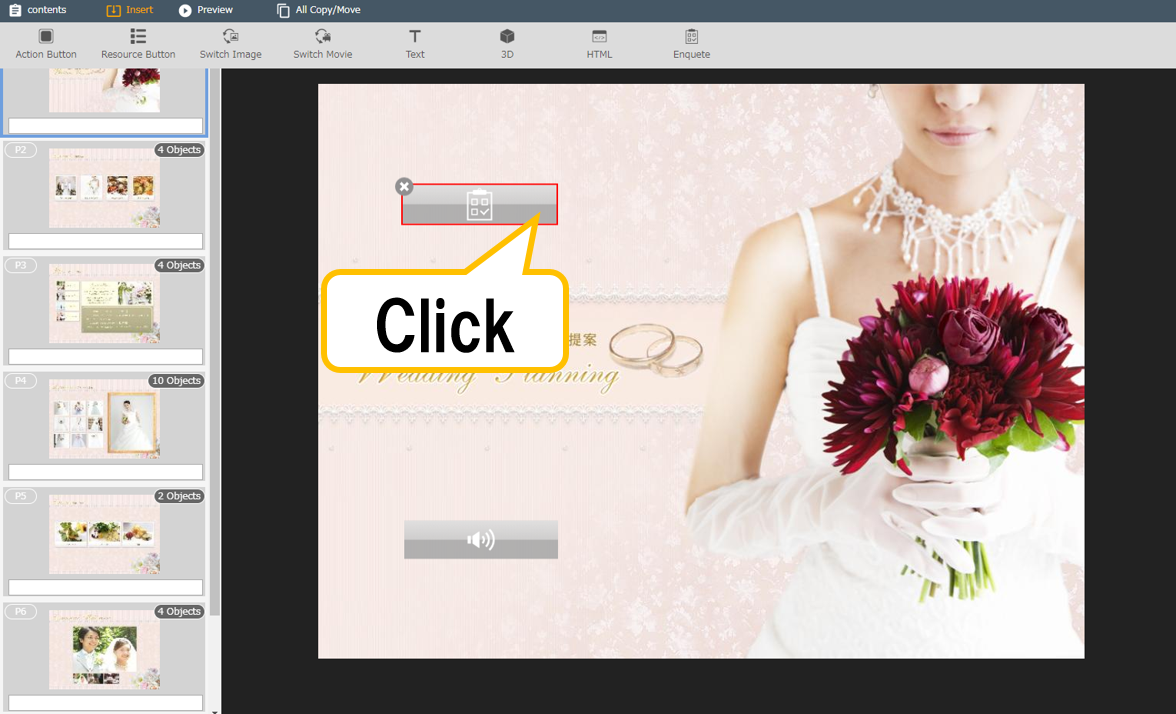
7.16 Setting a questionnaire
When setting a questionnaire, register the questionnaire in advance. For the registration procedures, see ”5.8 Registering a Questionnaire."
●Setting a questionnaire using a button
The  (ENQUETE) button is displayed on the page of a content so that a questionnaire can be conducted and its answers can be collected.
To set a questionnaire, you can place the [ENQUETE] button and select a questionnaire later, or you can place a questionnaire using the Resource button.
1 Adding a questionnaire
■Adding the [Enquete] button
Click the [Enquete] in the  [Insert] tab.

A questionnaire button is placed in the main view.
■Adding a questionnaire
Click the [Resource Button] in the  [Insert] tab.

Select “Enquete” from “Type” on the [Select Resource] window and press the Search button.
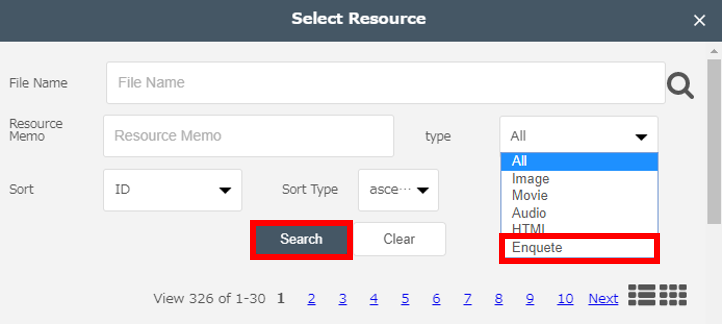
Only questionnaire resources are displayed.
Place a check mark for the questionnaire resource you want to set and click the “Select” button.

2 Adjust the size and the position of the button.
3 Click the added button.
4 Configure settings for the button.
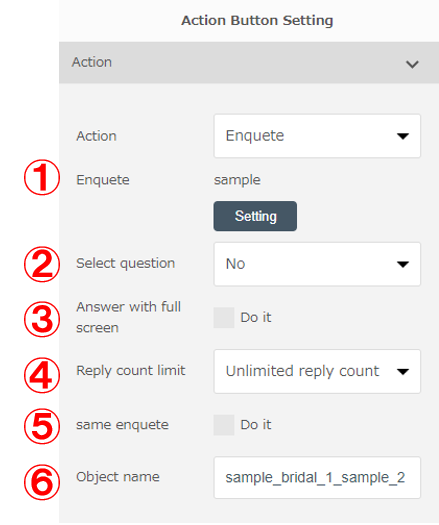 |
① Select a questionnaire by clicking "Setting" button. ② In "Select question," select the question to be displayed on the top when the questionnaire is displayed. When "No" is selected, items are displayed starting with the top item (questionnaire name). ③ Select setting for " Answer with full screen" When "Do it" is selected, the questionnaire will be displayed in full screen. When this item is not selected, the questionnaire will be displayed on the right edge of the screen. ④ Select setting for "Reply count limit." When "Unlimited reply count" is selected, the set questionnaire can be sent any number of times. When "reply once" is selected, the questionnaire can be sent only once. ⑤ Select setting for "Same Enquete." When "Do it" is selected, setting for "Object name" will be fixed. When the item is not selected, any name can be set for "Object name." ⑥ Enter a name for "Object name." When "Same Enquete" is set to "Do it" this item cannot be entered. |
Hint
・When different names are set for "Object name" of the same questionnaire for each button, answers can be narrowed down and checked by object name.
・Setting of "Do it" for "Same Enquete" is enabled when the same questionnaire is set for two or more buttons. For example, when "Reply count limit" is set to "reply once," users cannot answer the questionnaire from other buttons once they answer it from one button.
Memo
・If you have registered a questionnaire using the resource button, you do not need to select a questionnaire.
・You can place multiple buttons on the same page
・You can also set a questionnaire by selecting "Action Button" and set "Enquete" for the "Action."
7.17 Previewing Authored (Edited) Data
Authored (edited) data of the content can be previewed.
1 Click the  [Preview] button on the upper part of the authoring tool.
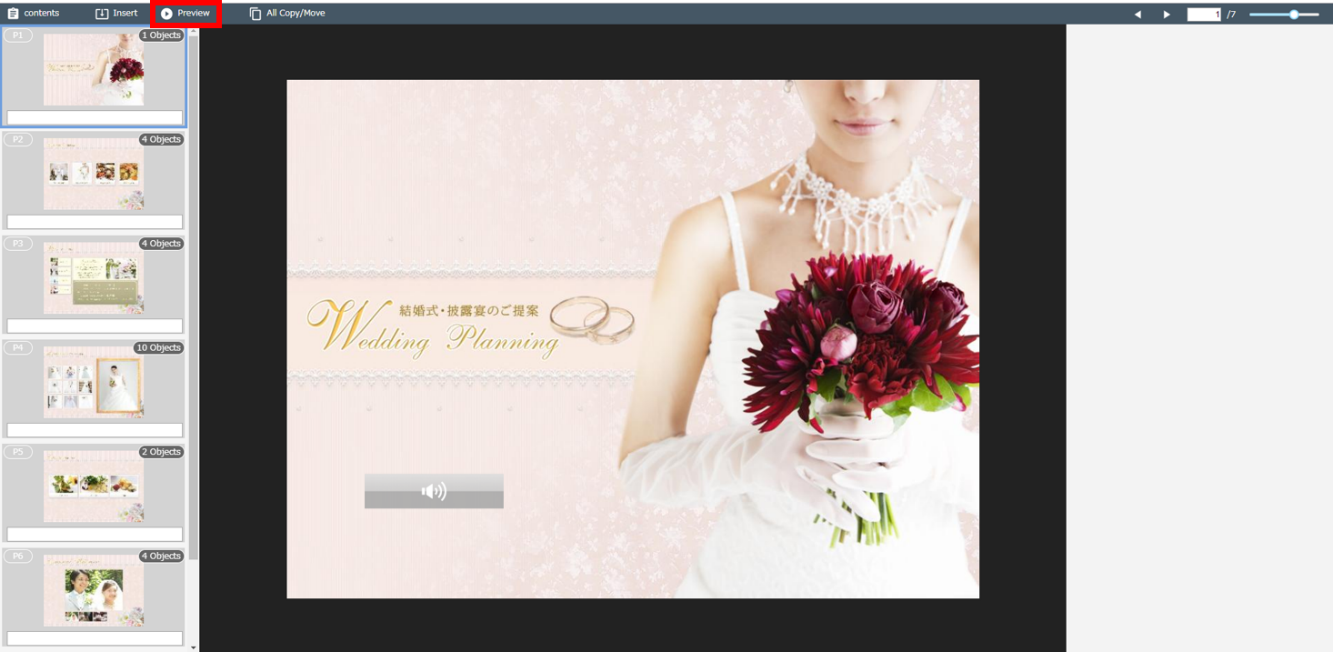
The viewer screen for preview is displayed.
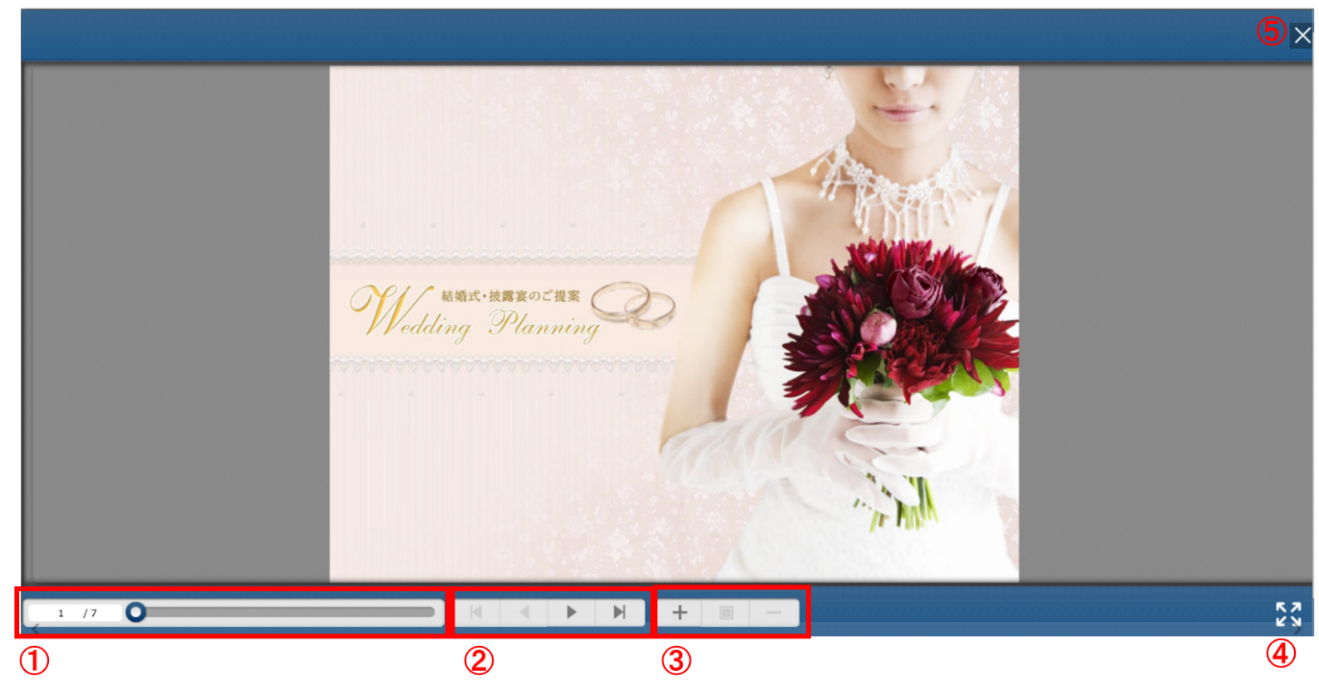
| No | Name | Explanation |
|---|---|---|
| ① | Scroll bar | Drag the bar left and right to move pages. |
| ② | Page back/forward | Move to the first page/previous page/following page/last page. |
| ③ | Change zoom ratio | “Zoom in”, “Clear zoom ratio”, “Zoom out” are displayed. |
| ④ | Full-screen display | The operation menus on the top and bottom are hidden to display the full-screen content area. |
| ⑤ | Quit | Quit preview |
Notes
・The unsaved content is not displayed in the preview screen. Save the content before it is previewed.
・HTML content cannot be previewed.
・Videos may not be played in the preview mode depending on the movie format and the settings of your PC.
・The preview function is for checking incorrect resource placement and layout. The operation of placed resources on devices is not guaranteed.
7.18 Copying Authoring (Editing) Data
Use this function to copy and apply the buttons and other items you created on a different page.
1 Select the page to copy and click the  [All Copy/Move] button on the upper part of the authoring tool.
A dialog box for setting “All Copy/Move” is displayed.

2 Select either "Copy Objects to All Pages" or "Copy objects to page" from the pull-down menu and click the [Start] button.
When copying to specific pages, specify the start page and end page of the copy destination pages.
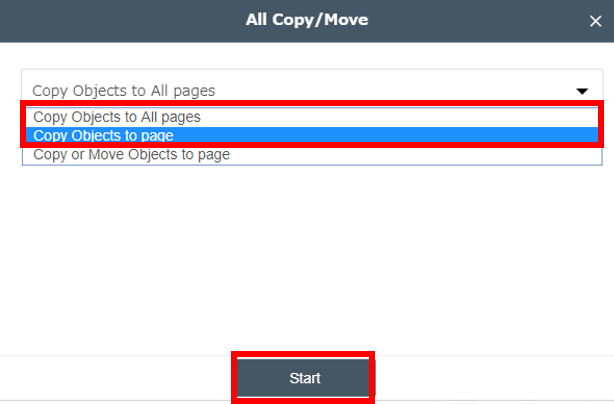
The same button is created on the page specified as the copy destination.
Hint
Copying objects is convenient when you want to place the [Back to Table of Content] or [Back to Menu] on all pages.
7.19 Copying or Moving Authoring (Editing) Data at One Time
You can copy or move created data such as buttons to other pages at one time. Use the copy function to copy objects on a specific range of pages to the specified page and after. Use the move function when pages have become incorrectly arranged after replacing the base PDF of content.
1 Click the  [All Copy/Move] button on the upper part of the authoring tool.
A dialog box for setting "All Copy/Move" is displayed.
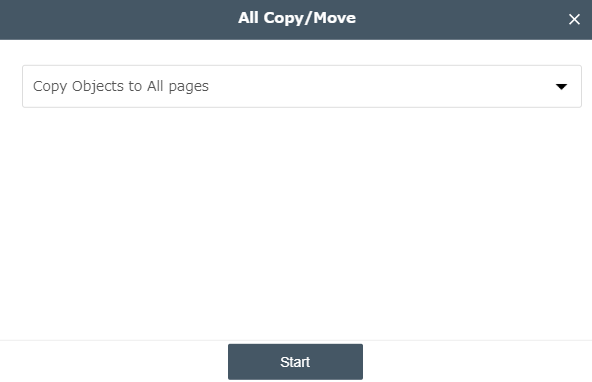
2 Select "Copy or move objects to page" from the pull-down menu.
3 Set the details and click the [Start] button.
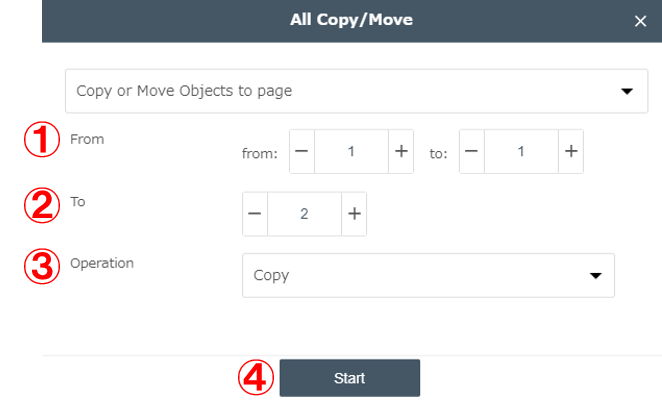 |
① Specify a range of pages of “From” source. ② Specify the start page of “To” destination. ③ Select the action to perform (either “Copy” or “Move”). ④Click the “Start” button. |
Objects on the range of pages specified as “From” source are copied or moved to the page specified as "To” destination.
Note
When "Move" is performed, all objects on the pages specified in the "Move" destination are overwritten.
7.20 Saving Content
Save the content in the process of being authored (edited).
Hint
Save data often when authoring (editing) content.
1 Mouse over the  [Content] tab on the upper part of authoring tool.
The “Save” menu is displayed.
2 Click the [Save] button.

7.21 Finishing Authoring (Editing) of Content
●Finishing with saving the authored (edited) content
1 Mouse over the  [Content] tab on the upper part of authoring tool.
The “Save” menu is displayed.
2 Click the [Save and Quit] button.

The confirmation dialog is displayed.
3 Click the [OK] button.
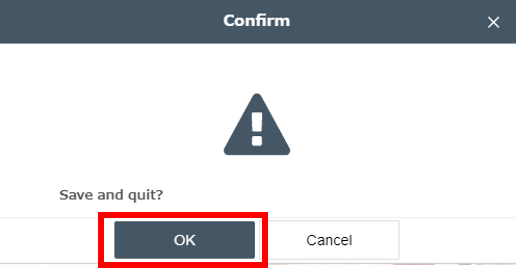
The data of the content is saved, and the authoring tool is closed.
Hint
If you have only saved the data of authoring, the saved authoring data will not be applied to the device. You need to publish (or republish) after saving it. Check the status of a content from the content list, and if it is stated as [Registered], please publish it. If it is stated as [open] and blinking or flowing right to left, please republish it. About publishing a content, please refer to the "8.1 Publishing Content."
●Finishing without saving the authoring data
The data in the process of being authored (edited) is discarded and the authoring tool is closed.
1 Mouse over the  [Content] tab on the upper part of authoring tool.
The “Save” menu is displayed.
2 Click the [Quit without saving] button.

The confirmation dialog is displayed.
3 Click the [OK] button.
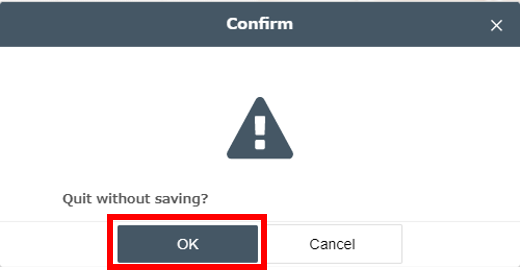
The data of the content in the process of being authored (edited) is discarded and the authoring tool is closed.