Index
- 3.1 Login
- 3.2 Header Menu
- 3.3 Managing Users
- 3.4 Downloading User Information
- 3.5 Creating Users
- 3.6 Batch Registration Of Users
- 3.7 Viewing and Updating Users
- 3.8 Deleting Users
- 3.9 Managing Groups
- 3.10 Creating Groups
- 3.11 Viewing Group Information
- 3.12 Batch Registration of Group
- 3.13 Managing Genres
- 3.14 Creating Genres
- 3.15 Viewing Genre Information
- 3.16 Batch Registration of Genre
- 3.17 History
- 3.17.1 Log Acquisition Rights
- 3.17.2 Selection of Logs( Required )
- 3.17.3 Period( Required )
- 3.17.4 Content ID
- 3.17.5 Group Name
- 3.17.6 Device Type
- 3.17.7 Importance
- 3.17.8 Genre
- 3.17.9 Display Item
- 3.17.10 Questionnaire( Required )
- 3.17.11 Object Name
- 3.17.12 Clear
- 3.17.13 Download CSV
- 3.17.14 Display Graph
- 3.17.15 Format of the Downloaded CSV File
- 3.18 Support
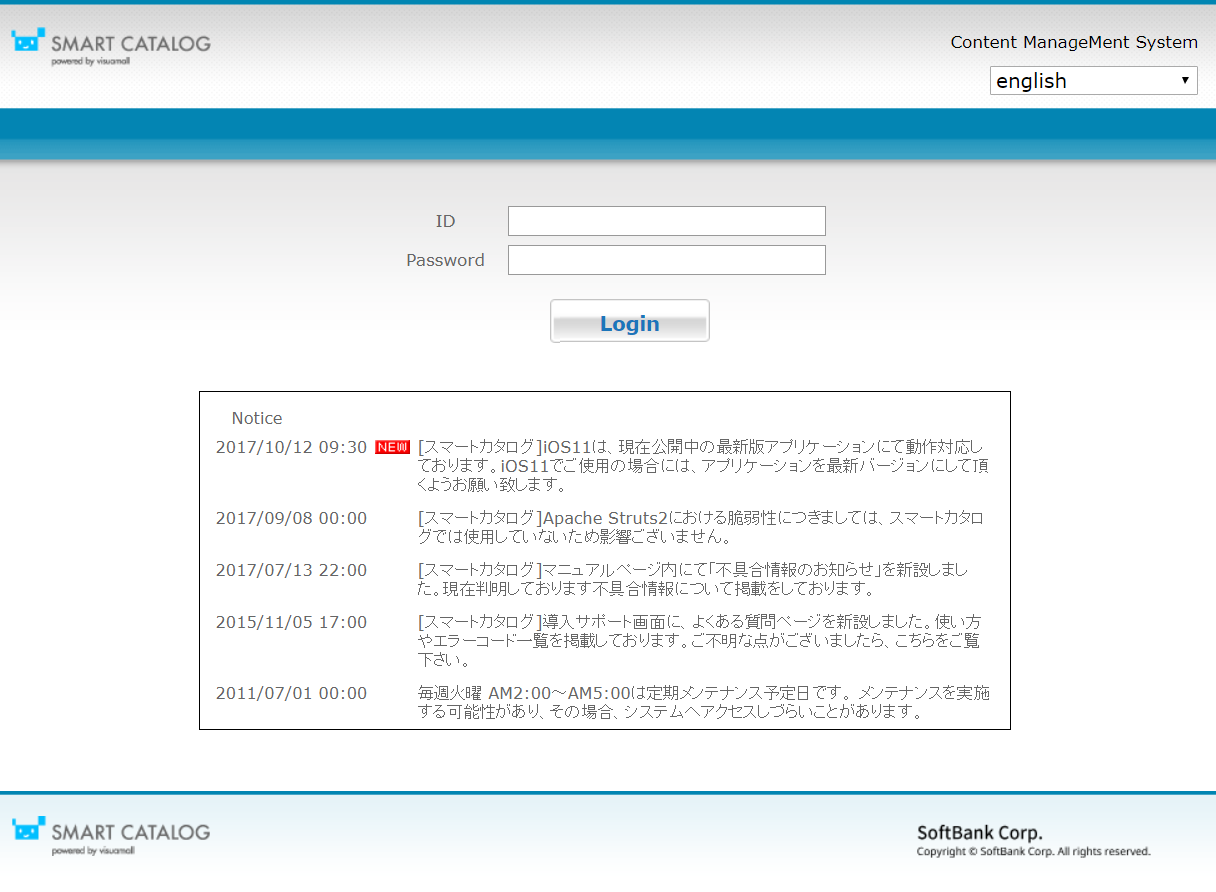
3.1 Login
Access the login address you received with your login account information in a web browser. Enter your ID and password on the login screen that appears.
Please refer to the "Contents Creation & Delivery Manual" for more detail
3.2 Header Menu
At the top of the screen, there is a menu that can be used to perform various tasks.

| ① | User ID | Displays the ID of the user that is currently logged in. |
| ② | Manual | You can open the manual page for the system. |
| ③ | Manual (video) button | You can see the video explaing how to use the system. |
| ④ | Content | Opens the [Content List] screen. |
| ⑤ | Resource | Opens the [Resource Management] screen. |
| ⑥ | History | Allows you to download logs as CSV files. |
| ⑦ | User | It displays the "User List" screen. Please refer to the admin manual for the details. *It wil be not displayed when the user role is "Editor". |
| ⑧ | Genre | It displays the "Genre List" screen. *It will be displayed only when the user role is "Content administrator". |
| ⑨ | System | It displays the "Support" screen. *It will be displayed only when the user role is "Content administrator" or "System administrator". |
| ⑩ | Submenu | Select an icon to the left of the menu name to display and select submenus. |
| ⑪ | Logout button | You can log out from the system. |
All of the above menus have their own sub-menus, except for History and Genre. To open a sub-menu, move your mouse cursor over the main menu section.

3.3 Managing Users
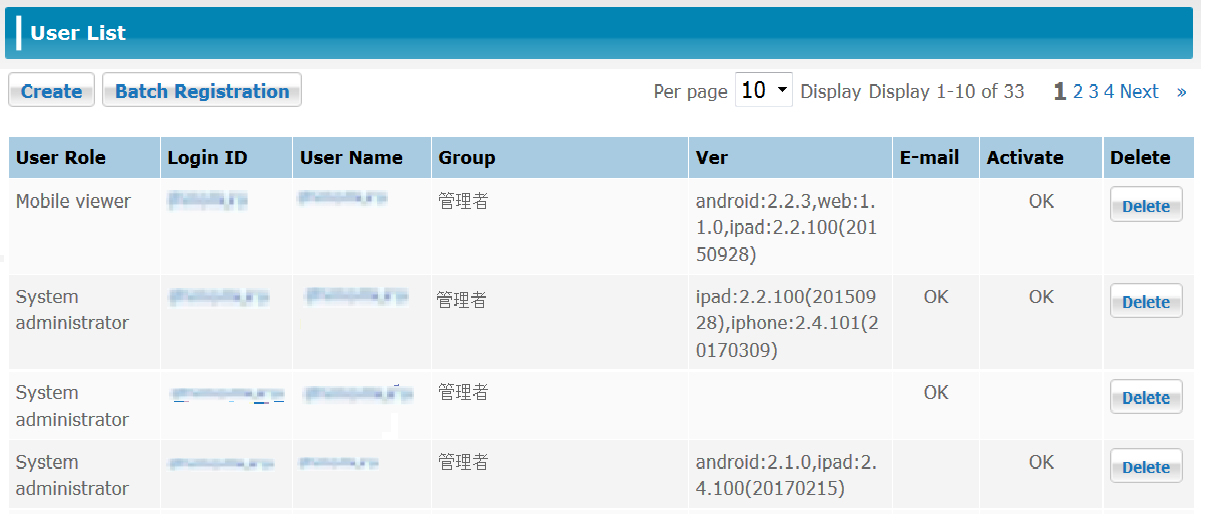
Click the [User] button on the menu to view a list of all users.
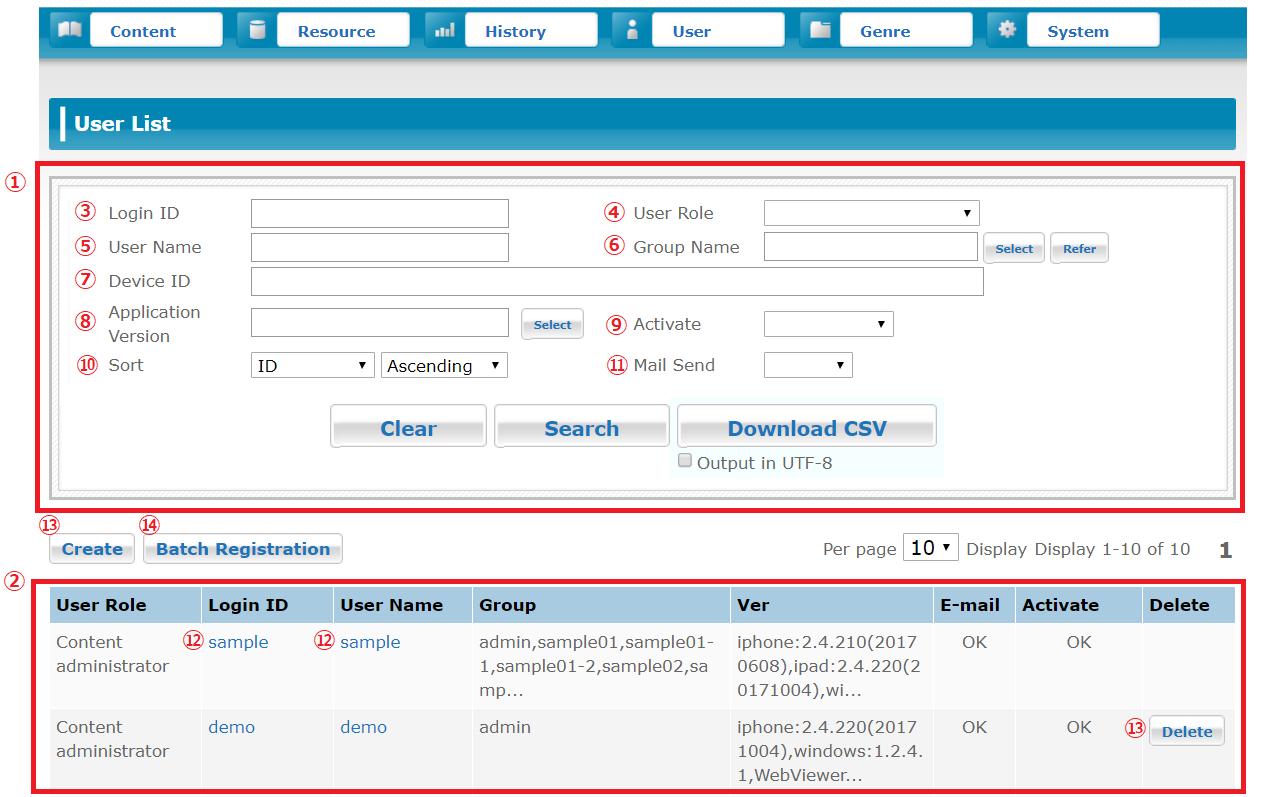
| ① | User Search Area | Search for a specific user or users based on a set of search conditions. |
| ② | User List Area | It displays a list of all registered users or a list of users that match he search conditions. |
| ③ | Login ID | Enter the login ID of the user you want to search for. |
| ④ | User Roles | Select the user role you want to search for. |
| ⑤ | User Name | Enter the user name of the user you want to search for. |
| ⑥ | Group Name | Enter the group name you want to search for. |
| ⑦ | Device ID | Enter the device ID (SmartCatalog ID) you want to search for. |
| ⑧ | Application Version | Enter the app version you want to search for. |
| ⑨ | Activate | Select this option if you want to search for activated users only. |
| ⑩ | Sort | Select the item and order by which to sort. |
| ⑪ | Mail Send | Select whether the account notification mail has been sent or not. |
| ⑫ | User Reference | Click the number, login ID, or user name in the User List to view detailed information about them. |
| ⑬ | Delete User | Click the [Delete] button to delete the user. Refer to 「3.8 Deleting Users 」for details about deleting users. |
| ⑭ | [Create] Button | It moves to the [Create User] screen. |
| ⑮ | [Batch Entry] Button | It moves to the [User batch registration] screen. |
- SmartCatalog ID generated by the application is used as the device ID in version 1.8.8 or later versions. The MAC address is used as the device ID starting from version 1.6. Prior to version 1.6, the UDID was used.
- iOS, Android, Windows, WebViewer application can be used with one account at the same time. However, a request to use each application is required.
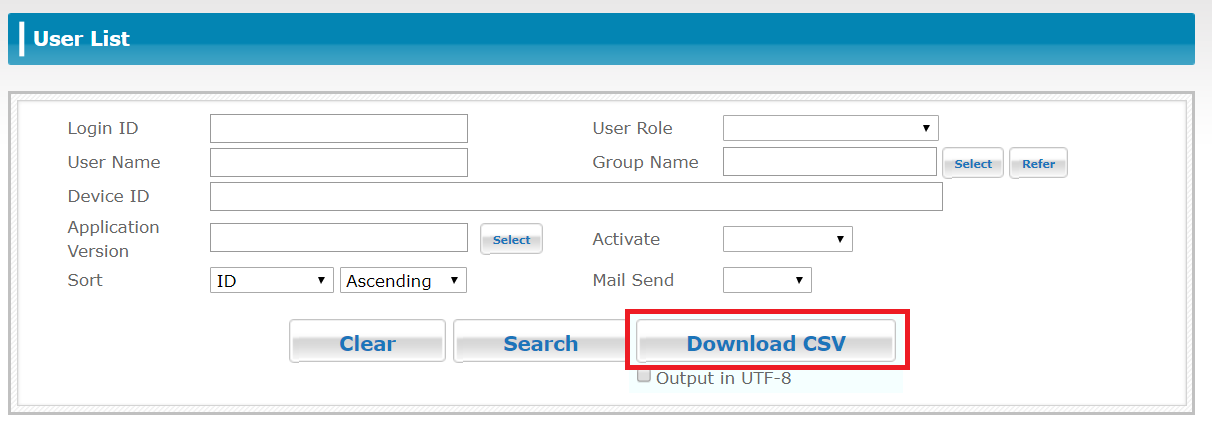
3.4 Downloading User Information
Click the [Download CSV] button in the User Search Area to download information about all users that match the search conditions in CSV format.
- Downloadable CSV file format
The CSV file is output with comma-delimited items without a header.
| ① | User Name | It displays the user name. |
| ② | User ID | It displays the user ID. |
| ③ | Password | Not displayed. * This item is used for file submission only. |
| ④ | Mail Address | It displays the user's e-mail address. |
| ⑤ | Mail Send Flag | Not displayed. * This item is used for file submission only. This is not the same as the mail sent flag displayed on the screen. |
| ⑥ | Device ID | It displays the device ID. (SmartCatalog ID) |
| ⑦ | Roles (Edit/View) | It displays the user role. "r" is displayed for viewing, and "w" for editing. Nothing is displayed for Admin. |
| ⑧ | Comment | It displays the set comment or memo information. |
| ⑨ | Group Name | It displays the name of the group(s) that the user belongs to. If the user belongs to multiple groups, the names will be separated by a semicolon (;). |
| ⑩ | Latest access from iPad | YYYY/MM/DD hh:mm:ss *A blank is shown if no available access. This item would be discard for the user batch registration. |
| ⑪ | Latest access from iPhone | YYYY/MM/DD hh:mm:ss *A blank is shown if no available access. This item would be discard for the user batch registration. |
| ⑫ | Latest access from Android | YYYY/MM/DD hh:mm:ss *A blank is shown if no available access. This item would be discard for the user batch registration. |
| ⑬ | Latest access from Android Phone | YYYY/MM/DD hh:mm:ss *A blank is shown if no available access. This item would be discard for the user batch registration. |
| ⑭ | Latest access from Windows | YYYY/MM/DD hh:mm:ss *A blank is shown if no available access. This item would be discard for the user batch registration. |
| ⑮ | Latest access from WEB Browser | YYYY/MM/DD hh:mm:ss *A blank is shown if no available access. This item would be discard for the user batch registration. |
* The latest access time is updated by system connection.
3.5 Creating Users
Select [Create User] from the sub-menu, or click the [Create] button on the [User List] screen to open the [Register User] screen.
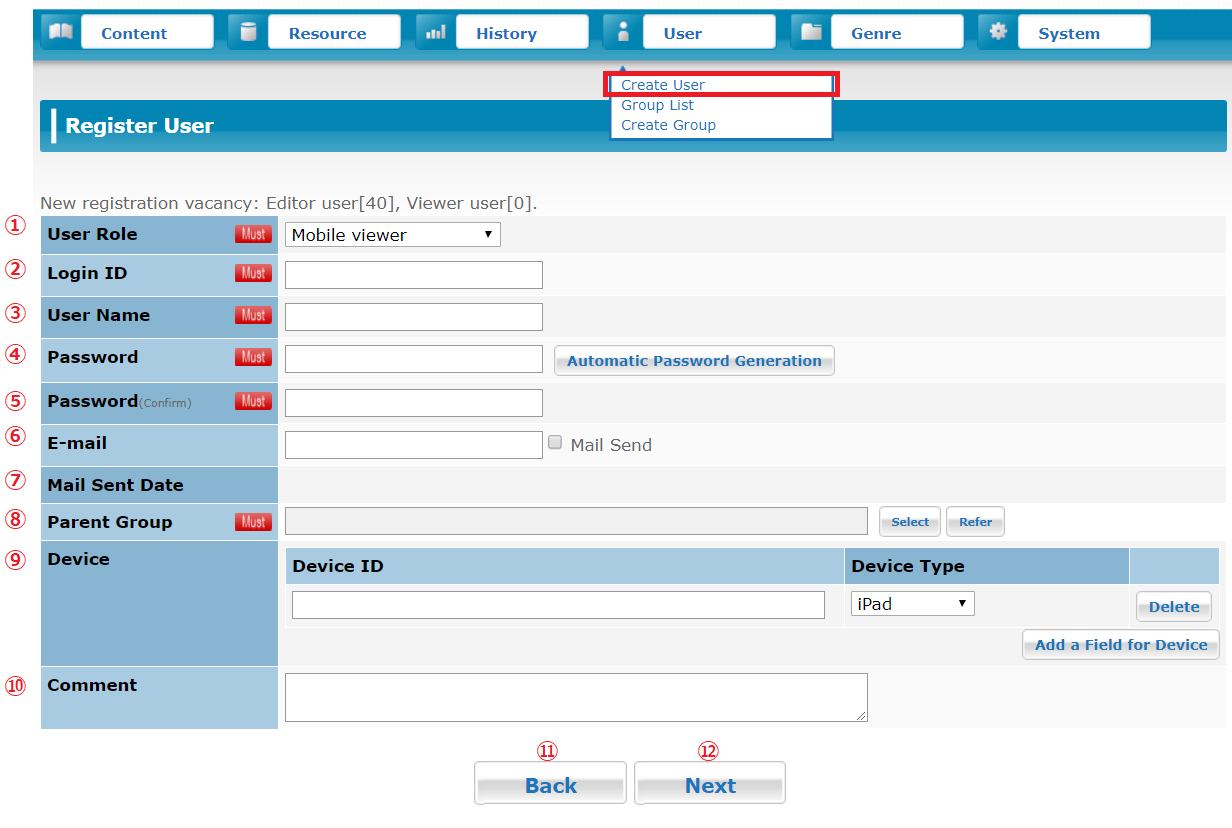
| ① | Select User Role (Required) |
Select the user role.
|
||||||||||
| ② | Login ID (Required) |
Enter the user ID to register. Enter between 4 and 31 single-byte alphanumeric characters. | ||||||||||
| ③ | User Name (Required) |
Enter the user name to register. Enter up to 30 double-byte characters. | ||||||||||
| ④ | Password (Required) |
Enter the password for the user. Enter between 6 and 16 single- byte alphanumeric characters. | ||||||||||
| ⑤ | Password Confirm (Required) |
Enter the same password you entered previously for input confirmation. | ||||||||||
| ⑥ | Enter the e-mail address for the user. Before [@] in an email address, only alphabets, numeric numbers, [ . ], [ - ], [ _ ] are allowed. * If an email has not been delivered, please check your spam folder because it might be marked as a spam email. |
|||||||||||
| ⑦ | Mail Sent Date | It displays the date on which the last account notification mail was sent. | ||||||||||
| ⑧ | Parent Group (Required) |
Specify the group(s) to assign the user to. Click the [Select] button to open the [Select Parent Group] screen. After you have made your selection, that selection is displayed. | ||||||||||
| ⑨ | Device | Enter the device ID (SmartCatalog ID) for each device type to be used. Enter this information only if you know the SmartCatalog ID beforehand. beforehand. |
||||||||||
| ⑩ | Comment | Enter a comment or memo. | ||||||||||
| ⑪ | [Back] Button | Returns to the User List. Any information that has not been saved will be canceled. | ||||||||||
| ⑫ | [Next] Button | It moves to the [Create User confirmation] screen. |
The number of users that can be added is shown at the top of the [Register User] screen.
| New registration vacancy of Editor users. | The total number of Content administrator, System administrator, and Editor users that can be added. |
| New registration vacancy of Viewer users. | The maximum number of Mobile viewer that can be added. |
The new registration vacancy of Editor users can be used to add to the new registration vacancy of Viewer users if necessary. For example, if the new registration vacancy of Editor users is 10, and the new registration vacancy of Viewer users is 10, you can use the 10 available Edit User slots to register a total of 20 Mobile Users. However, you cannot use empty Mobile User slots to add additional Edit Users.
Refer to 「3.18.1 Viewing Contract Information Confirmation」for how to check the maximum number of users that can be added.
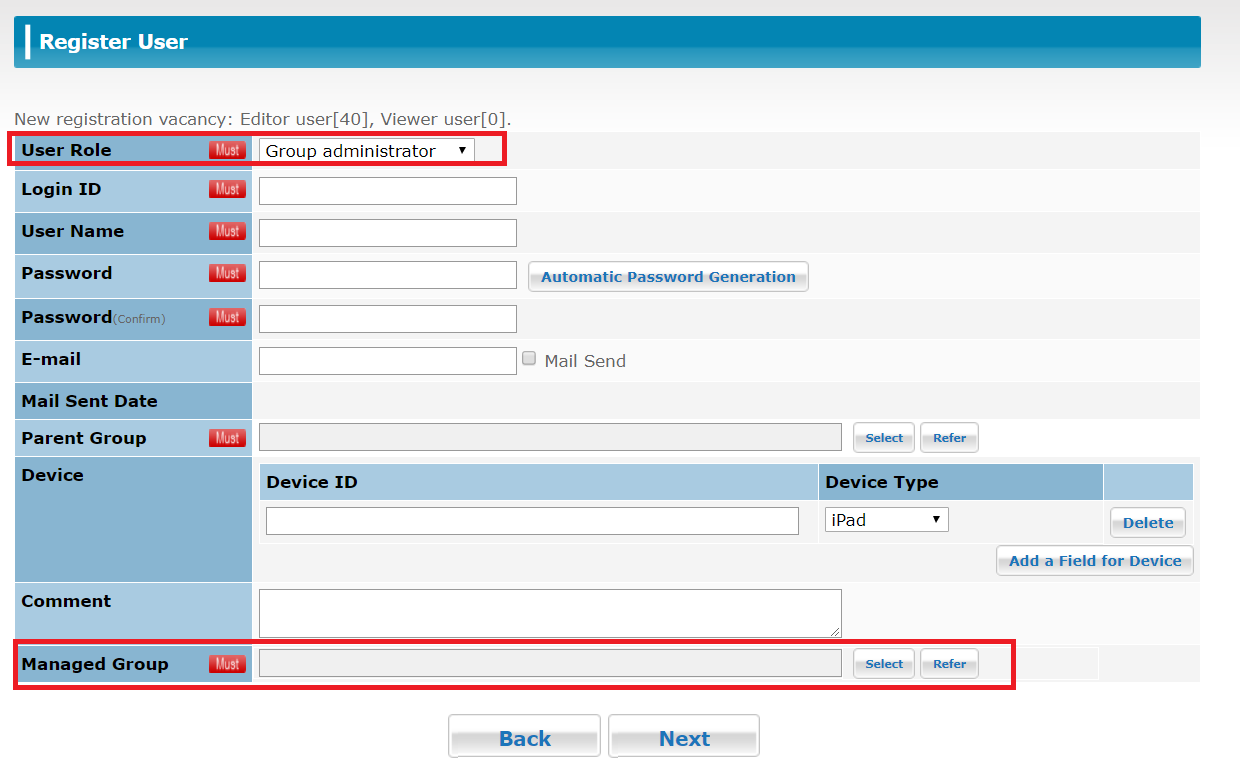
Group administrator can create and modify a user of the specified group within the group the Group administrator belongs to. If the user role is set as “Group administrator” when the user is created, the item of [Managed Group] is displayed at the bottom of the screen. Select the group to manage from the groups you belong to.
* A group which does not exist in the groups cannot be specified as the managed group.
3.5.1 Group Selection
If you click the [Select] button under [Parent Group] on the [Register User] screen, the [Select Parent Group] screen will be displayed. From there, you can specify which group(s) to assign the user to.
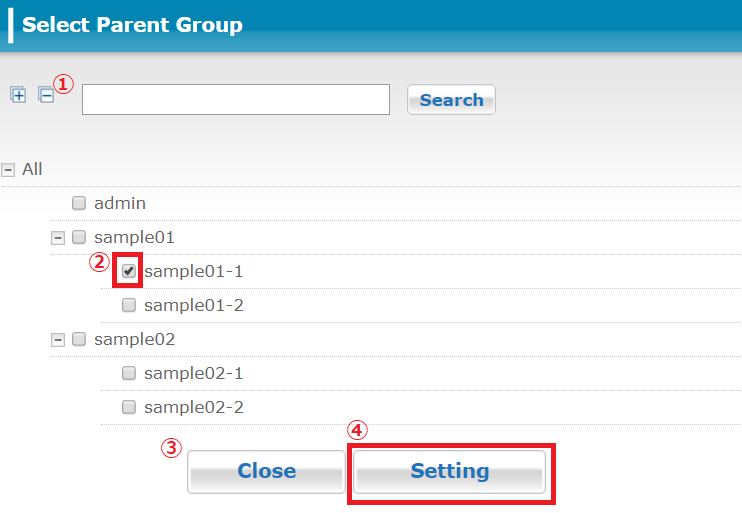
| ① | Search Area | Search for Groups. |
| ② | Group Name | Select the checkbox for the group(s) you want to assign the user to. You can assign a user to multiple groups. |
| ③ | [Close] Button | It cancels the selection and returns to the [Register User] screen. |
| ④ | [Setting] Button | Apply the specified Group settings. |
3.5.2 Confirming the New User Details
When you click the [Next] button on the [Register User] screen, a confirmation screen is displayed.
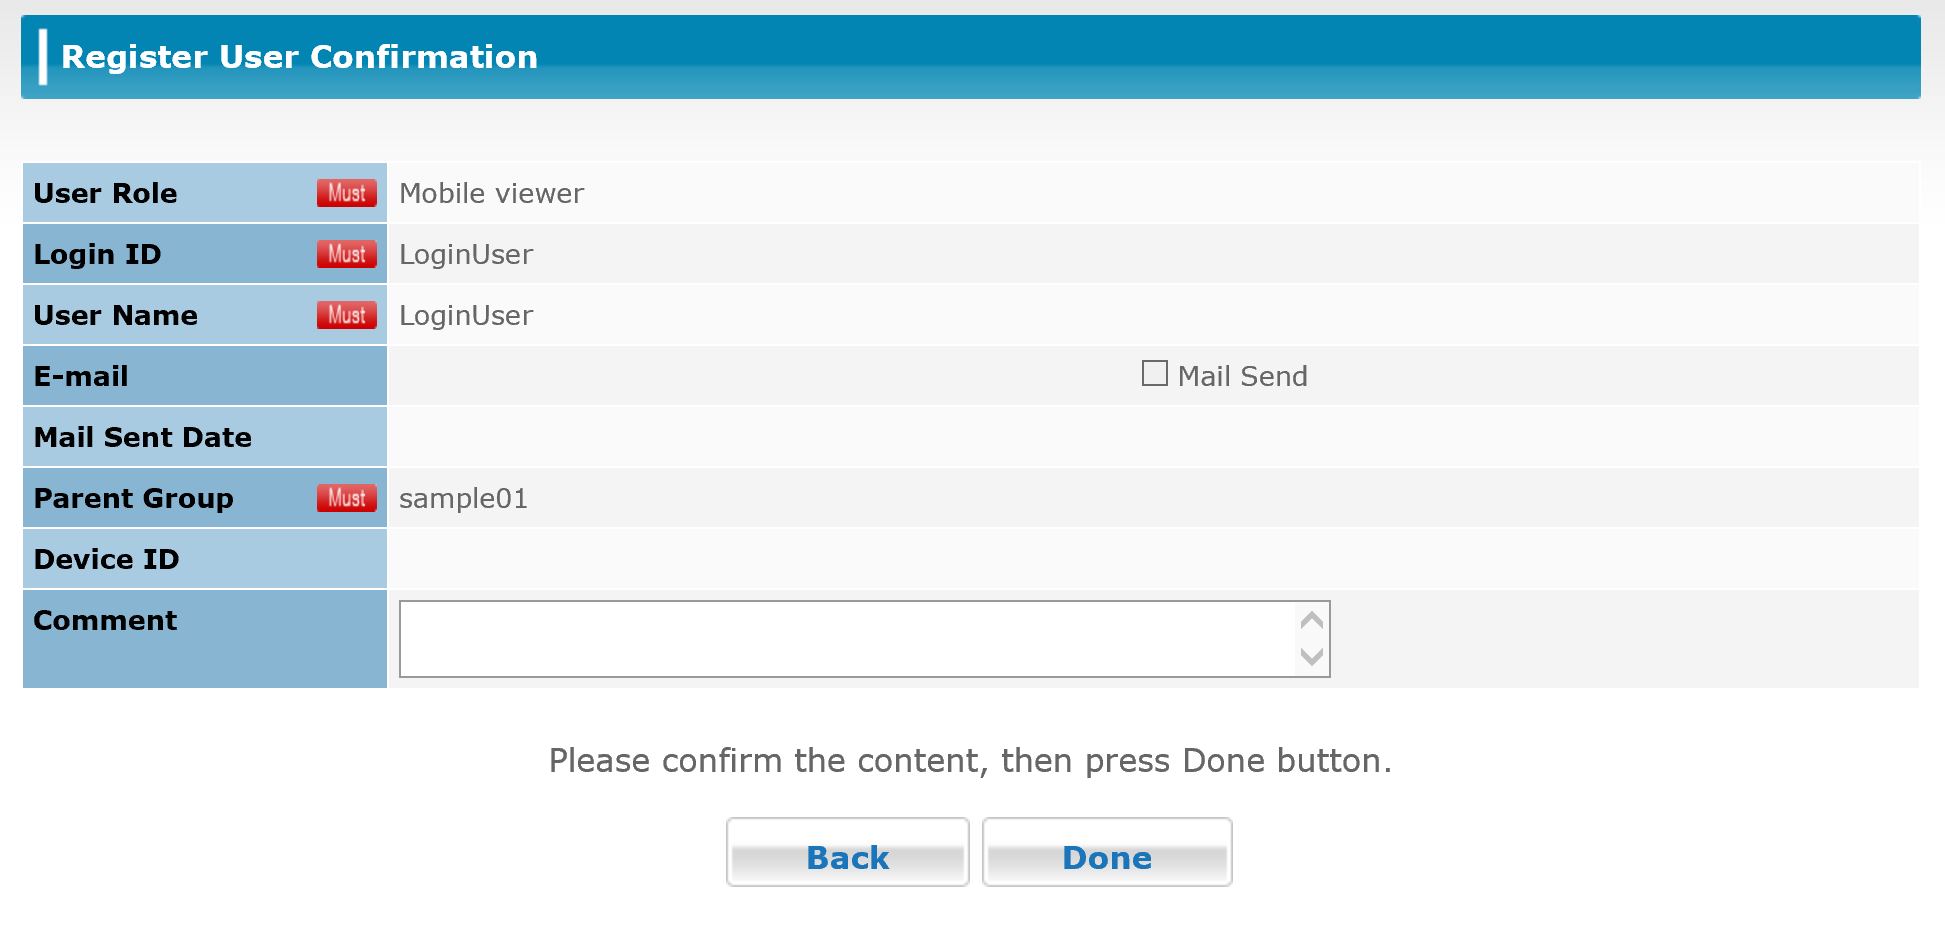
| ① | [Back] Button | Return to the [Register User] screen. |
| ② | [Done] Button | It confirms the entered user information and completes the creation of the user. |
3.5.3 Completing User Creation
When you click the [Done] button on the confirmation screen, a final screen is displayed showing that user creation is complete.
| ① | [Back to List] Button | Return to the [User List] screen. |
3.6 Batch Registration Of Users
You can create a CSV file* in advance to register multiple users at once.
Click the [Batch Registration] button on the [User List] screen to open the [User Batch Registration] screen.
*Refer to the downloadable user CSV file format for user creation and management in the Support for further details.
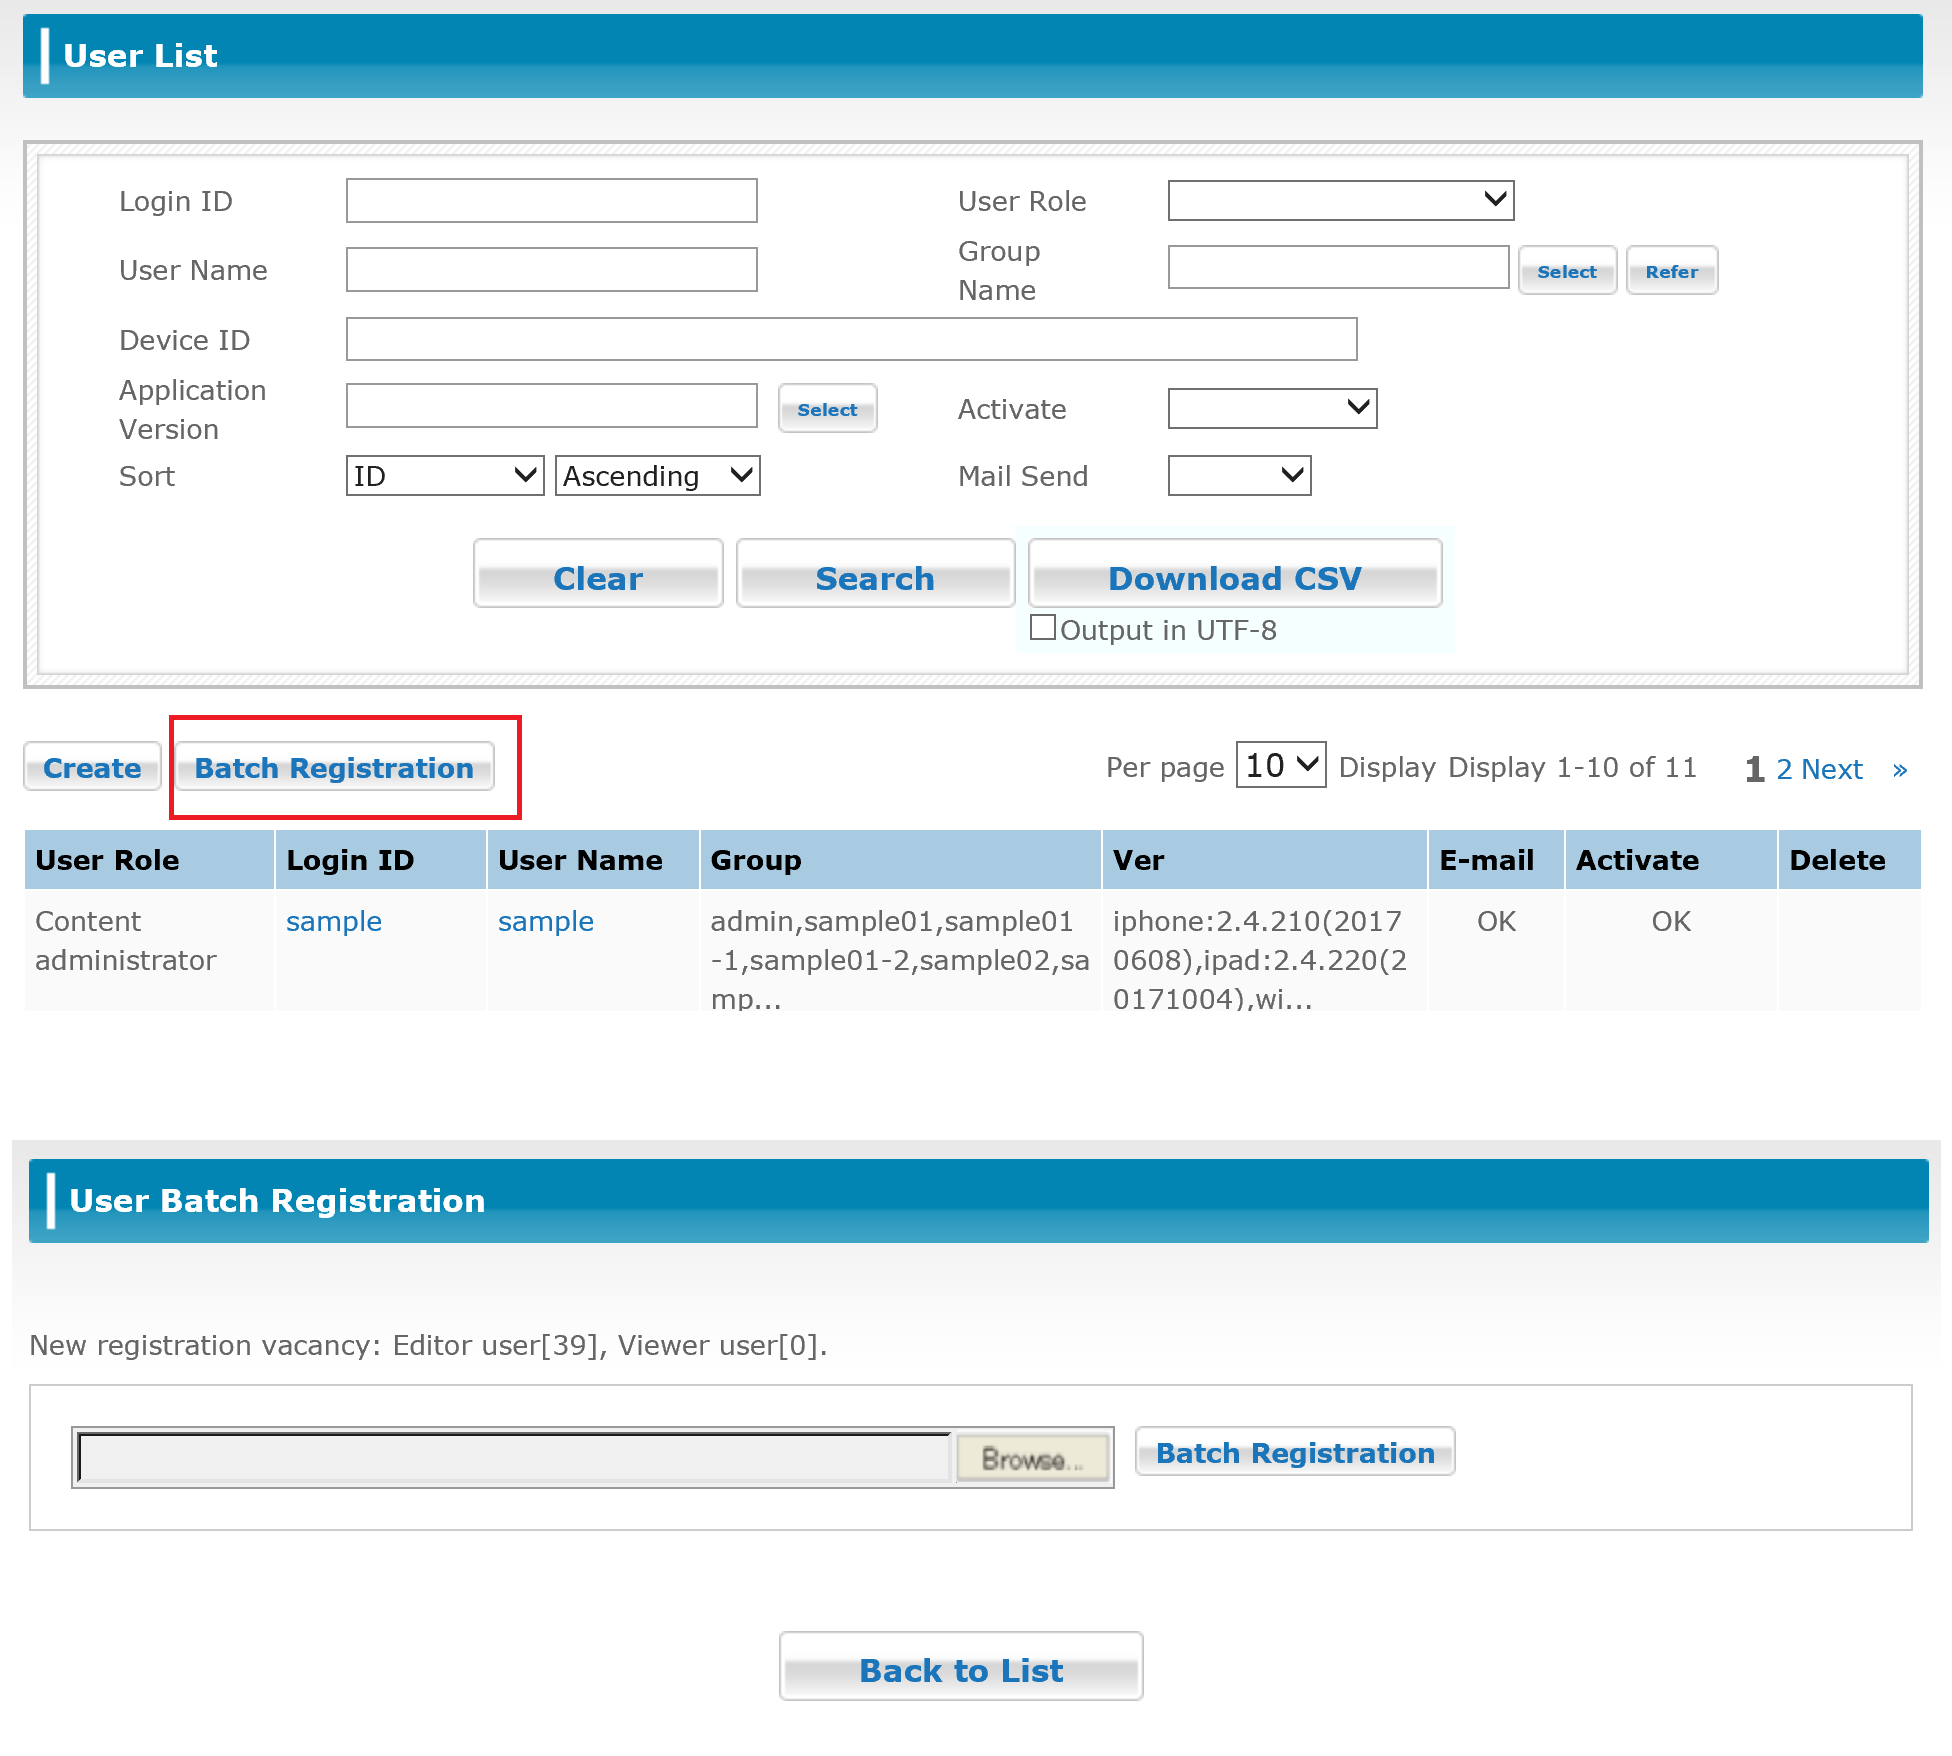
Click the [Browse] button to open the [Choose File to Upload] screen.
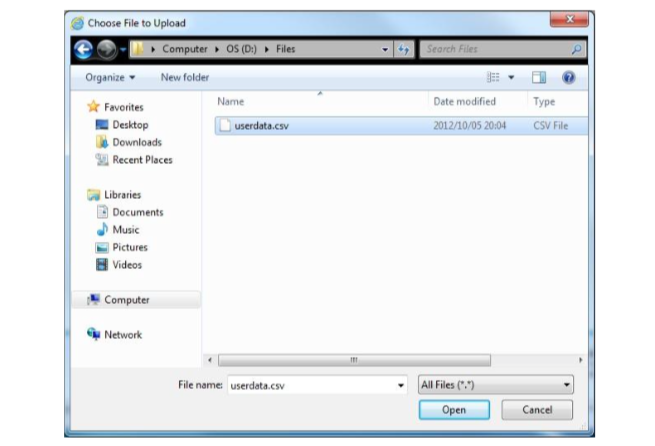
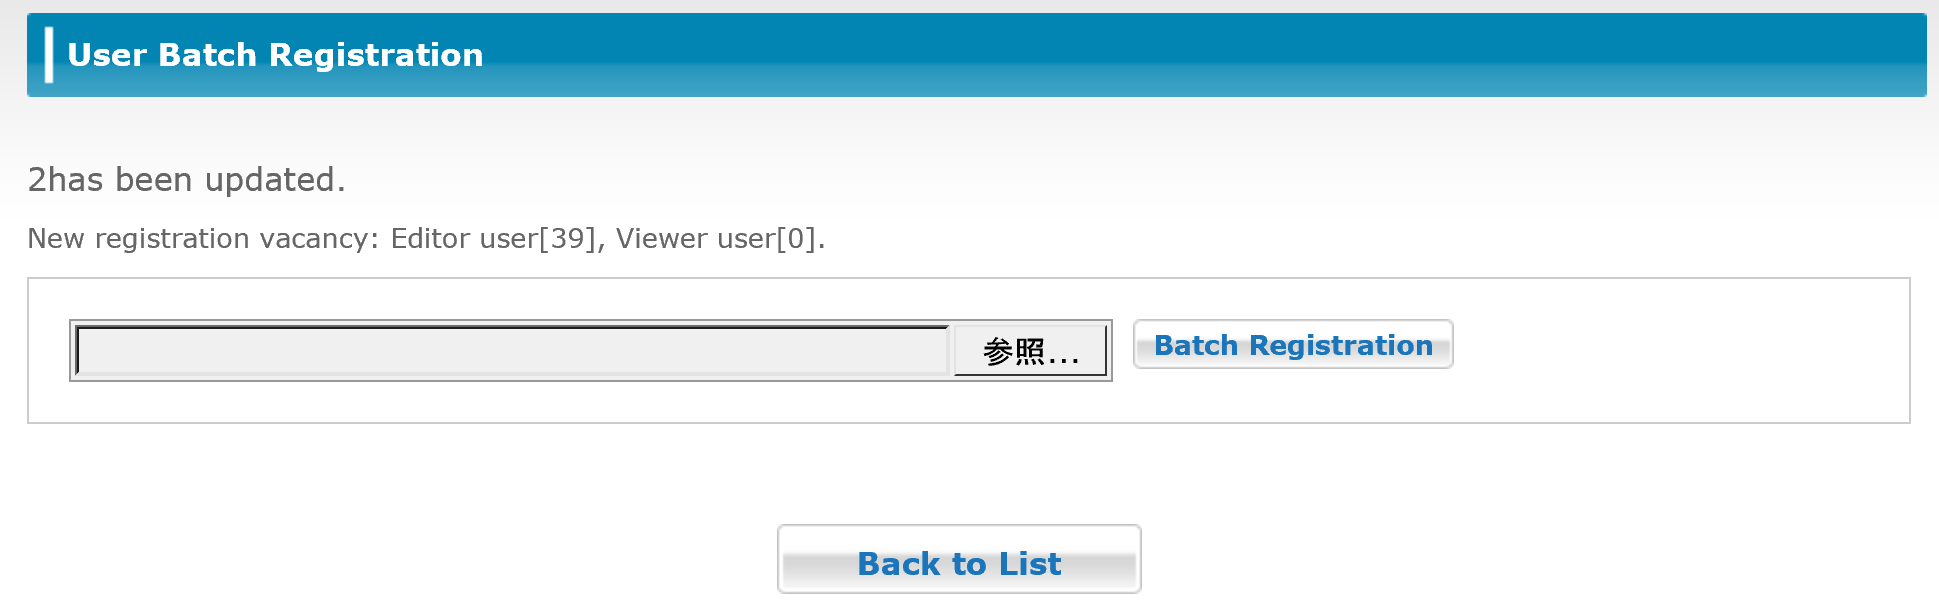
Select the CSV file you want to add and then click the [Open] button.
A message indicating the completion of registration is displayed after you click the [Batch Registration] button.
*Uploadable CSV file format
The CSV file is output with comma-delimited items without a header. Each item can be enclosed in double quotation marks (") if you need to include commas or other symbols.
| ① | User Name (Required) | Enter the user name to register. You can enter up to 30 double-byte characters. |
| ② | User ID (Required) | Enter the user ID to register. Enter between 4 and 31 single-byte alphanumeric characters. |
| ③ | Password | Enter the password for the user. You can enter between 6 and 16 single-byte alphanumeric characters. Unlike when the user changes their own password, you can set any string as the password. However, if you set the password as "PASSWORD," a password will be automatically generated for you. In this case, the e-mail address and send flag are required items. If the password is left blank, it will be automatically generated. |
| ④ | Mail Address | Enter the e-mail address for the user. This item is required when the password field is left blank or is set to "PASSWORD." However, if the e-mail address has already been registered this can be left blank. |
| ⑤ | Mail Send Flag | To send an e-mail, set this item to "Y" or "y." Leave this item blank if you do not want to send an e-mail. |
| ⑥ | Device ID | Enter the device ID (SmartCatalog ID). Note: Please register with leaving the column blank. Because the device ID is automatically registered when logging in on an application. |
| ⑦ | Role (Editor/Mobile viewer) (Required) | Specify the user role. It is possible to specify either Editor or Mobile viewer. Enter "r" for mobile viewer and "w" for editor. Content administrator / System administrator / Group administrator cannot be registered by batch registration |
| ⑧ | Comment | Enter a comment or memo. |
| ⑨ | Group Name (Required) | Specify the full path to the group(s) to which the user will be assigned to. Example: If you want to assign the user to the "Group 1" under the "Sales Control" in the "Company" /Company/Sales Control/1st Group You can specify multiple groups using a semicolon (;) in order to enter the group to assign the user to. |
*If you are updating existing records, the only required item is item (2) (User ID) and the other items are required only if they are to be updated.
*Your CSV file can include both new users and updates to existing users.
*You cannot add or delete lines in the CSV file due to its file format. Any attempt to do so will result in an entry error.
You can set reserved keywords for certain items in a CSV file for batch registration of users in order to control the processing performed when the user is created (see the table below).
| Reserved Keyword | Applicable Item | Function |
| PASSWORD | Password | Automatically generate a password. *1 |
| CLEAR | Mail Address, Device ID, Comment | Update the item with no data. |
| DELETE | User Name | Perform a logical delete of all user information. *2 |
*1 In addition to setting reserved keywords for password, you must also specify an e-mail address and set the mail send flag in order to automatically generate passwords.
*2 You can still view the operations log of the user even after the user name is deleted.
Memo
・When importing CSV file, text garbling might be happened because of character code. Smart Catalog supports the character code, "UTF-8." Please set character code to "UTF-8" because other character codes might cause text garbling. Furthermore, special characters are not supported, so delete all special characters and import CSV file.
・The upper limit for batch registration (update) of user is 3,000 at once. If more data need to be registered (updated), separate the data and do that multiple times.
3.7 Viewing and Updating Users
Click the Login ID, or User Name in the User List to open the [Update User] screen and view detailed information about that user. You can update information about the user by editing any of the information on this screen.
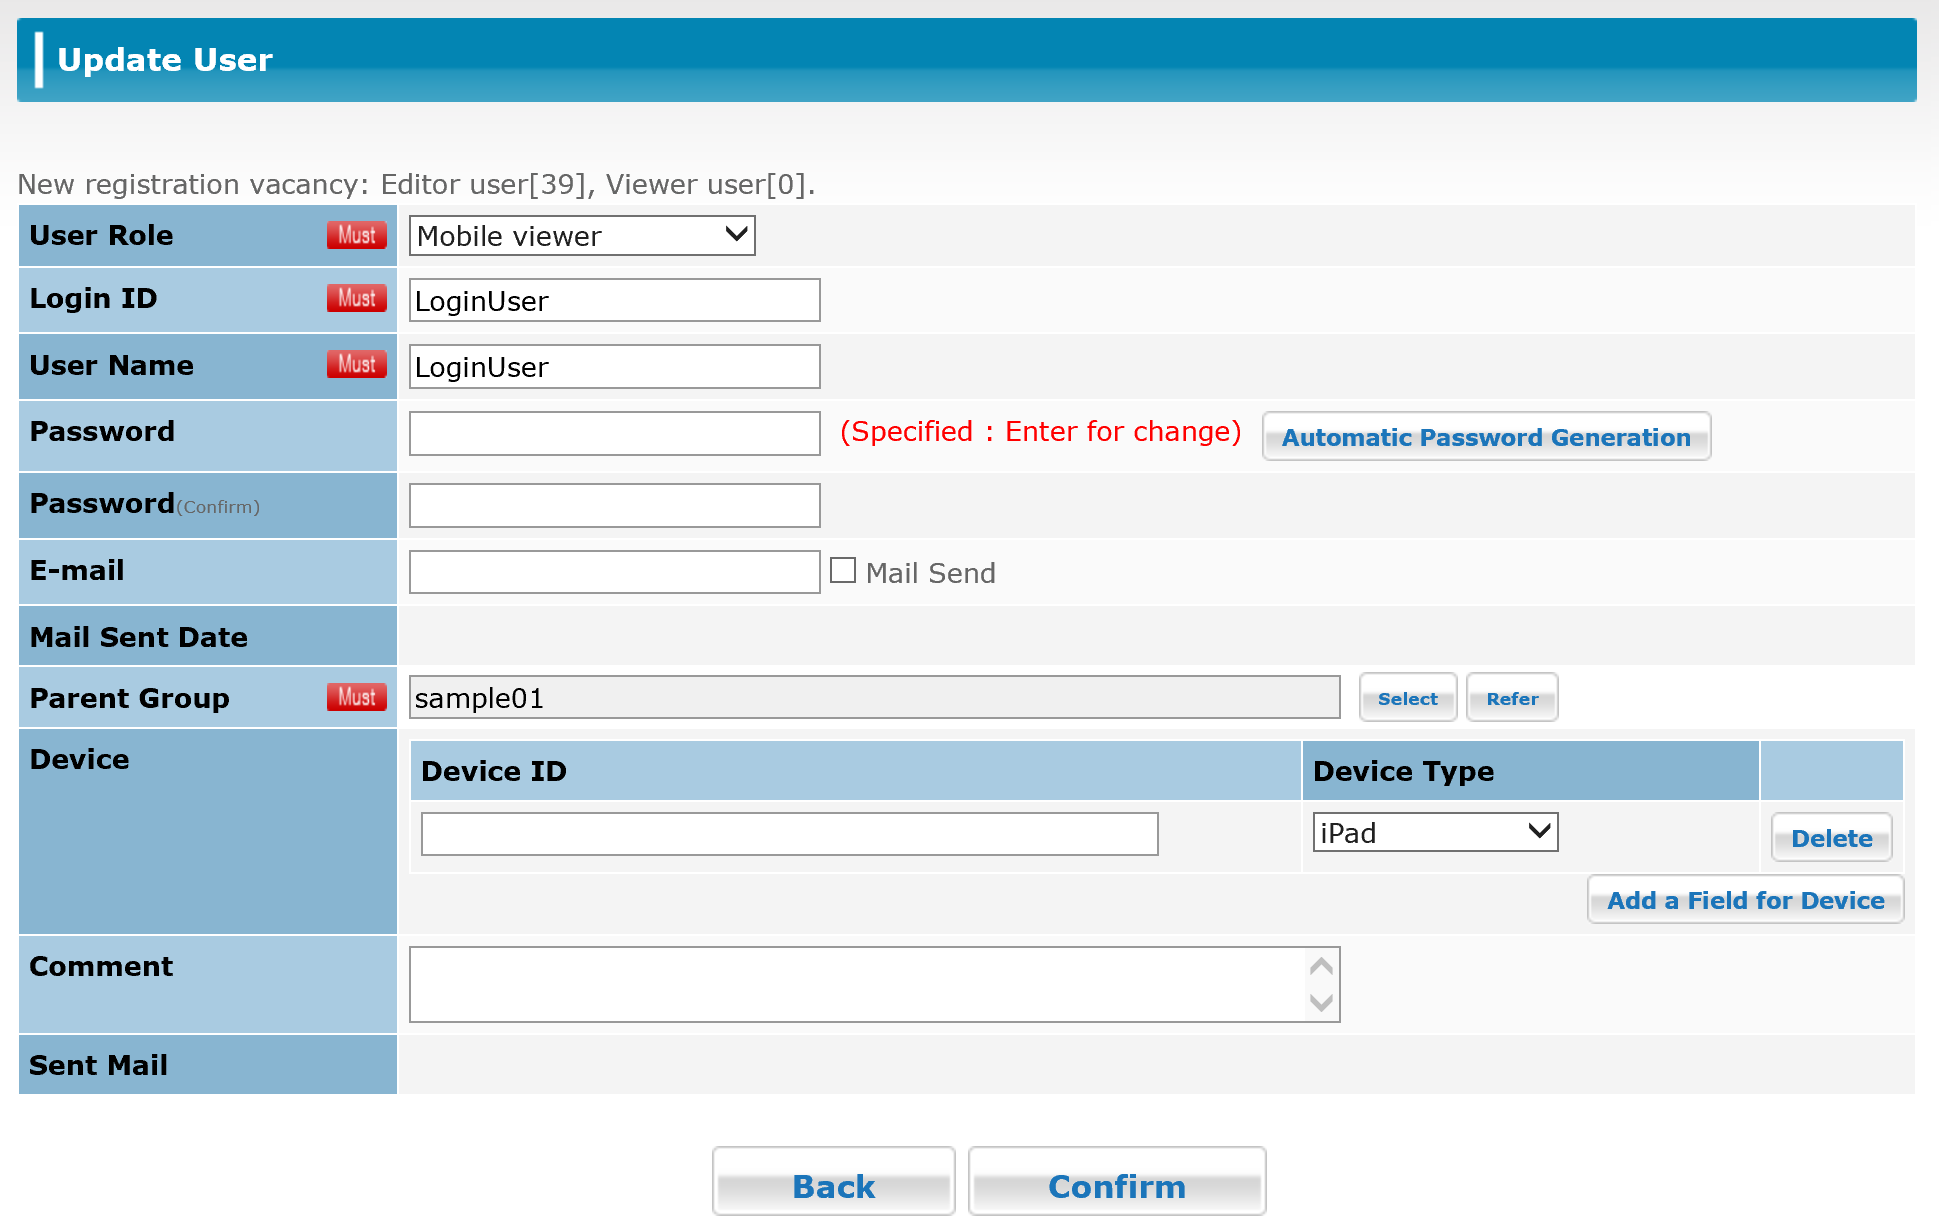
However, the user's password will not be displayed in any way on the [Update User] screen. If you want to change the password, move your mouse cursor over the password input text box and enter the new password.
| ① | [Back] Button | Return to the [User List] screen. |
| ② | [Confirm] Button | Proceed to the [Update User Confirmation] screen to update user information. |
*The items on this screen are the same as those on the [Register User] screen.
3.7.1 Confirming the Updated User Details
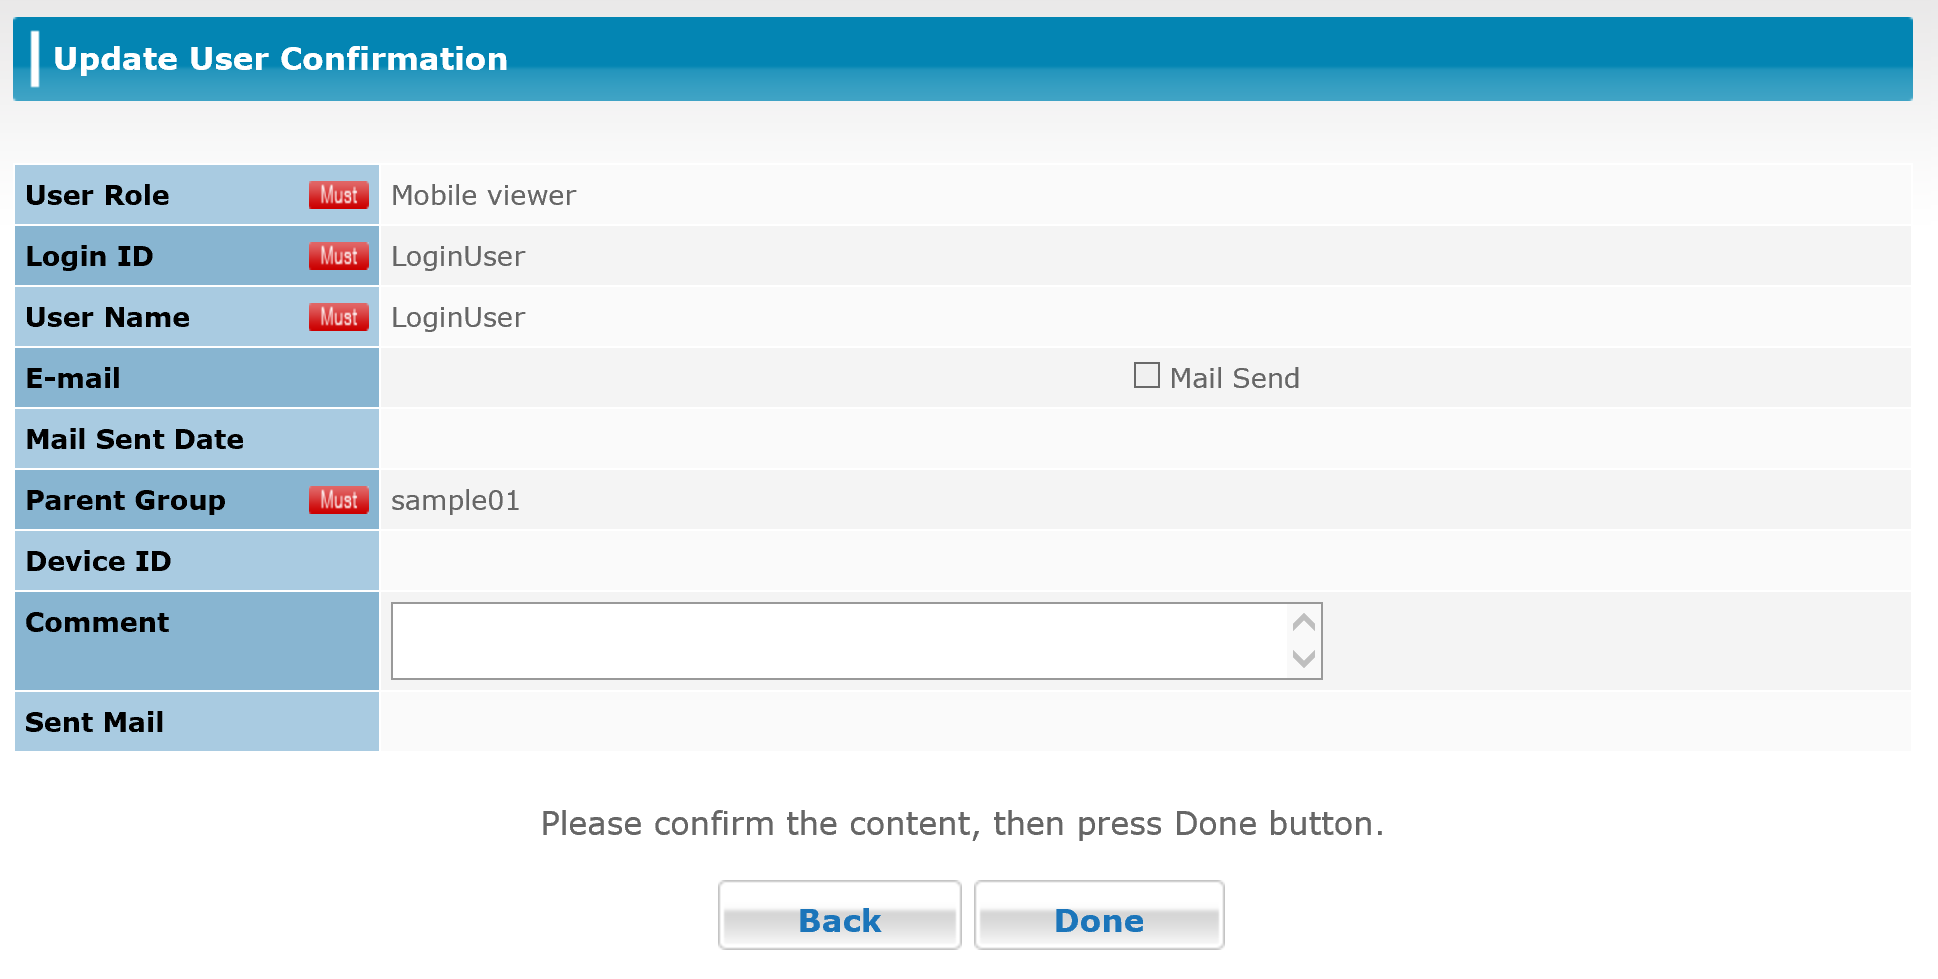
| ① | [Back] Button | Return to the [Update User] screen. |
| ② | [Done] Button | Confirm the updated user information and complete the update. |
3.7.2 Completing the User Update Process
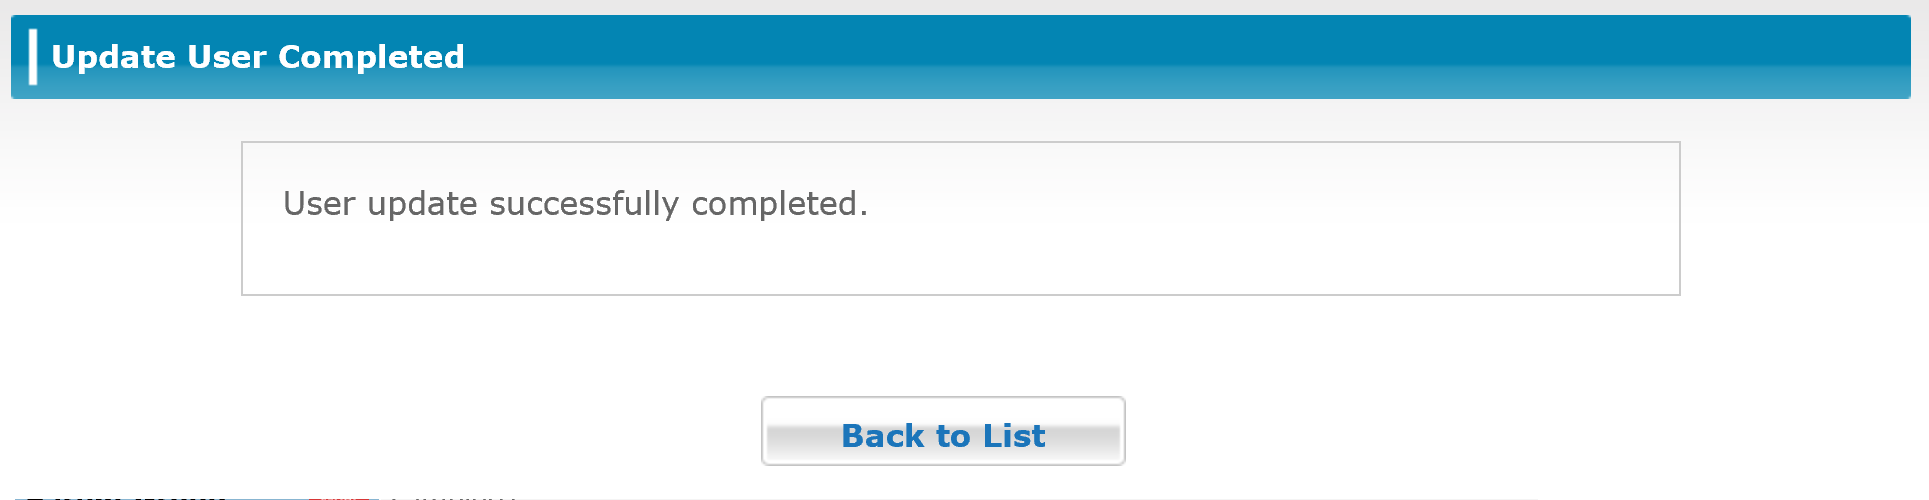
| ① | [Back to List] Button |
Return to the [User List] screen. |
3.7.3 Deactivating
According to the specification, the SMART CATALOG can be used on only one iPad, iPhone, Android, Android Phone, or Windows device per account.
After you perform the initial login on the application side, you cannot log in from another device with the same account or log in to the same device with another account. Therefore, if you want to log in from another device, you need to terminate the association (activation) between the device and the account.
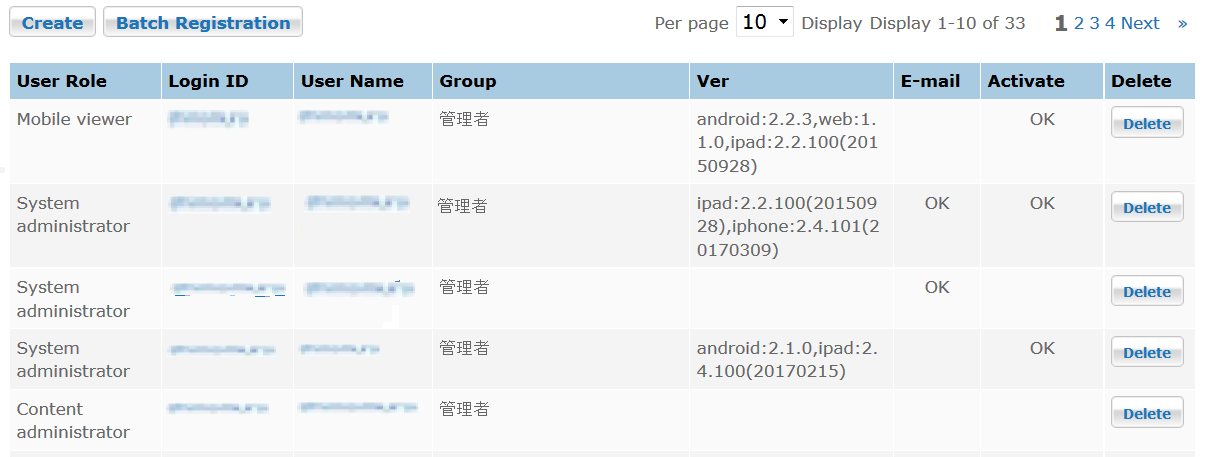
Click on "User" of the top menu and perform a search to find the user you want to deactivate his/her device. Once the user is shown in the list ,then click on "Login ID" or "User Name" to display the detailed user information.
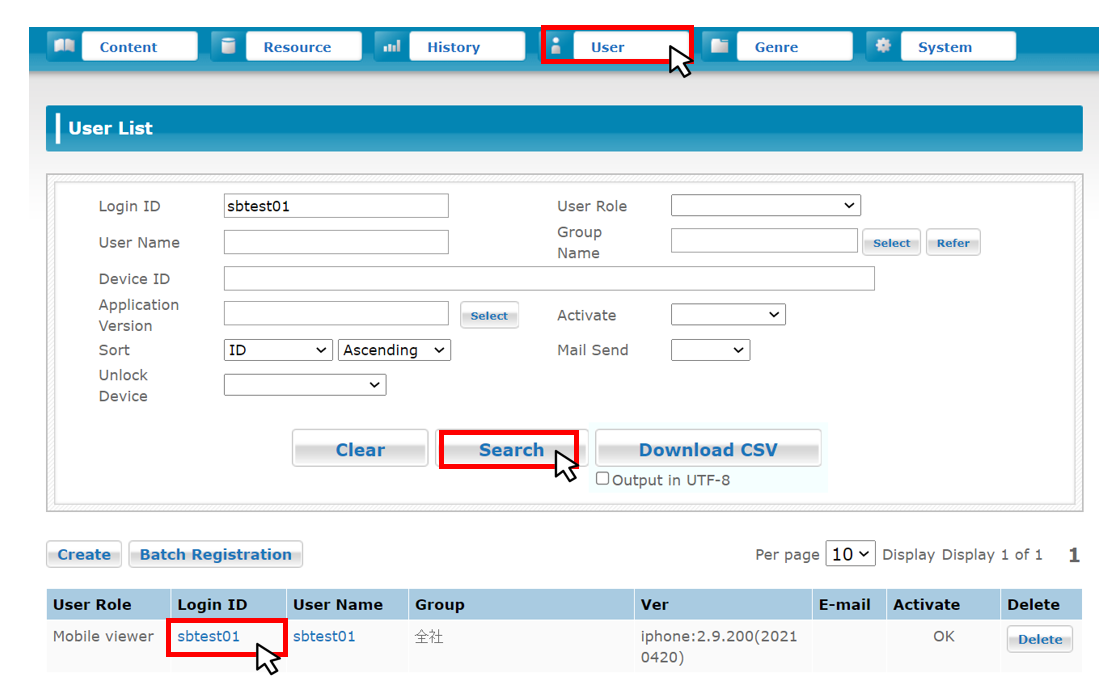
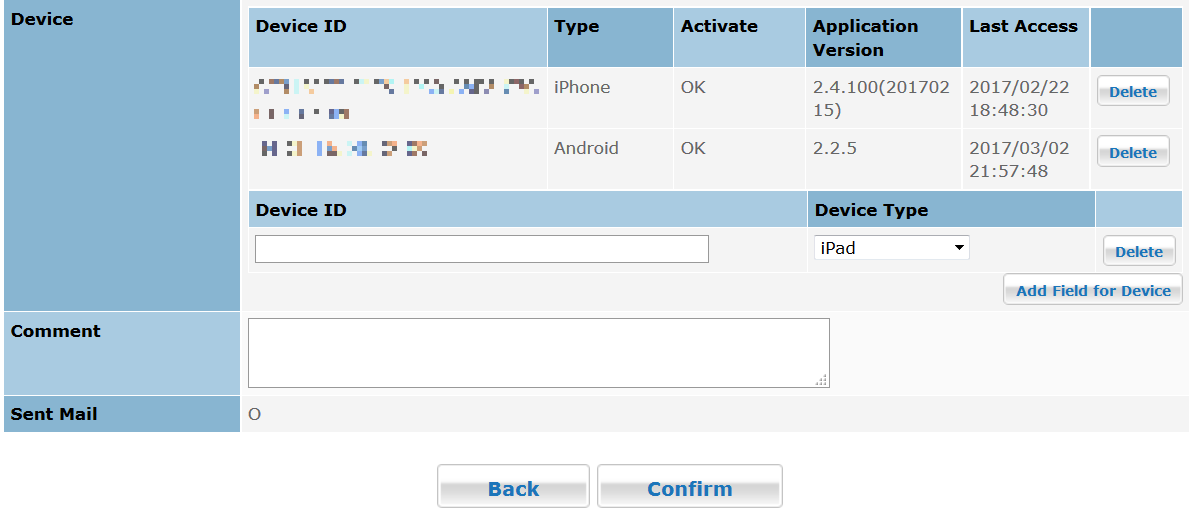
On the detailed user information screen, confirm the type of device to be deactivated, and click "Delete" button for the type of device. Then click "Confirm" button. * Deactivation is not yet done.
詳細画面にて、アクティベート解除すべき端末の「種別」を確認し、同じ行の右端にある「削除」ボタンをクリックし、その後「確認」ボタンをクリックします。※まだ操作は完了していません。
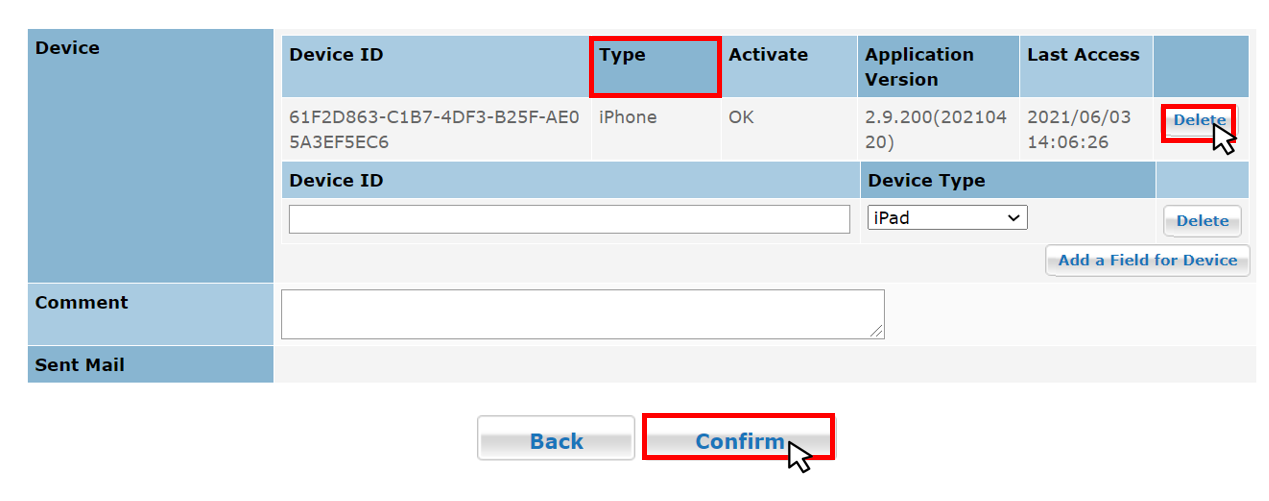
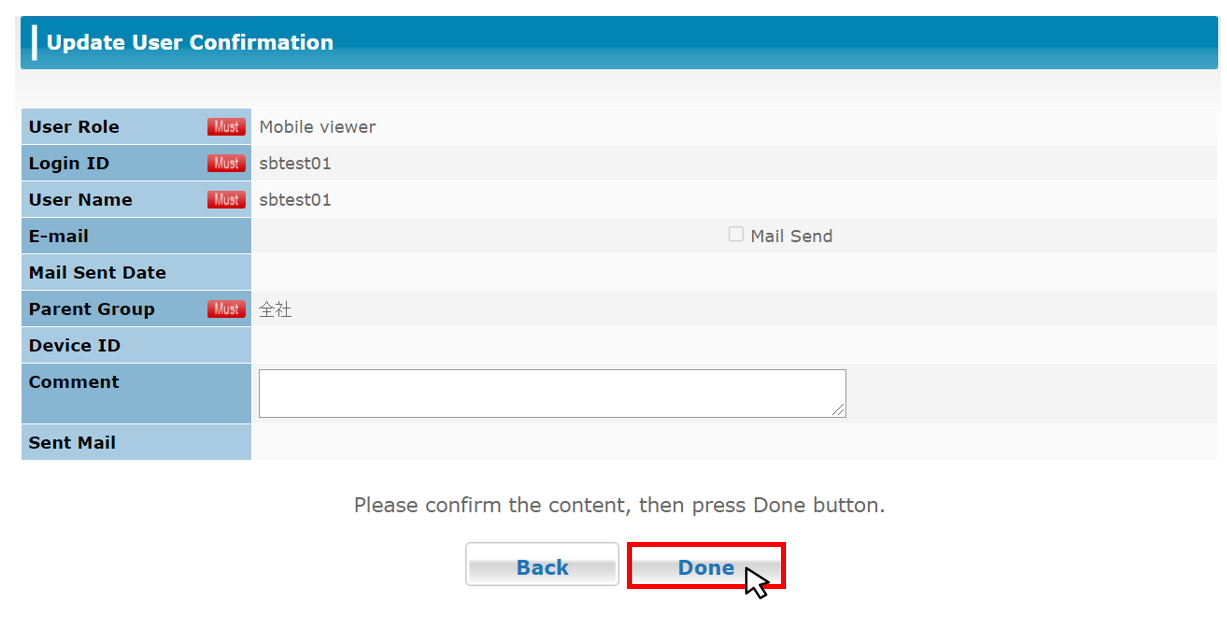
On the next screen ,click "Done" button, then the deactivation is completed.
The user can send the deactivation request from the application. The recipient of the deactivation application is the group administrator of the group of which the user belongs to. The group administrator receives the deactivation request notice by e-mail from the system.
*If a group administrator has not been registered, or the group administrator’s e-mail address has not been registered, the deactivation request is not sent.
The login ID and user name of the account that received the deactivation request are displayed in red. Click the login ID or user name to move the user update screen.
In the [Device] item, click the [Delete] button at the right of the device you want to deactivate. You can inform the requester that the deactivation is complete by e-mail. In that case, select the [Device Unlocked] check box and then click the [Confirm] button at the bottom of the screen. Click the [Done] button to finish. When the deactivation request was withdrawn, select the [Cancel Device Unlocking] check box to finish, which allows you to inform the user of the withdrawal.
MEMO
・For webviewers, the user becomes active when logged in and becomes inactive when logged out automatically, so you don't need to deactivate the user individually.
3.8 Deleting Users
Click the [Delete] button beside the user you want to delete in the [User List] screen.
When you click the [Delete] button, an alert dialog box is displayed asking you to confirm deletion of the user.
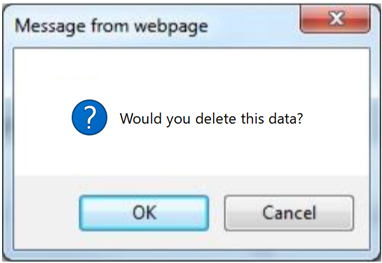
Click the [OK] button to delete the specified user. Click the [Cancel] button to cancel deletion and return to the User List.
3.9 Managing Groups
Select [Group List] from the menu to view a list of company-wide groups and groups that belong to those groups. This button is shown for Admin users only.
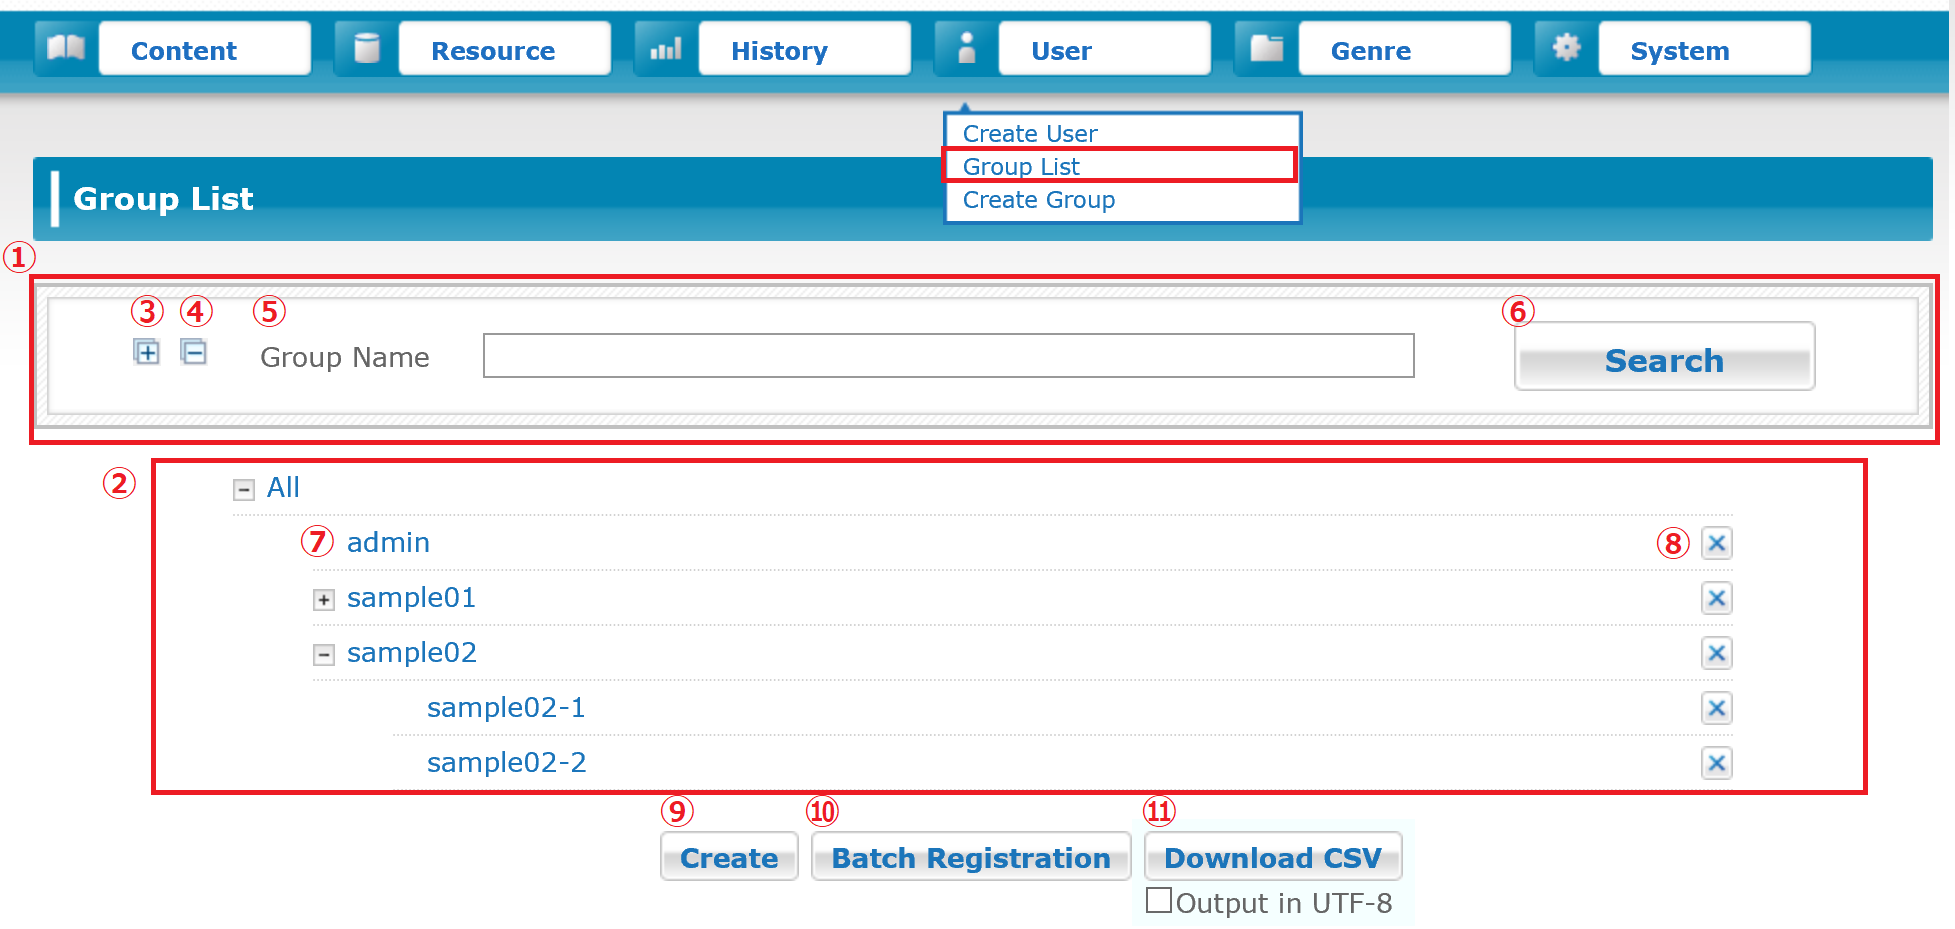
| ① | Group Search Area | It allows you to search for a specific group or groups based on a set of search conditions. |
| ② | Group List Area | It displays a list of all registered groups or a list of groups that meet the specified search conditions. |
| ③ | Show All Groups | Click the Expand All [+] button to view all groups. |
| ④ | Hide All Groups | Click the Collapse [-] button to collapse the group list display. This will close all but the top level of the hierarchy view. |
| ⑤ | Group Name Search | Enter the name of the group to search for. |
| ⑥ | [Search] Button | Search for the entered group name. |
| ⑦ | Group Display Name | It moves to the [Refer Group] screen. |
| ⑧ | [Delete] Button | Click the [X] icon next to the group(s) you want to delete, then delete the selected group(s). |
| ⑨ | [Create] Button | It moves to the [Create Group] screen. |
| ⑩ | [Batch Entry] Button | It moves to the [Group Batch Registration] screen. |
| ⑪ | [Download CSV] Button | Download the list of all registered groups in CSV format. |
Hint
・The order of the groups is [UTF-8, A-Z], specifically, number → English → Japanese. The application also follows this. If you would like to organize contents as your intention, put numbers at the beginning of the group names.
3.9.1 Format of the Downloaded CSV File
| ① | Group Name | It displays the group name. |
| ② | Path | It displays the group path in the full path. Parents and children are separated by "/." If "/" is used in the name of a group, it will be escaped with a backslash |
| ③ | Folder | It displays the group folder name. |
| ④ | Description | It displays the description of the group. |
3.10 Creating Groups
Select [Create Group] from the menu, or click the [Create] button on the [Group List] screen to open the [Create Group] screen.
*The maximum number of groups that can be registered is 500. The maxium number of group level that can be registered is 12 (including "All" level).
| ① | Group Name (Required) | Enter the name of the group to create. You can enter up to 30 double-byte characters. |
| ② | Parent Group (Required) | Specify the parent group to which the group you want to create should belong to. Click the [Select] button and the [Select Parent Group] screen will pop up. The group you have selected will be displayed. |
| ③ | Member User | Specify the member user to you want to assign to the group you create. Click the [Select] button and the [Member Group] screen will pop up. The member group you have selected will be displayed. |
| ④ | Limit Number of Member Users | Enter the maximum number of users that can belong to the group that is to be created. The group administrator can create up to the maximum number of users. The groups which have a set number of maximum users are displayed in red on the [Group List] screen. |
| ⑤ | Comment | Enter a comment for the group. |
| ⑥ | [Back] Button | Return to the [Group List] screen. Any information that was entered will be canceled. |
| ⑦ | [Next] Button | It moves to the [Create Group confirmation] screen. |
3.10.1 Group Selection
Specify the parent group to which the registered group belongs.

| ① | Search Area | Search for Groups. |
| ② | Parent Group Name | Select the checkbox for the parent group you want to select. |
| ③ | [Close] Button | It cancels the parent group selection and returns to the [Create Group] screen. |
| ④ | [Setting] Button | Apply the specified Group settings. |
3.10.2 Member User Selection
Specify the users you want to add to the group you create. As shown in the figure below, another screen is displayed when you click the [Select] button. Users will appear as selected as you select them on this screen.
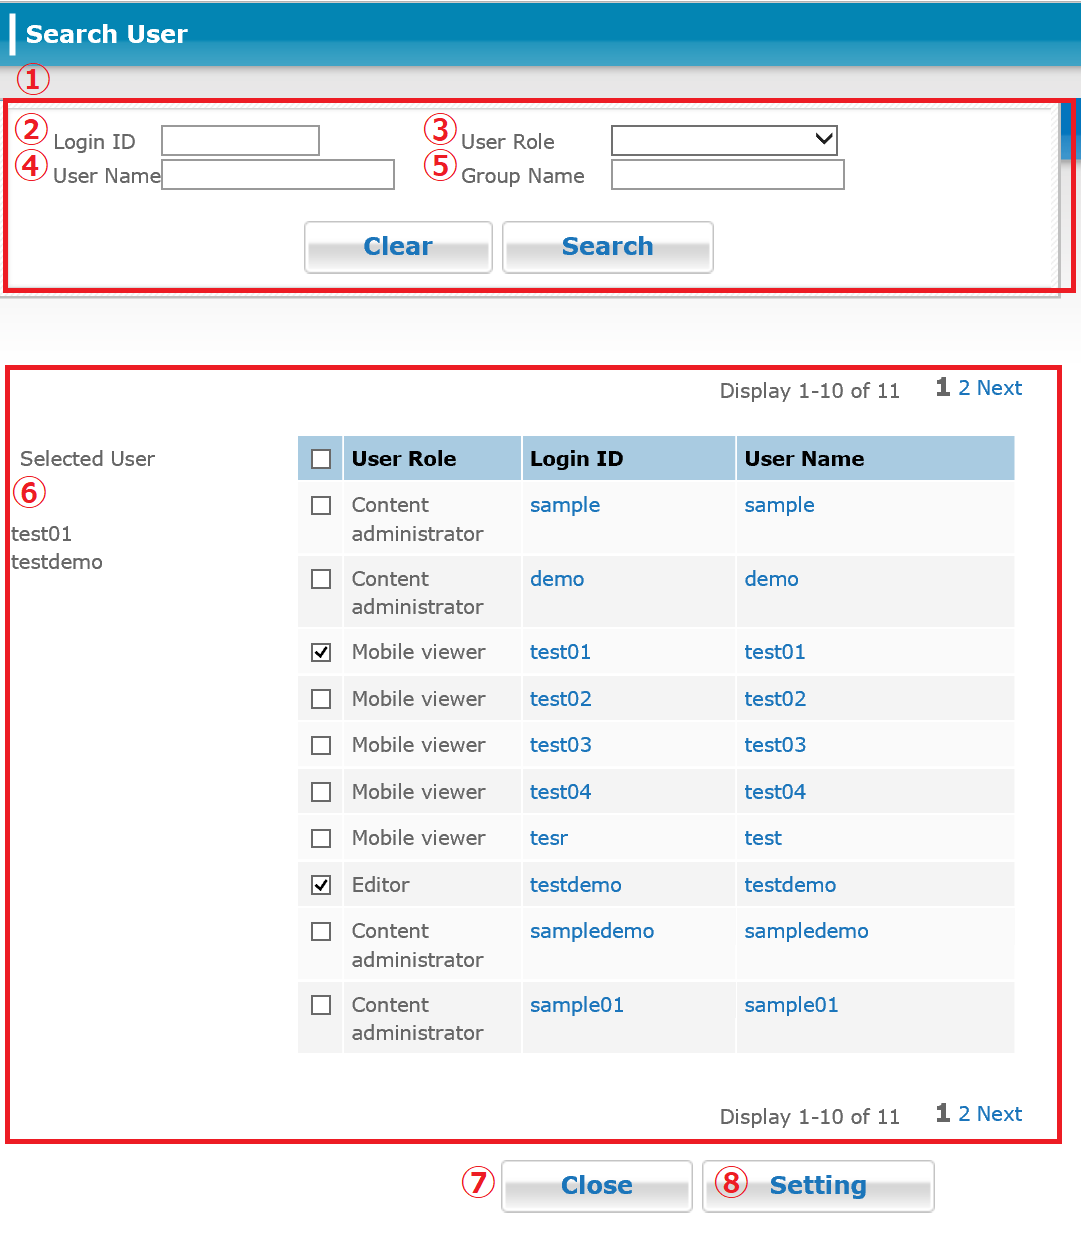
| ① | Search Area | It allows you to search for member users using a refined search. |
| ② | Login ID | Enter the login ID of the user you want to search for. |
| ③ | User Role | Select the user role you want to search for. |
| ④ | User Name | Enter the user name to search for. |
| ⑤ | Group Name | Enter the name of the group to search for. |
| ⑥ | User Selection | Select the checkbox for the users you want to add as members of the group. |
| ⑦ | [Close] Button | It cancels the member group selection and returns to the [Create Group] screen. |
| ⑧ | [Setting] Button | Apply the specified Group settings. |
3.10.3 Confirming the New Group Details
The [Create Group Confirmation] screen is displayed. Here you can review the information you entered on the [Create Group] screen.
| ① | [Back] Button | Return to the [Create Group] screen. |
| ② | [Done] Button | It creates and adds the group information you entered. |
3.10.4 Completing Group Creation
When you click the [Done] button on the confirmation screen, a final screen is displayed showing that group creation is complete.
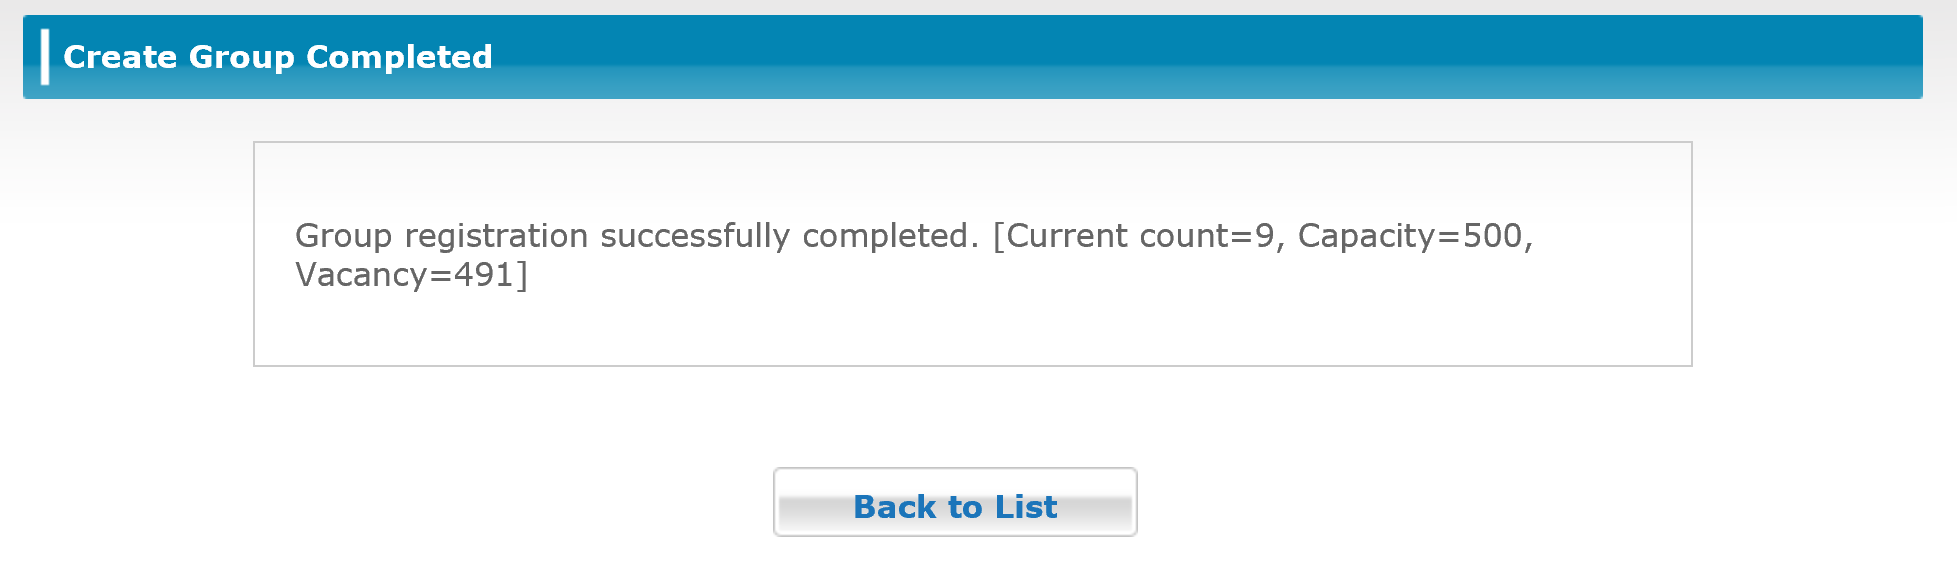
| ① | [Back to List] Button | Return to the [Group List] screen. |
*You can add up to 500 groups.
3.11 Viewing Group Information
You can click any group name in the Group List to view detailed information about that group.
| ① | [Back to List] Button | Return to the [Group List] screen. |
| ② | [Next] Button | It moves to the [Update Group] screen. |
3.11 1. Updating Groups
Click the [Next] button to open the [Update Group] screen.
| ① | [Back] Button | Return to the [Refer Group] screen. |
| ② | [Next] Button | It proceeds to the [Update Group confirmation] screen to update group information. |
3.11 2. Confirming the Updated Group Details
Click the [Next] button to open the [Update Group confirmation] screen.
| ① | [Back] Button | Return to the [Update Group] screen. |
| ② | [Done] Button | Update the group information. |
3.11 3. Completing the Group Update Process
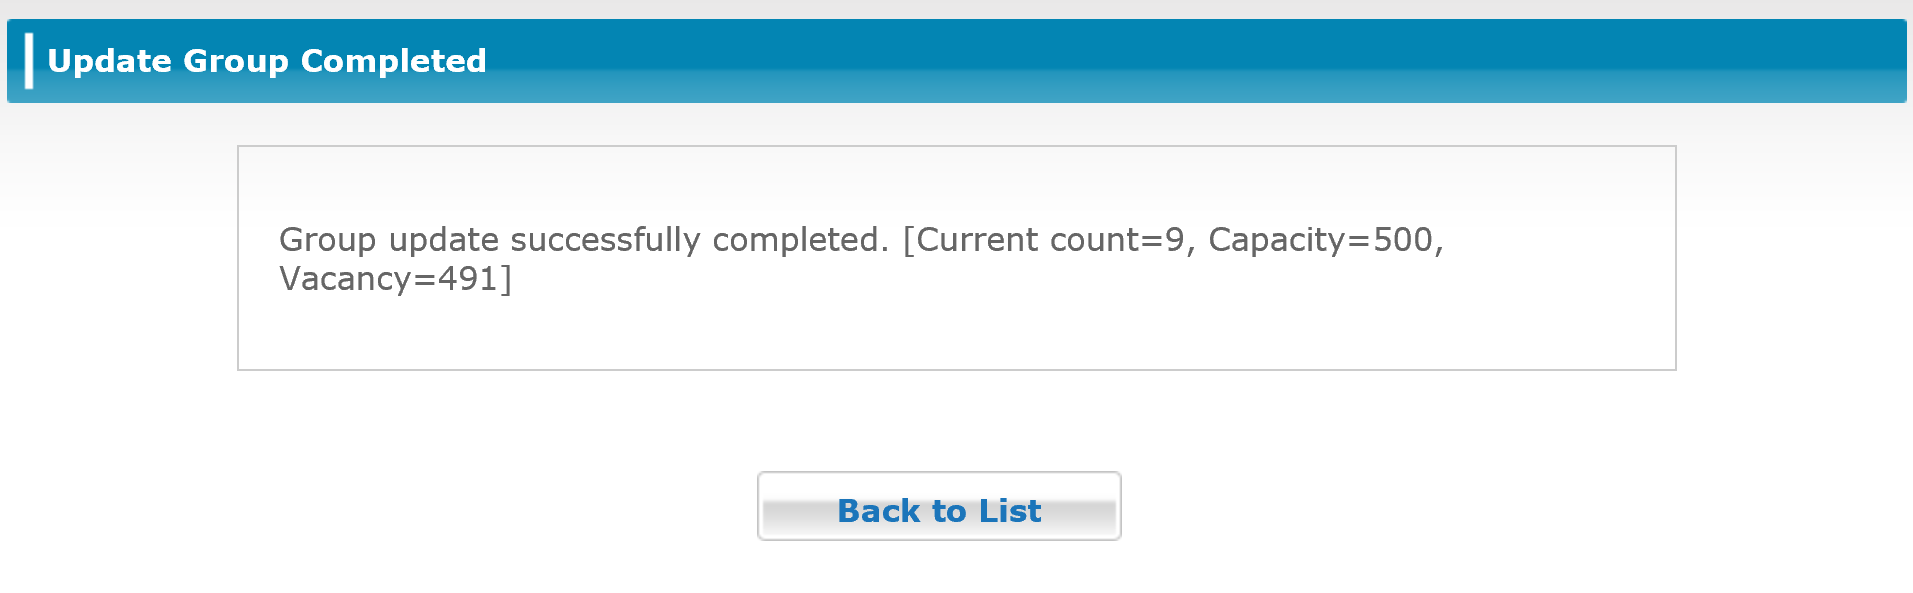
| ① | [Back to List] Button |
Return to the [Group List] screen. |
3.12 Batch Registration of Group
Click the [Batch Registration] button on the [Group List] screen to open the [Group Batch Registration] screen. You can add and edit a batch of groups by entering the data in a CSV- format file.
* You can add up to 500 groups.
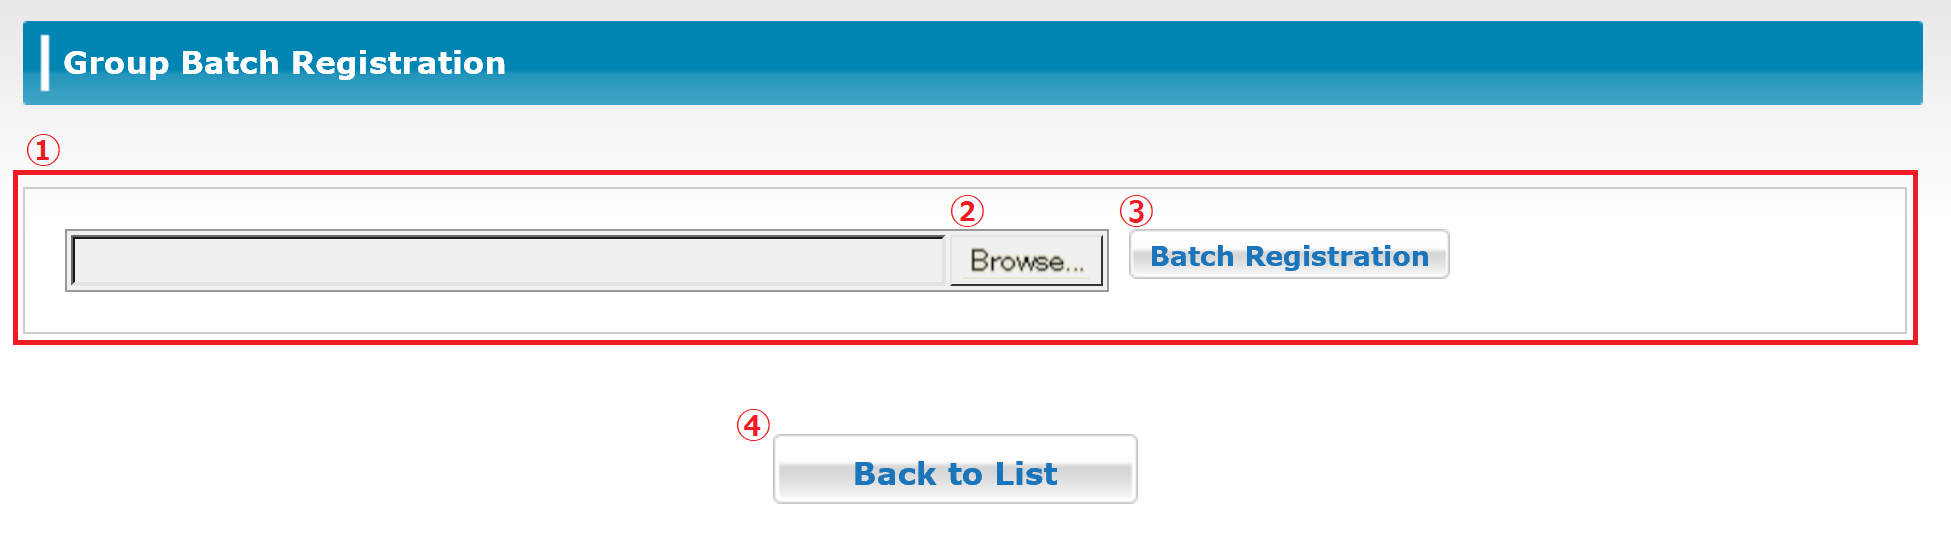
| ① | File Browse Area | It allows you to upload a CSV file to perform group batch registration. |
| ② | [Browse] Button | It allows you to browse for the file to upload. |
| ③ | [Batch Registration] Button | Data is loaded from the file you selected. |
| ④ | [Back to List] Button | Return to the [Group List] screen. |

Select the CSV file you want to add and then click the [Open] button.
A message indicating the completion of registration is displayed after you click the [Batch Registration] button.
* If there is an error in the content of the CSV file, the line where the error was detected and any available error message will be displayed in the web browser. If any errors are detected at all, none of the contents of that CSV file are processed for group batch registration.
3.12.1 Format of the Uploaded CSV File
For details about the format of the CSV file used to perform group batch registration, refer to the Group CSV Batch Registration File Format downloadable from 3.18 Support.
<Uploadable CSV File Format>
The CSV file is output with comma-delimited items without a header. Each item can be enclosed in double quotation marks (") if you need to include commas or other symbols. When specifying group names, specify them starting from the top level of the group hierarchy down, separating each level with a forward slash (/). This is required for both existing and new group name specifications.
Example: /Company/Sales Department/Sales Section 1 (the full path to the group, starting from the top level of the group hierarchy down to the target group name) If the group name you want to specify contains a forward slash (/) in its name, insert a backslash (\) as an escape character before the forward slash so that it will be interpreted as part of the group name. Double-byte characters do not need to be escaped.
| ① | Command (Required) |
Specify the type of operation to perform in single-byte alphanumeric characters. m: Move, r: Rename, d: Delete, n: Create New |
| ② | Old Group Path (Required) *1 |
Specify the full path to the existing group for the operation. Example: If the "Group 1" exists under the "Sales Control" in the "Company" /Company/Sales Control/Group 1 |
| ③ | New Group Path (Required) *2 |
Specify the full path to the new group for the operation. Example: If "Group 2" exists under the "Sales Control" in the "Company". /Company/Sales Control/Group 2 |
| ④ | Group Folder Name | Since it is not used, please set it as empty. |
*1: Required for m: Move, r: Rename, and d: Delete operations.
*2: Required for m: Move, r: Rename, and n: Create New operations.
<Batch Processing Conditions>
- The contents of the CSV file are processed one line at a time, starting from the top of the file downward. As discussed later, the CSV file must include the description about the parent/child relationships between groups.
- When creating a new group, a parent group must already have been created for it. If you want to create the parent and child groups at the same time, you must make sure to create the parent group first before attempting to create the child group.
- To delete a group, that group must not have any children. To delete a group and all its children, you must specify to delete the child groups first.
- CSV files are processed starting from the first line in the file. Be careful not to include any statements later in the file that conflict with previous processing. For example, suppose you move a group called A to be the child of another group. If you were to then attempt to create a new group as a child of group A later on in the CSV file, the full path to group A would already have been changed from the previous move command and an error would occur. This can also occur when changing group names.
3.13 Managing Genres
Click [Genre] on the menu to open the [Genre List] screen. From here you can add and edit genre names that were set during content creation. Genres can be nested up to 5 levels deep. You can even place content in the middle of hierarchy levels.
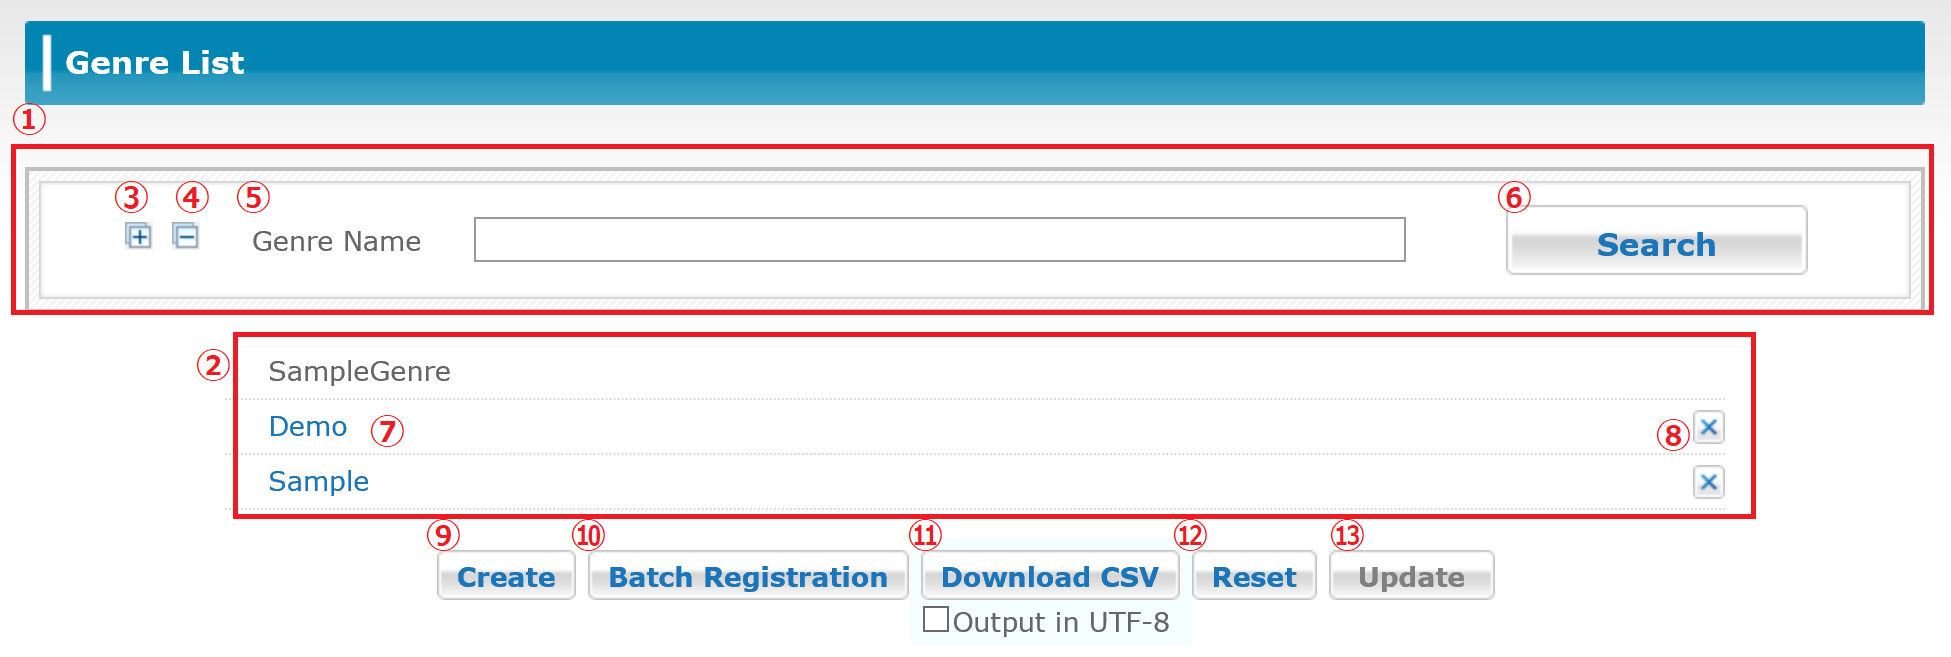
| ① | Genre Search Area | It allows you to search for a specific genre or genres based on a set of search conditions. |
| ② | Genre List Area | It displays the list of all registered genres or the list of genres that meet the specified search conditions. |
| ③ | Show All Genres | Click the Expand All [+] button in the Search Area to view all genres. (Maximum 5 levels) |
| ④ | Hide All Genres | Click the Collapse [-] button in the Search Area to collapse the genre list display. This will close all but the top level of the hierarchy view. |
| ⑤ | Genre Name Search | Enter the name of the genre to search for. |
| ⑥ | [Search] Button | Search for the entered genre name. |
| ⑦ | Genre Display Name | It moves to the [Refer Genre] screen. |
| ⑧ | [Delete] Button | Click the [X] icon next to the genre(s) you want to delete, then click [Update] to delete the selected genre(s). |
| ⑨ | [Create] Button | It moves to the [Register Genre] screen. |
| ⑩ | [Batch Registration] Button | It moves to the [Genre Batch Registration] screen. |
| ⑪ | [Download CSV] Button | Download the list of all registered genres in CSV format. |
| ⑫ | [Reset] Button | It resets any changes made. |
| ⑬ | [Update] Button | Apply the changes made. |
Hint
・The order of the genres is [UTF-8, A-Z], specifically, number → English → Japanese. The application also follows this. If you would like to organize contents as your intention, put numbers at the beginning of the genre names.
3.14 Creating Genres
Click the [Create] button on the [Genre List] screen to open the [Register Genre] screen.
*You can create up to 500 genres. The maxium number of genres level that can be registered is 5.
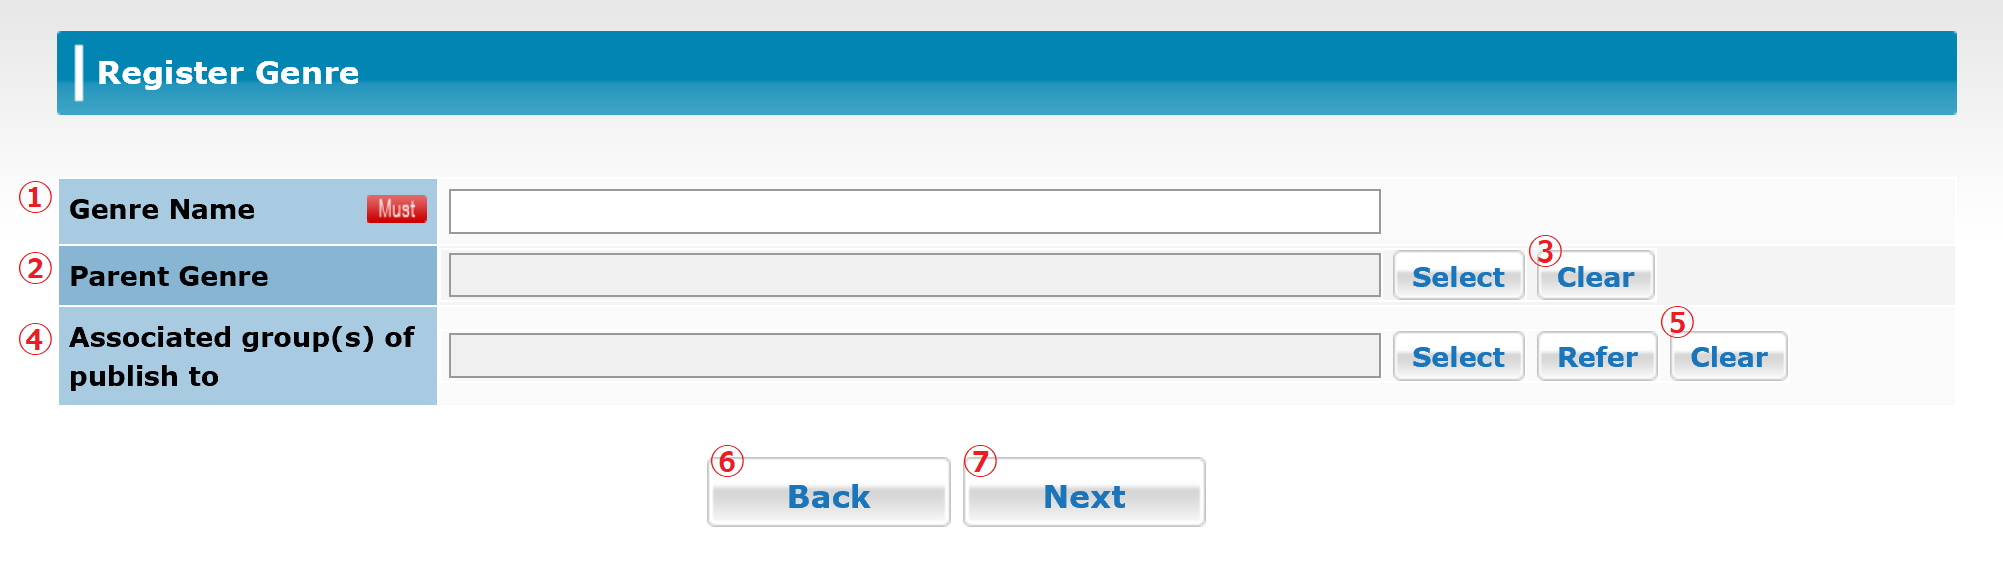
| ① | Genre Name (Required) | Enter the name of the genre to create. Enter up to 30 double-byte or single-byte alphanumeric characters. |
| ② | Parent Genre | Specify the parent genre to which you want to assign the new genre. Click the [Select] button and the [Select Parent Genre] screen will pop up. The genre you selected will be displayed. |
| ③ | [Clear] Button (Parent Genre) | Clear the selected parent genre. |
| ④ | Associated group(s) of publish to *1 | Specify the default Linked Release Groups for the new genre. Click the [Select] button and the [Select Parent Group] screen will pop up. The group you selected will be displayed. |
| ⑤ | [Clear] Button (Associated group(s) of publish to) | The selected associated group(s) of publish to is cleared. |
| ⑥ | [Back] Button | Return to the [Genre List] screen. Any information that was entered will be canceled. |
| ⑦ | [Next] Button | It moves to the [Register Genre Confirmation] screen. |
*1 In the case of setting the associated group(s) of publish to, the associated group(s) of publish to which are set to the groups of publish to is automatically registered when the corresponded genre is selected on the content registration screen.
3.14.1 Selecting a Parent Genre
Specify the parent genre to which you want to assign the new genre.
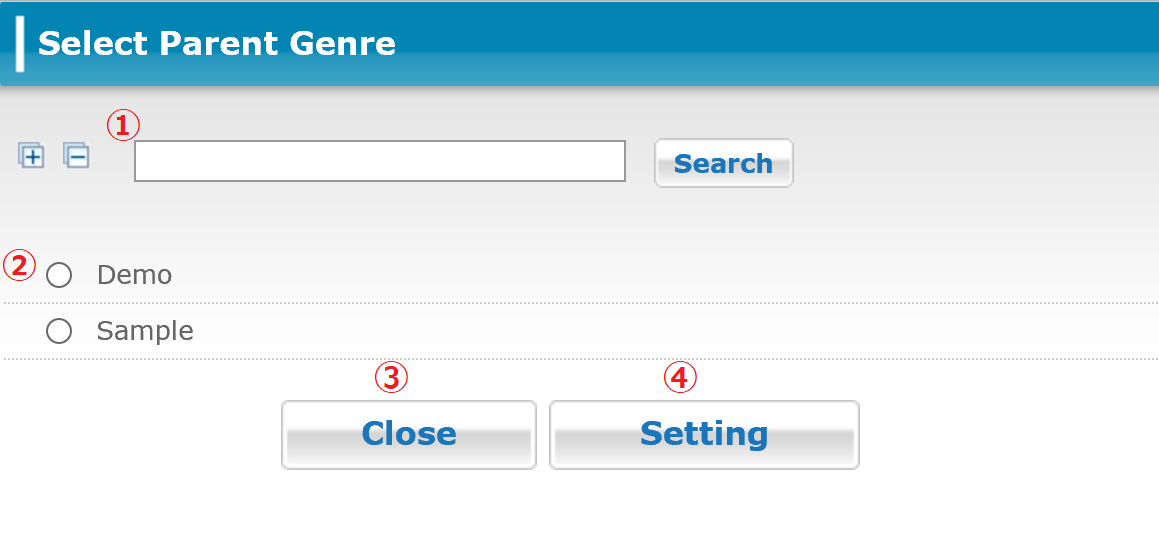
| ① | Search Area | It allows you to search for a parent genre. |
| ② | Group Name | Click the radio button beside a parent genre to select it. |
| ③ | [Close] Button | It cancels parent genre selection and returns to the [Register Genre] screen. |
| ④ | [Setting] Button | Set the specified parent genre. |
3.14.2 Selecting Associated group(s) of publish to
Specify the default Associated group(s) of publish to for the new genre.
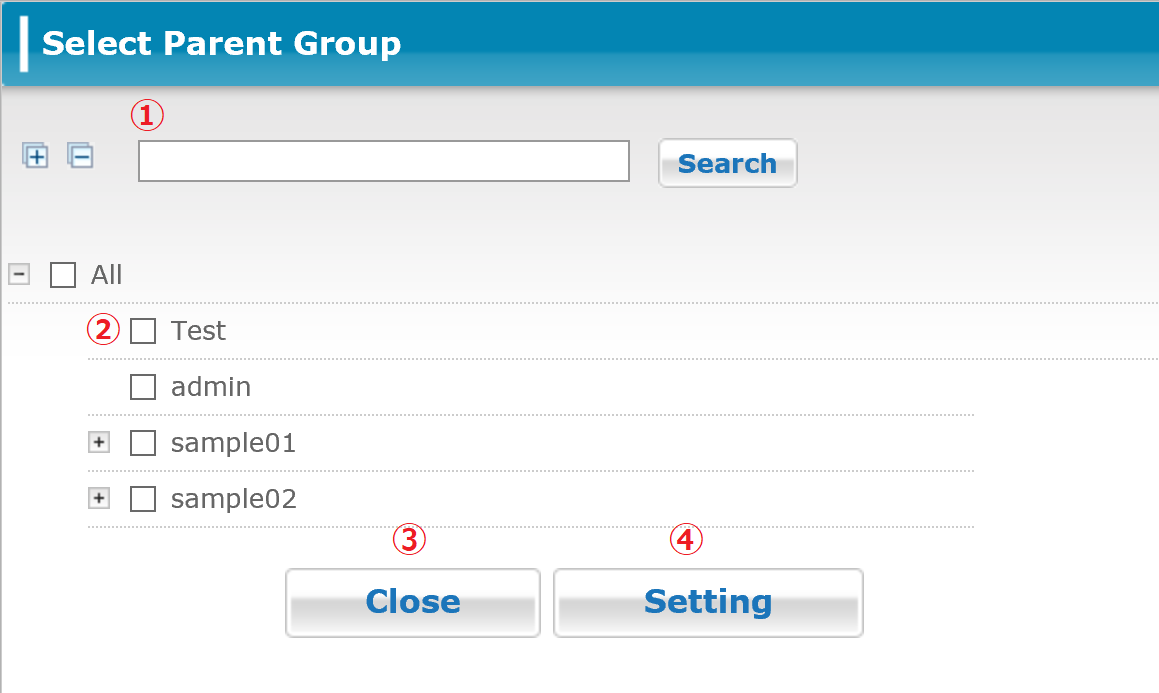
| ① | Search Area | It allows you to search for Linked Release Groups. |
| ② | Group Name | Select the checkbox for the Associated group(s) of publish to you want to assign for the genre. |
| ③ | [Close] Button | It cancels Associated groups(s) of publish to selection and returns to the [Register Genre] screen. |
| ④ | [Setting] Button | Apply the specified Associated groups(s) of publish to settings. |
3.14.3 Confirming the New Genre Details
The [Register Genre Confirmation] screen is displayed. Here you can review the information you entered on the [Register Genre] screen.
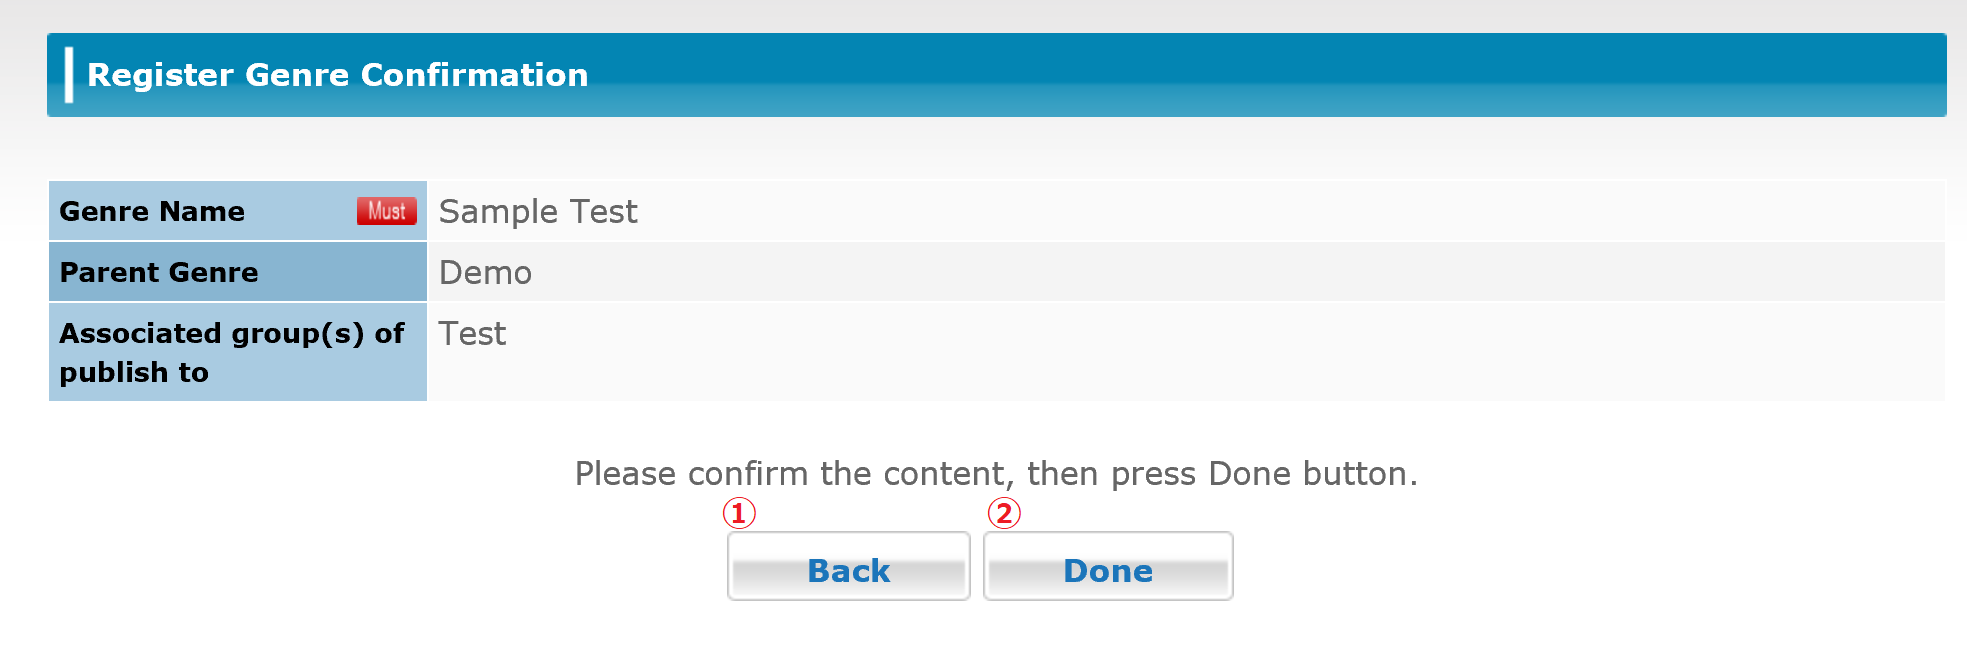
| ① | [Back] Button | Return to the Register Genre] screen. |
| ② | [Done] Button | It creates and adds the genre information you entered. |
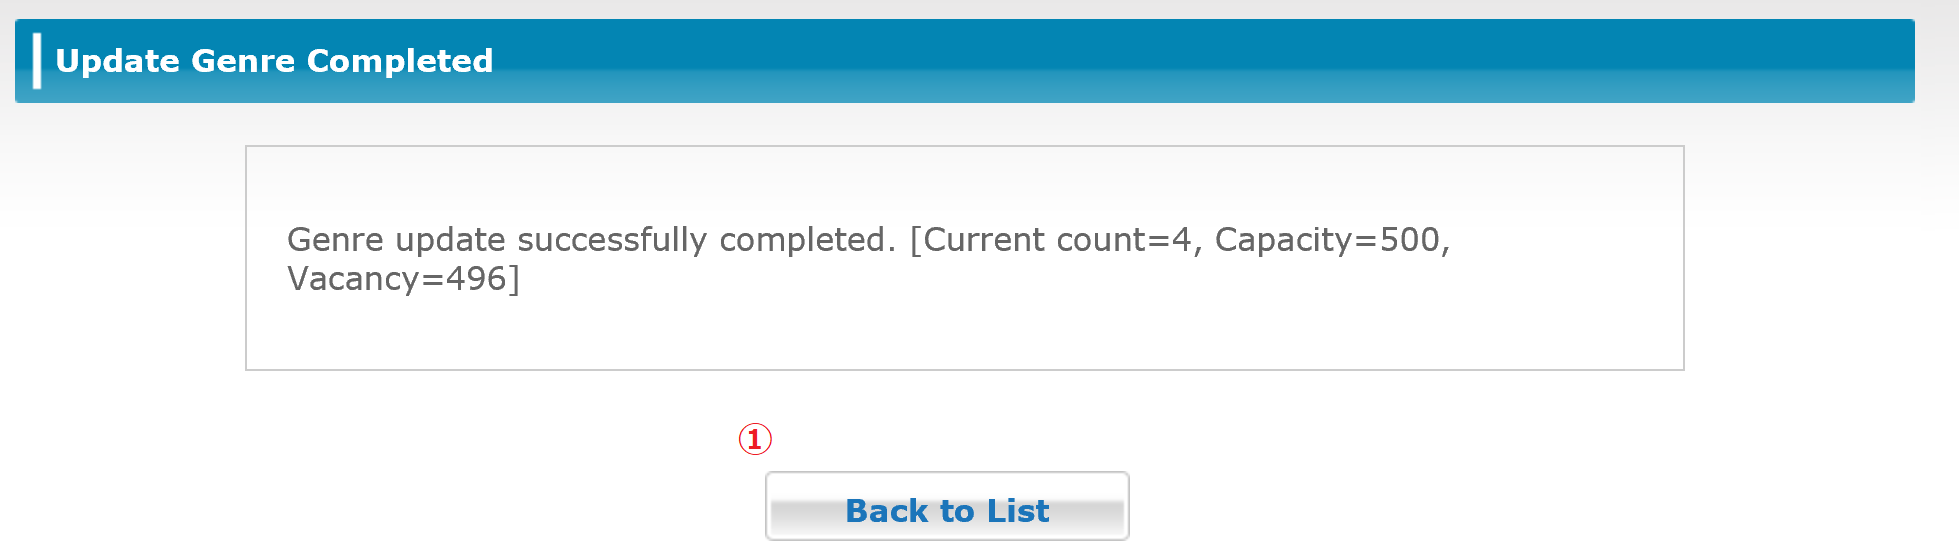
3.14.4 Completing Genre Creation
When you click the [Done] button on the confirmation screen, a final screen is displayed showing that group creation is complete.
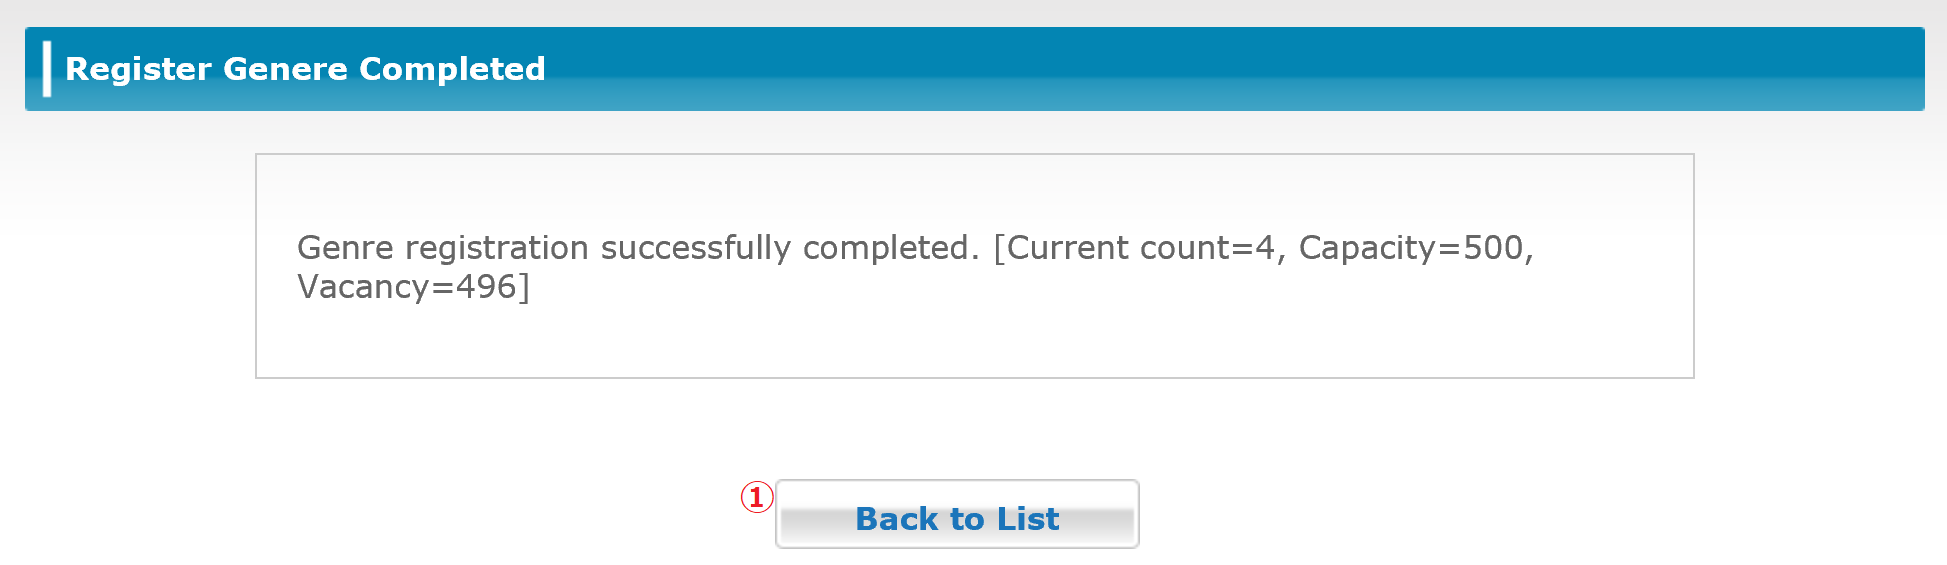
| ① | [Back to List] Button | Return to the [Genre List] screen. |
*You can create up to 500 genres
3.15 Viewing Genre Information
You can click any genre name in the [Genre List] to view detailed information about that genre.
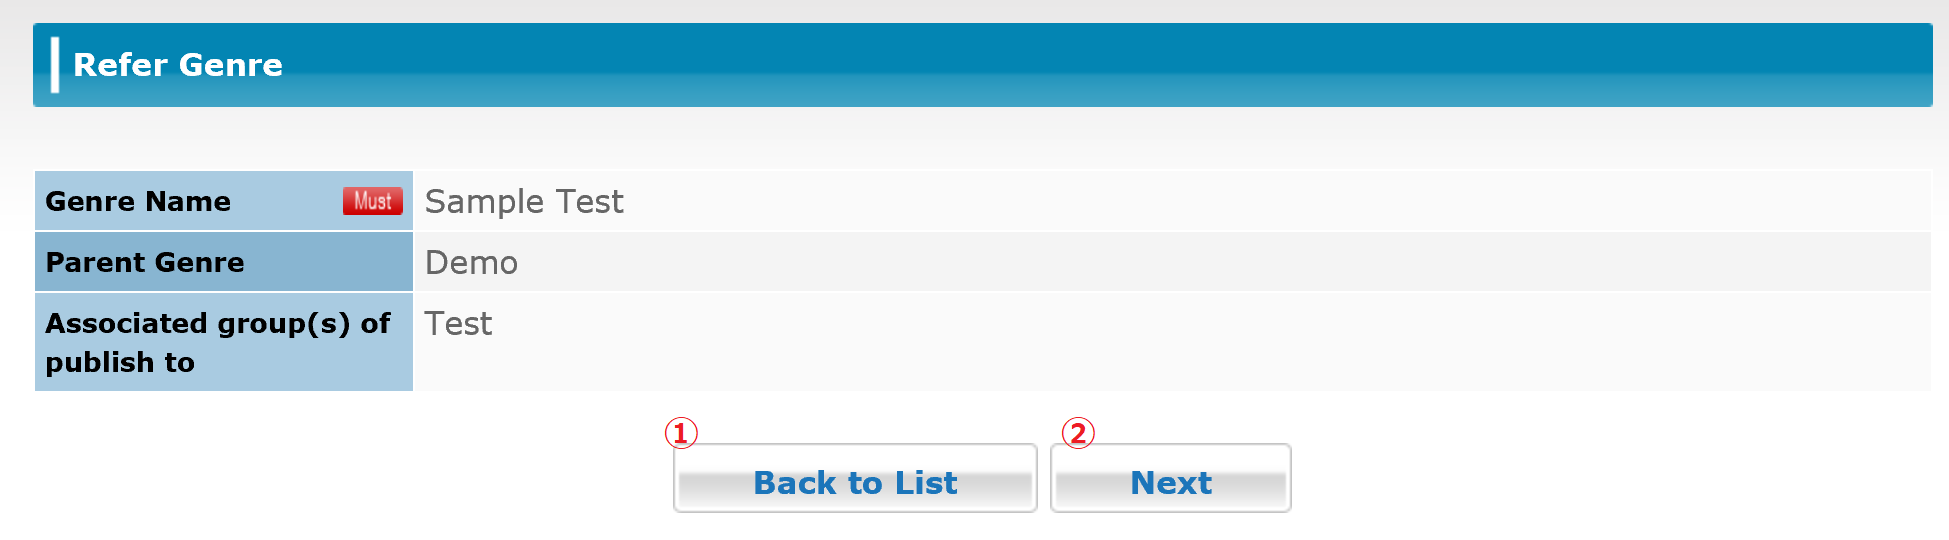
| ① | [Back to List] Button | It proceeds to the [Update Genre] screen to update genre information. |
| ② | [Next] Button | Return to the [Genre List] screen. |
3.15.1 Updating Genre Information
Click the [Next] button to open the [Update Genre] screen.
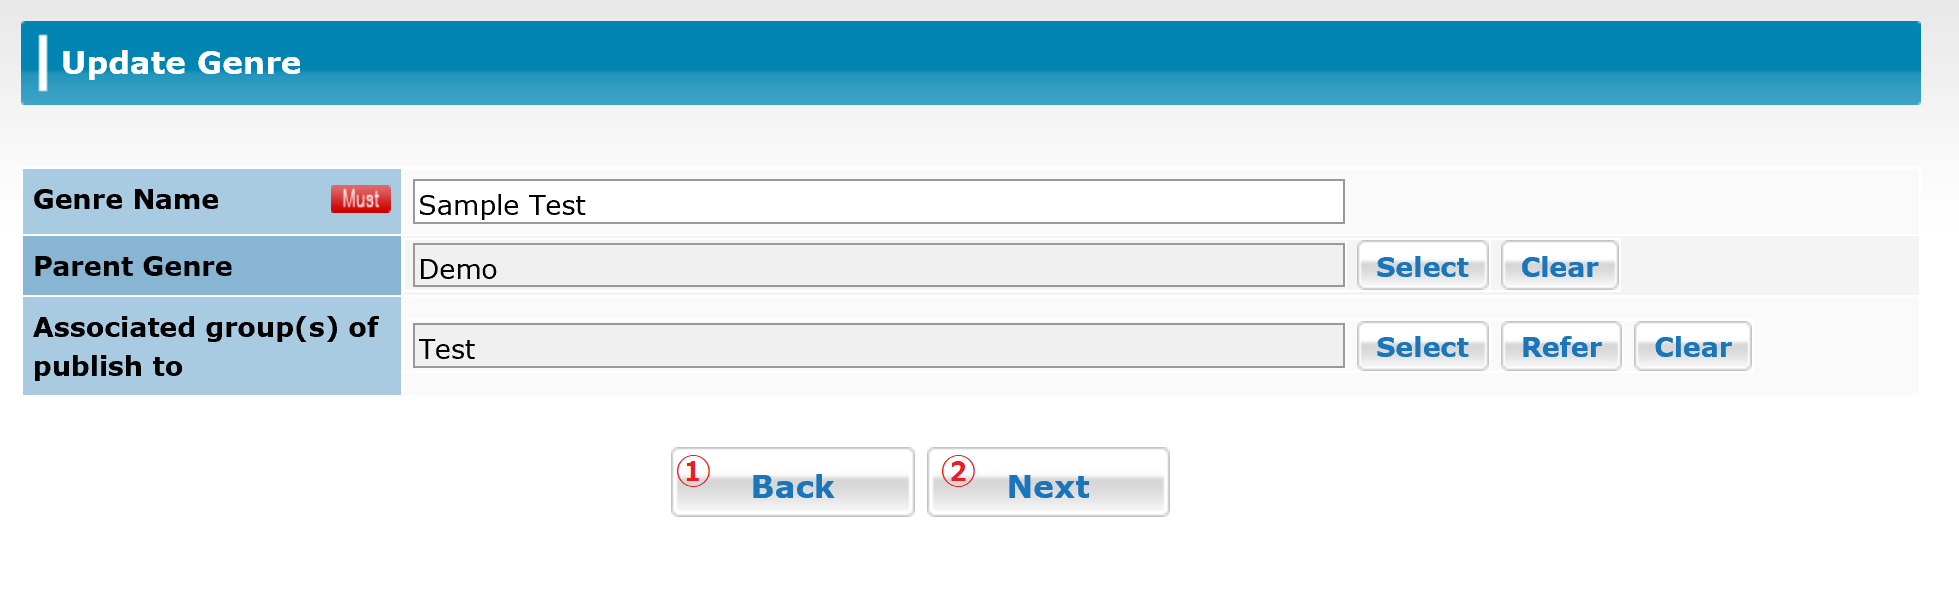
| ① | [Back] Button | Return to the [Refer Genre] screen. |
| ② | [Next] Button | Apply the updated genre information you entered. |
*Parent genres can be selected in the same way as on the [Register Genre] screen.
3.15.2 Confirming the Updated Genre Details
Click the [Next] button to open the [Update Genre Confirmation] screen.
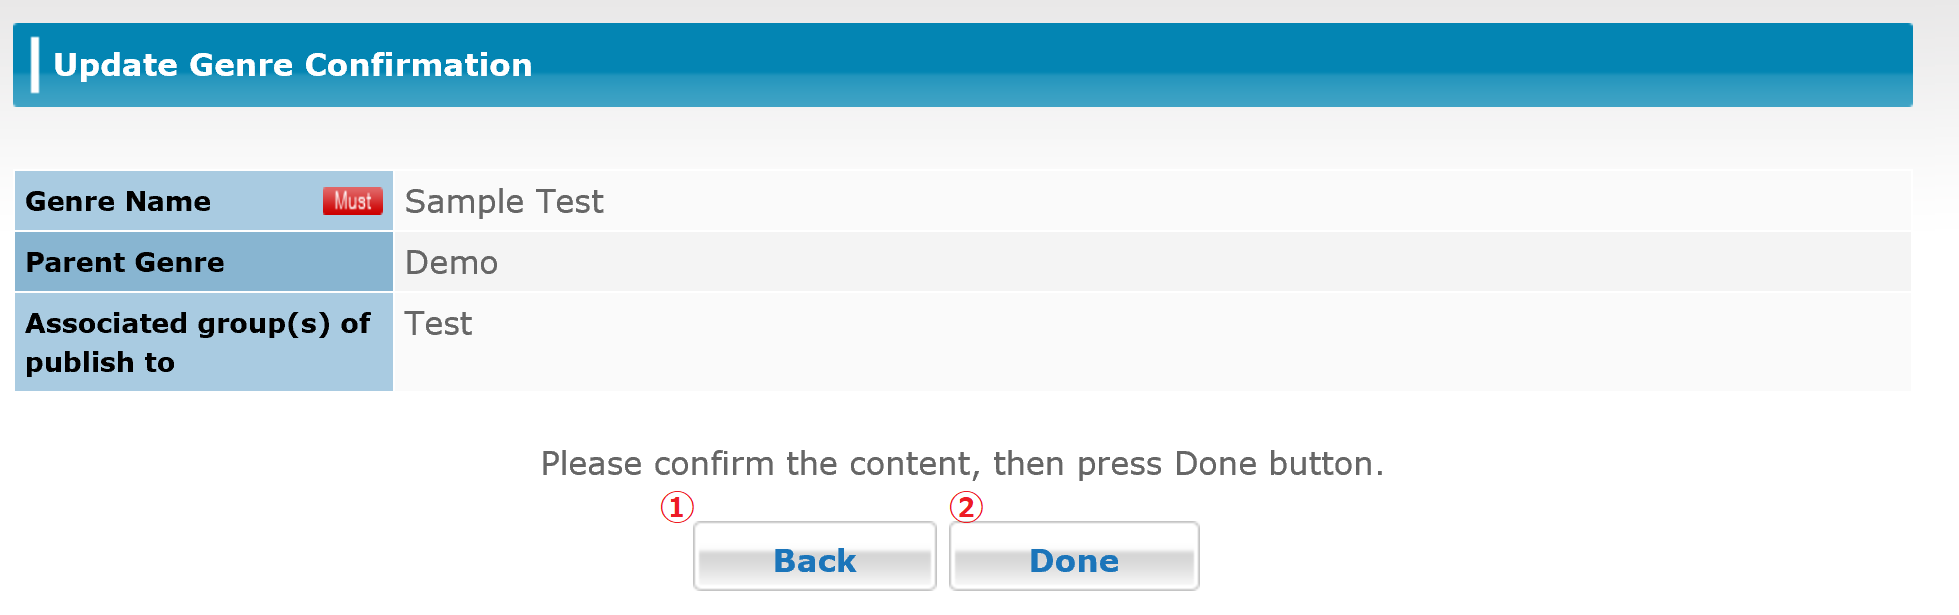
| ① | [Back] Button | Return to the [Update Group] screen. |
| ② | [Done] Button | Update the group information. |
3.15.3 Completing the Genre Update Process
When you click the [Done] button on the confirmation screen, a final screen is displayed showing that genre creation is complete.
| ① | [Back to List] Button | Return to the [Genre List] screen. |
3.16 Batch Registration of Genre
Click the [Batch Registration] button on Genre List to open the Genre Batch Registration screen. You can add and edit a batch of genres by entering the data in a CSV- format file.
* You can add up to 500 genres.

| ① | [Browse Files] Button | It allows you to browse for the file to upload. |
| ② | [Batch Registration] Button | Data is loaded from the file you selected. |
| ③ | [Back to List] | Return to the [Genre List] screen. |
*If there is an error in the content of the CSV file, the line where the error was detected and any available error message will be displayed in the web browser. If any errors are detected at all, none of the contents of that CSV file are processed for genre batch registration.
3.16.1 Format of the Uploaded CSV File
About CSV file format for genre batch registration, please refer to "3.18 Support" and download the format "CSV for batch registration" on the content management system.
<Uploadable CSV File Format>
The CSV file is output with comma-delimited items without a header.
Each item can be enclosed in double quotation marks ("") if you need to include commas or other symbols.
When specifying genre names, specify them starting from the top level of the genre hierarchy down, separating each level with a forward slash (/).
This is required for both existing and new genre name specifications.
Example: /Brochure/For Sales Guide/Deliverable (the full path to the genre, starting from the top level of the genre hierarchy down to the target genre name)
If the genre name you want to specify contains a forward slash (/) in its name, insert a backslash () as an escape character before the forward slash so that it will be interpreted as part of the genre name. Double-byte characters do not need to be escaped.
| ① | Command (Required) |
Specify the type of operation to perform in single-byte alphanumeric characters. m: Move, r: Rename, d: Delete, n: Create New |
| ② | Old Genre Path (Required) *1 |
Specify the full path to the existing genre for the operation. Example: If the "Deliverable" exists under the "For Sales Guide" in the "Brochure" /Brochure/For Sales Guide/Deliverable |
| ③ | New Genre Path (Required) *2 |
Specify the full path to the new genre for the operation. Example: If the "Undeliverable" exists under the "For Sales Guide" in the "Brochure" /Brochure/For Sales Guide/Undeliverable |
| ④ | Linked Release Groups | Specify the full path to the group which registered the genre to release automatically. Moreover, you cannot batch update only linked release groups. You can change linked release groups when you move or rename the contents. |
*1: Required for m: Move, r: Rename, and d: Delete operations.
*2: Required for m: Move, r: Rename, and n: Create New operations.
<Batch Processing Conditions>
- The contents of the CSV file are processed one line at a time, starting from the top of the file downward. As discussed later, the CSV file must include the description about the parent/child relationships between genres.
- The contents of the CSV file are processed one line at a time, starting from the top of the file downward. As discussed later, the CSV file must include the description about the parent/child relationships between genres.
- When creating a new genre, a parent genre must already have been created for it. If you want to create the parent and child genres at the same time, you must make sure to create the parent genre first before attempting to create the child genre.
- To delete a genre, that genre must not have any children. To delete a genre and all its children, you must specify to delete the child genres first.
- CSV files are processed starting from the first line in the file. Be careful not to include any statements later in the file that conflict with previous processing. For example, suppose you move a genre called A to be the child of another genre. If you were to then attempt to create a new genre as a child of genre A later on in the CSV file, the full path to genre A would already have been changed from the previous move command and an error would occur. This can also occur when changing genre names."
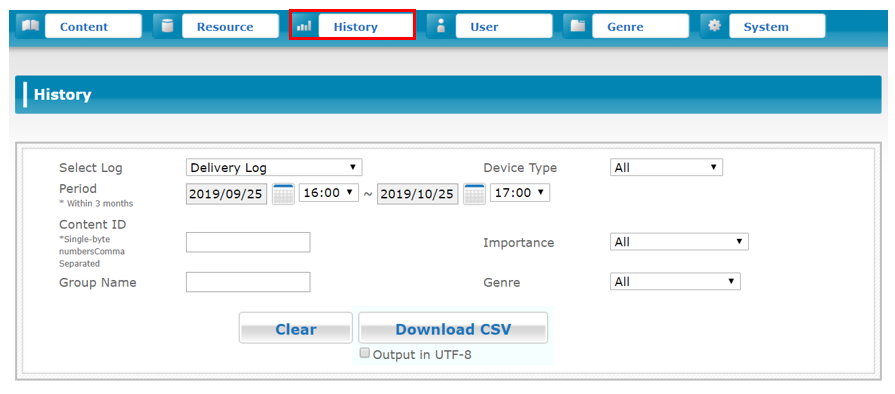
3.17 History
After clicking "History" on the menu, the history screen will be displayed. The various logs such as Delivery log (Download) or View log can be output.
3.17.1 Log Acquisition Rights
Refer to User Rights in This System in 「2.2 User Access Rights」 about the rights required to obtain delivery and view logs.
System administrator, Group administrator or Editor users can obtain logs related to content for the group(s) in which they have editing rights.
*Questionnaire, Content Statistics, Content Review is Option Functions. Only customers with your contract will be displayed.
3.17.2 Selection of Logs( Required )
You can select from the following 8 types of logs:
• Delivery Logs
-Log information downloaded for each piece of content
• View Logs
-Content viewing information for individual users
• Push Messages
-Push message log information
• Storage Usage
-Used storage
• Activate User Count
-Number of activated users
• Content Download Total
-Daily number of content downloading and information
• Operation Logs
-The logs of operation history on CMS and login history on the application are displayed.
• Questionnaire
-Displays the results of questionnaires answered on and sent from devices
• Content Statistics
-Displays the statistics of the content evaluated by each user from devices
• Content Review
-Displays the List of the content evaluated by each user from devices
3.17.3 Period( Required )
Enter the period to output log information for. Set a time period of 3 months or less.
If you need logs for a period longer than 3 months, divide the log output into multiple parts.
Moreover, the logs kept on server side are the logs taken since a year ago. Logs more than a year ago cannot be extracted.
3.17.4 Content ID
Specify the content ID to output logs for.
If a content ID is specified here, only logs for the specified content ID are output.
*You can specify a content ID only if you selected [Delivery Log], [View Log], or [Push Message] as the log type.
*You can specify multiple content IDs by separating them with a comma.
3.17.5 Group Name
Specify the group name to output logs for.
If a group name is specified here, only logs for the specified group name are output.
3.17.6 Device Type
Select to output logs for all device types or iPad, iPhone, Android, WebViewer, or Android Phone. Only logs of the selected type will be output. *This option can be selected only when [Delivery Log], [View Log], or [Total Content DL] was selected for the log type. Select the device type.
3.17.7 Importance
Specify content importance to output logs for. If you specify the importance here, then only the contents with the specified importance will be output.
* This is available only for "Delivery Log" and "View Log".
3.17.8 Genre
Specify the genre to output logs for.
If a genre is specified here, only logs for the specified genre are output.
* This option can be selected only when [Content Download Total] was selected for the log type.
3.17.9 Display Item
Select the item to display on the graph. You can choose between [Download bytes] or [Number of Download].
* This item can only be selected if [Content Download Total] was selected as the log type.
3.17.10 Questionnaire( Required )
Select the questionnaire resource to output logs for
* This option can be selected only when [Questionnaire] was selected for the log type.
3.17.11 Object Name
Select the object name of the questionnaire resource for which to output logs.
If an object name is specified here, only logs for the specified object name in the questionnaire resource specified in 「3.17.10 Questionnaire(Required)」 are output.
* This option can be selected only when [Questionnaire] was selected for the log type.
3.17.12 Clear
Click the [Clear] button to reset the information you entered.
3.17.13 Download CSV
Click the [Download CSV] button to download the logs that match the input conditions in CSV format.
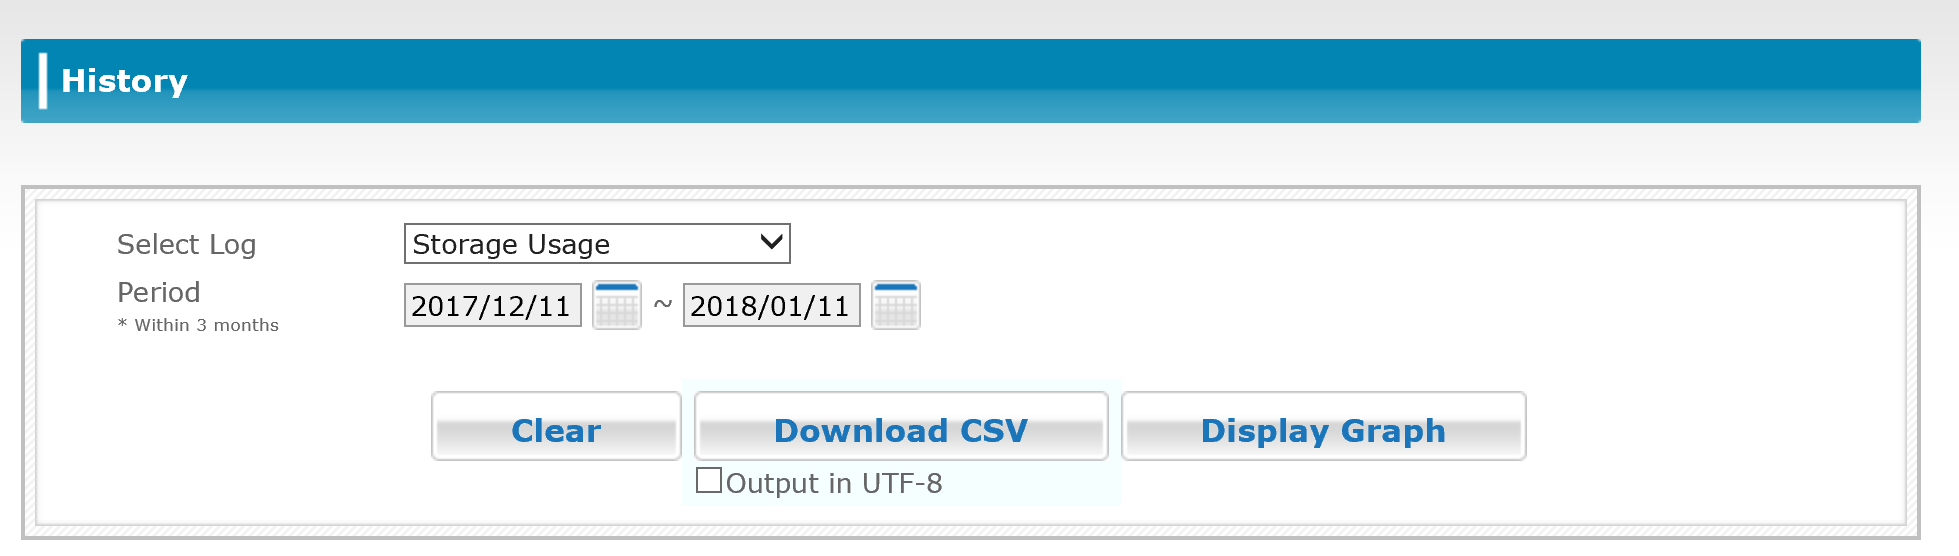
3.17.14 Display Graph
Click the [Display Graph] button to show a graph of the selected input conditions.
You can view details of the graph by hovering your mouse over it.
* The graph is displayed only when [Storage Usage], [Active User Count], or [Content Download Total] is selected as the log type.
Hint
If graphs are not displayed, check if Flash is enabled in your browser.
3.17.15 Format of the Downloaded CSV File
3.17.15.1 Delivery Log Format
| Line Number | Column | Name | Details |
|---|---|---|---|
| 1 | Download start time | Download start time | |
| 2 | ContentID | Content ID | No. |
| 3 | ContentName | Content Name | Content Nam |
| 4 | GenreName | Genre Name | Genre Name |
| 5 | UserID | UserID | UserID |
| 6 | UserName | User Name | User Name |
| 7 | GroupName | Group Name | Group Name |
| 8 | success/fail(1/0) | Download Success/Fail | Result: 1=Success, 0=Failed * 0 (Failed) is recorded for a downloading content or a pauseed content. After completing the download, the status will be changed to 1 (Success). |
| 9 | Device | Device Type | Device type(iPad=1、iPhone=2、Android=3、Windows=5、AndroidPhone=6) |
3.17.15.2 View Log Format
| Line Number | Column | Name | Details |
|---|---|---|---|
| 1 | OpenedTime | Content Opened Time | The time at which the content was opened for viewing. |
| 2 | ClosedTime | Content Closed Time | The time at which the content was closed after viewing. |
| 3 | UsedTime | Content Viewed Time | The amount of time the content was viewed, in seconds. |
| 4 | ContentID | Content ID | No. |
| 5 | ContentName | Content Name | Content Name |
| 6 | GenreName | Genre Name | Genre Name |
| 7 | UserID | User ID | User identifier |
| 8 | UserName | User Name | User Name |
| 9 | GroupName | Group Name | Group Name |
| 10 | Device | Device Type | Device type(iPad=1、iPhone=2、Android=3、Windows=5、AndroidPhone=6) |
Memo
- a view log taken when the device was offline will be recorded when gotten back on online and connected to a server.
- [ClosedTime(sec)] is recorded if actions below operated during a content is being viewed.
■ Quitting veiwing a content on purpose and going back to the [content list] page
■ Pressing the home button and running the application in the background, or quitting the application by double-tapping home button.
■ Turning off the phone, or the device is being offline
- If someone views a content by [content share] function, view logs will be shown like below:
UserID: NONE
UserName: 「GUEST」
GroupName: NONE
3.17.15.3 Push Message Log Format
| Line Number | Column | Name | Details |
|---|---|---|---|
| 1 | ContractId | Contractor ID | This ID never changes. |
| 2 | PushID | Push ID | Automatically issued |
| 3 | MessageID | Message ID | Automatically issued |
| 4 | Message | Message | |
| 5 | BadgeNum | Badge Number | Always 0. |
| 6 | ReceiverUserID | Receiver User ID | The login ID of the recipient. |
| 7 | SenderUserID | Sender User ID | The login ID of the sender. |
| 8 | Status | Status | Result:1=Success,2=Failed |
| 9 | InsertDate | Insert Date | The date of insertion |
| 10 | UpdateDate | Update Date | Date of the last update |
3.17.15.4 Storage Usage Log Format
| Line Number | Column | Name | Details |
|---|---|---|---|
| 1 | DateTime | Date Time | YYYY/MM/DD HH24:MI:SS |
| 2 | StorageUsage | Storage Usage | Unit: bytes |
Hint
- StorageUsage is calculated once a day at undifined time and applied the changes to the system. It takes time to be applied the changes of numeric values in CSV file or graphs, so please check the changes next day or later.
- About data included in StorageUsage, please refer to the FAQ.
3.17.15.5 Active User Count Log Format
| Line Number | Column | Name | Details |
|---|---|---|---|
| 1 | Date | Date | YYYY/MM/DD |
| 2 | UserCount | Registered Users | This number includes all users from Admin to viewers. |
| 3 | DeviceIdCount | Registered MAC Addresses | |
| 4 | DeviceTokenCount | Registered Device Tokens | |
| 5 | ActivatedUserCount | Activated Users | The total number of activated users out of all registered users. |
| 6 | ActivatedDeviceCount | Active Devices | The total number of active devices for all registered users. |
| 7 | ContentOpenUserCount | Maximum Number of View Users | The total number of users that have opened the content. |
| 8 | ActiveUserCount | Active Users | The total number of users that logged in, downloaded, or viewed the content on that day. |
3.17.15.6 Content Download Total Log Format
| Line Number | Column | Name | Details |
|---|---|---|---|
| 1 | Date | Date Time | YYYY/MM/DD |
| 2 | ContentDownloadByte | Content Download Bytes | |
| 3 | ContentDownloadCount | Content Download Count | |
| 4 | Device | Device Type | Device Type(iPad=1、iPhone=2、Android=3、Windows=5、AndroidPhone=6) |
3.17.15.7 Operation Log Format
| Line Number | Column | Name | Details |
|---|---|---|---|
| 1 | Date | Date Time | YYYY/MM/DD HH24:MI:SS |
| 2 | Command Type | Command Type | A string such as "Update Content". *1 |
| 3 | UserID | User ID | Login ID |
| 4 | UserName | User Name | User Name |
| 5 | GroupName | Group Name | The group name (for SFTP only) |
| 6 | ResourceID | Resource ID | |
| 7 | ContentID | Content ID | |
| 8 | Line Type | Line Type | |
| 9 | IP Address | IP Address | |
| 10 | UserAgent | UserAgent | |
| 11 | SessionID | Session ID |
*1:Depending on the operation type, information about the results of the command may also be included with the command type information.
3.17.15.8 Questionnaire Log Format
| Line Number | Name | Details |
|---|---|---|
| 1 | Answered Date Time | YYYY/MM/DD HH24:MI:SS |
| 2 | Login ID | |
| 3 | Answer Result | Variable |
3.17.15.9 Content Statistics Format
| Line Number | Column | Name | Details |
|---|---|---|---|
| 1 | ContentID | Content ID | |
| 2 | ContentName | Content Name | |
| 3 | AveragePoint | Average Point | |
| 4 | DLCount | DLCount | |
| 5 | ViewCount | ViewCount | |
| 6 | ReviewCount | ReviewCount | |
| 7 | StartDateOfStatistics | StartDateOfStatistics | YYYY/MM/DD |
| 8 | EndDateOfStatistics | EndDateOfStatistics | YYYY/MM/DD |
3.17.15.10 Content Review Format
| Line Number | Column | Name | Details |
|---|---|---|---|
| 1 | ContentID | Content ID | |
| 2 | ContentName | Content Name | |
| 3 | UserID | User ID | |
| 4 | UserName | User Name | |
| 5 | Point | Point | |
| 6 | Comment | Comment | |
| 7 | UpdateDate | UpdateDate | YYYY/MM/DD HH24:MI:SS |
3.17.15.11 Command Type
The command type strings you can obtain from the Operation Logs are as follows:
- Login (to CMS)
- Login (to App Download)
- Login (to App)
- Login (to Web App)
- Create Content
- Update Content
- Delete Content
- Update from The Authoring
- Create Resource
- Update Resource
- Delete Resource
- Batch Entry of SFTP Resources
- Automatic Delivery of SFTP Content
* When a failed login occurs, an error code will be included after the "Login failed" message.
The CSV file format for Operation Logs is different depending on the command type. Refer to the following table for details on the CSV file format for each command.
| Command Result | User ID | Group ID | Resource ID | Content ID | Connection Source Info | Session ID | |
|---|---|---|---|---|---|---|---|
| Login (to CMS) | △ | ○ | ○ | ○ | |||
| Login (App Download) | △ | ○ | ○ | ○ | |||
| Login (to App) | △ | ○ | ○ | ○ | |||
| Create Content | ○ | ○ | ○ | ||||
| Update Content | ○ | ○ | ○ | ||||
| Delete Content | ○ | ○ | ○ | ||||
| Update from The Authoring | ○ | ○ | ○ | ||||
| Create Resource | ○ | ○ | ○ | ||||
| Update Resource | ○ | ○ | ○ | ||||
| Delete Resource | ○ | ○ | ○ | ||||
| Batch Entry of SFTP Resources | △ | ○ | ○ | ||||
| Automatic Delivery of SFTP Content | △ | ○ | ○ |
○:Required
△:Sometimes required, depending on the situation
* If the service provider performs operations on the server for a special reason such as troubleshooting issues or other emergency cases, the required items in logs containing operations performed by the service provider will be blank.
3.18 Support
Select [System] or [Support] from the menu to open the [Support] screen, which you can use to find contact information, manuals, and other reference materials.

3.18.1 Viewing Contract Information Confirmation
Select [Contract Information Confirmation] from the menu to open the [Contract Information Confirmation] screen, where you can view your current contract Information
- Contract Name
The contract name of the company is displayed. - Company type
Type of the contract is displayed. During the contract: Service During the trial: Trial - Account Path (Company ID)
It displays the unique string that identifies the company. This is used for the initial login to the application. - E-mail Address of the Responsible Person for the Company
Dislay the e-mail address of a person who is assigned in this contract. It requires the change of contract to change the e-mail address. - Number of Admin / Editor IDs
Upper limit number of ID that is available to register as Content Administrator / System Administrator / Group Administrator / Editor Role is displayed. It requires the change of contract to change the upper limit number. - Number of Viewer ID
Upper limit number of ID that is available to register as mobile viewer role is displayed. It requires the change of contract to change the upper limit number. Mobile viewer use the number of Admin / Editor user. Please refer to ""3.5 Creating Users"" for the details. - Contract Storage Size
Strage capacity of the contract is displayed. Able to use the system in a range of strage capacity. It requires the change of contract to change the strage capacity. It is not displayed during the trial. - Device
Device (OS) available to use with an application is displayed. Login on the corresponding device (OS) is possible in case of Y. Login cannot be done on the corresponding device (OS) in case of N. It requires the change of contract to change the device.
- Service Details
The setting value of each option that is applied in time of the contract is displayed. It requires the change of contract to change the content of the service.
・Enable force password change when first time login
-If you choose the "Reminder", it reminds to change password at first login.(A user can choose not to change password as well.)
For "Forced password change", password change at first login is mandate.
・Enable force password change at stated period
-If you choose the "Reminder", it reminds to change password in 90 days after the last login. (A user can choose not to change password as well.)
For "Forced password change", password change in 90 days after the last login is mandate.
※It applies the server time for counting days.
・Enable application lock after a period
-It locks the application and you will not be able to login after a certaion period of time have past since the last login.
Please refer to "Application lock interval" for the period.
・Enable print option:
-If it shows "Y", printing PDF function is available.
If it shows "N" printing PDF function is not available. If you want to use this function, a change application is required. Please contact to the sales representative.
・Enable mail sending
-If it shows "Y", mail sending function is availabile.
If it shows "N", mail sending function is not available. If you want to use this function, a change application is required. Please contact to the sales representative.
・Questionnaire
-If it shows "Y", questionnaire function is available.
If it shows "N", questionnaire function is not available. If you want to use this function, a change application is required. Please contact to the sales representative.
・Application lock interval
-This interval is applied if "Enable application lock after a period" is enabled.
If it pasts more than the stated days for locking the application, then the system verifies with ID and password which has been stored on the SMART CATALOG application.
<90 days / 30 days / 1 day/ every booting / every booting AND when online> are available for Application lock interval.
・Content Review
-If it shows "Y", content review function is available.
For more detail, please refer to "5.13 Reviewing Content".
If it shows "N", content reviewing function is not available. If you want to use this function, a change application is required. Please contact to the sales representative.
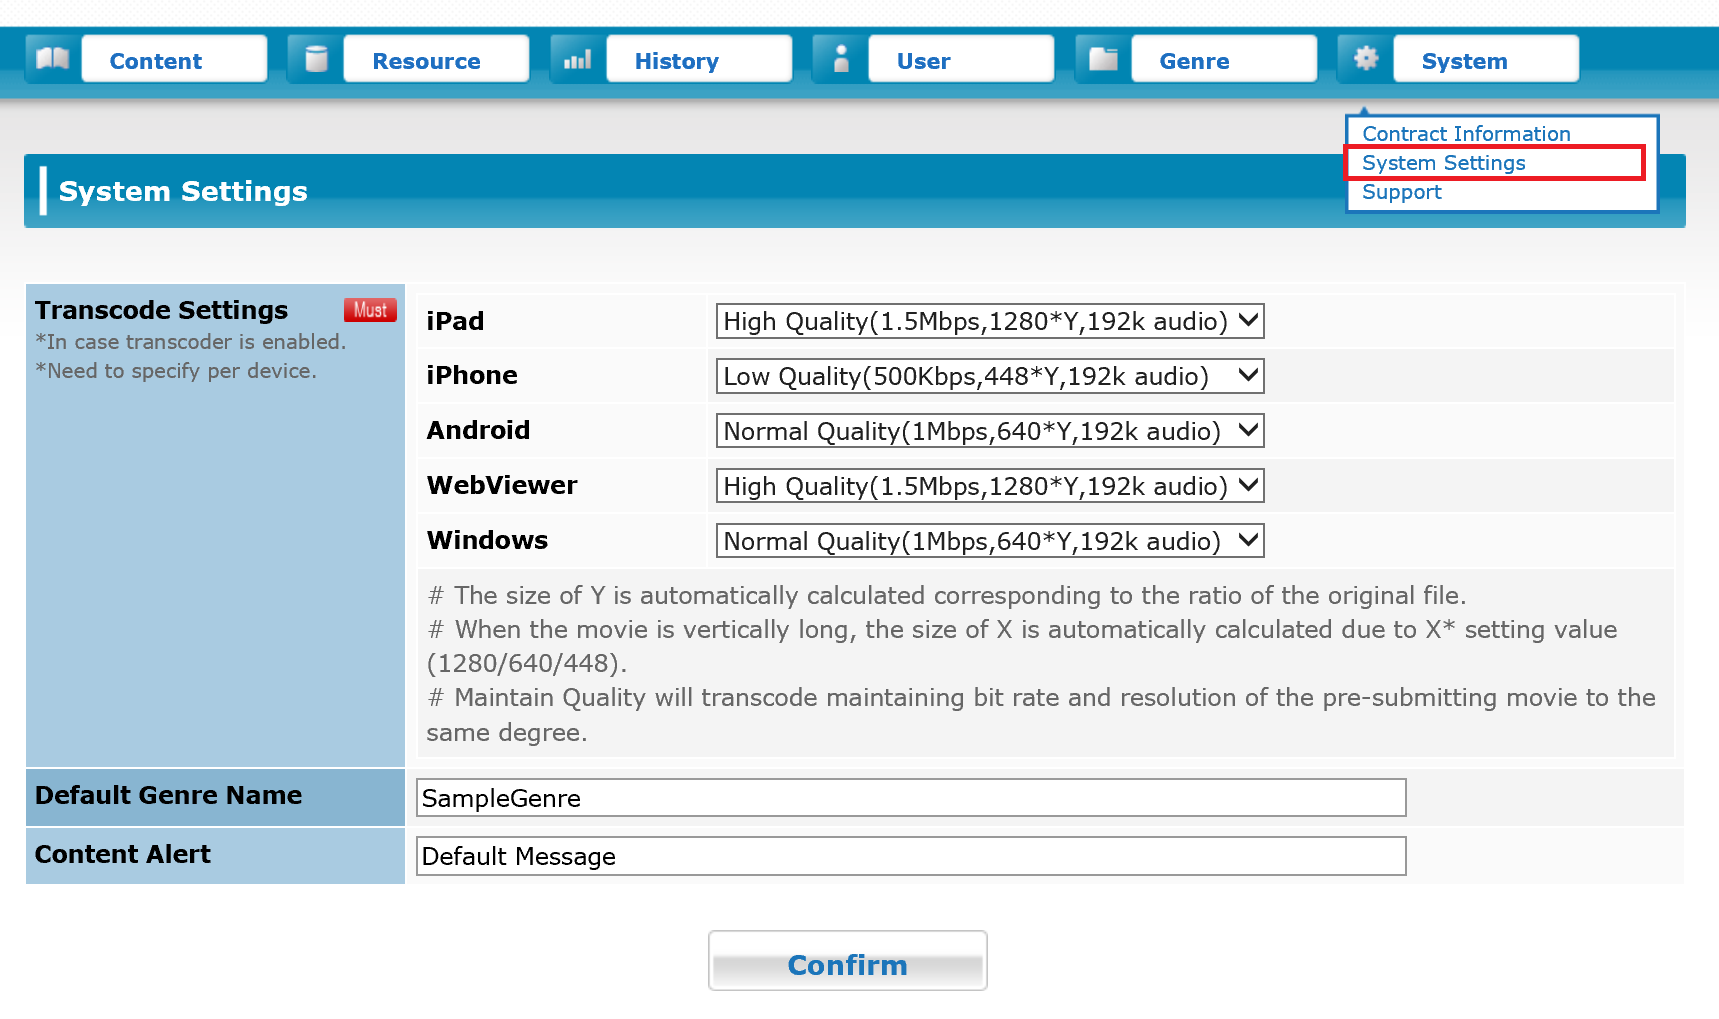
- Transcode Settings
Information of the setting value for the transcode in time of uploading a video file is displayed. Setting for each device (OS) type is available. It can be changed on "System Settings". - Language
Language registered as a main language in the system is displayed. - Time Zone
Information of the registered time zone is displayed. - CMS IP Address
If the connection to the CMS is restricted, an accessible IP address is displayed.
*If the IP address of the connection source is restricted due to your environment settings, you will only be able to access the SFTP from the specified address. In this case, you need to add the required settings to connect. Contact your sales representative or support center for assistance.
3.18.2 System Settings
Select [System Settings] from the menu to open the [System Settings] screen. The items which can be modified are Transcode Settings, Default Genre Name and Content Alert.