Index
- 4.1 Show / Hide the Operation Menu
- 4.2 Turning Page
- 4.3 Switch Multiple Images on a Page
- 4.4 Displaying Preview Images
- 4.5 Viewing Videos
- 4.6 Playing Music
- 4.7 Jump to the Linked Websites
- 4.8 Jump to a Different Content
- 4.9 Rotate a 3D Animation
- 4.10 Jump to an HTML Content
- 4.11 Answering a Questionnaire
- 4.12 Copying Texts
- 4.13 Highlighting Texts
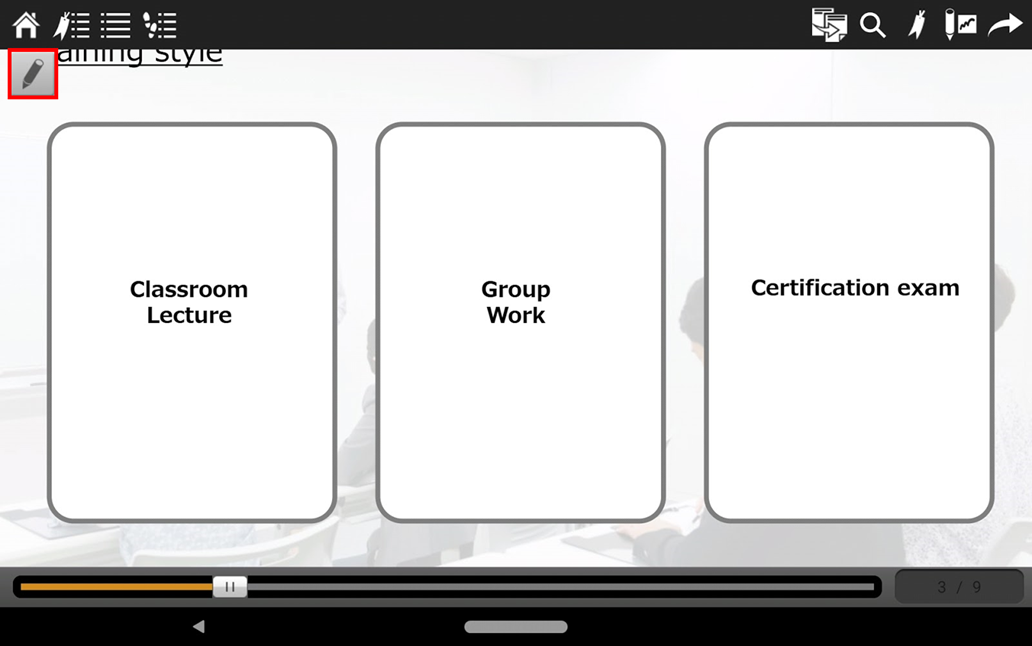
4.1 Show / Hide the Operation Menu
Tap anywhere on the viewer screen to display the operation menu. Available functions are listed as below. Tap on the button to use the function. To hide the menu, make another tap on the screen.
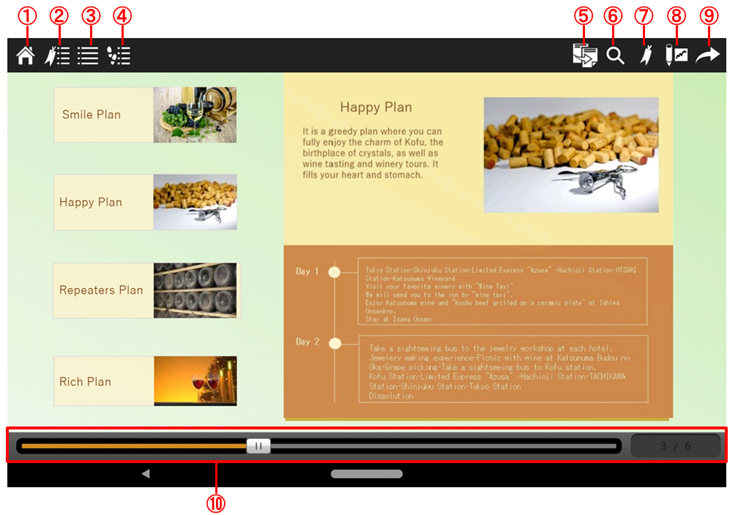
| ① |
 |
Home | Return to the My Library list. |
| ② |
 |
Bookmark List | A list of registered bookmarks is displayed. |
| ③ |
 |
Index | The index of contents is displayed. |
| ④ |  |
History | Up to 50 pages of viewing history is displayed. |
| ⑤ |
 |
Copy Text | Text on the page displayed is also displayed in a pop- up window, and can be copied. |
| ⑥ |
 |
Search | Enter words to search contents. |
| ⑦ |
 |
Add Bookmark | A displayed page can be bookmarked, and the bookmark labeled if bookmark labeling is available. |
| ⑧ |
 |
Highlighting | You can add highlighting on the displayed page. |
| ⑨ |
 |
Output | You can print out contents, send by e-mail, share contents, and register contents to favorite. |
| ⑩ |
-
|
Scrollbar | Drag the bar left or right to move the page. |
4.2 Turning Page
The following are the two ways of turning page for a content which consists from multiple pages.
4.2.1 Slide Your Finger on the Page
On the viewer screen where the content is displayed, move your finger from left to right or from right to left to slide the page.
4.2.2 Using the scrollbar
Tap anywhere on the viewer screen where the content is displayed. Then drag the scrollbar to the left or right.

4.3 Switch Multiple Images on a Page
On a content which switching image is set, you can switch images to be displayed.
1. On the viewer screen of the content, select an image. The selected image is displayed.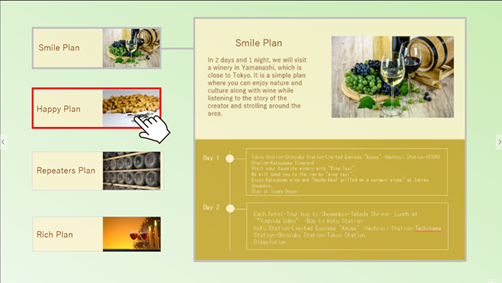
2. The following is the screen when you click on "Happy Plan". You can see the big picture on the right side has changed to the picture which is assigned to "Happy Plan".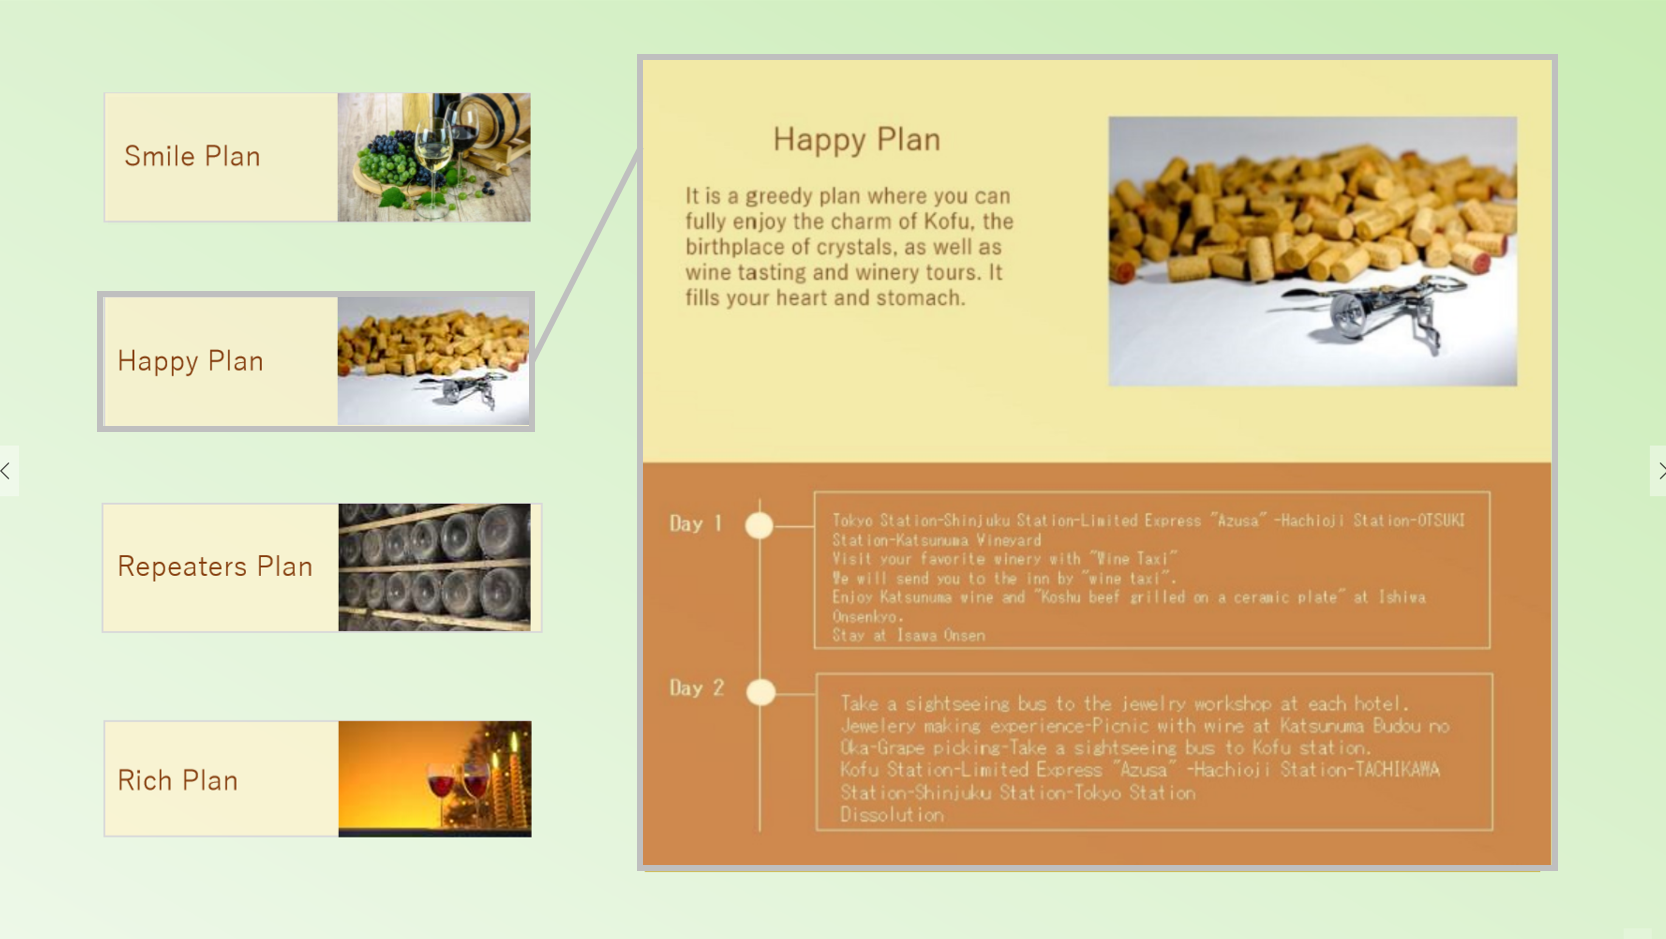
4.4 Displaying Preview Images
On contents that preview images are set, you can display multiple images in a slide show.
1. On the viewer screen of the content, select an image.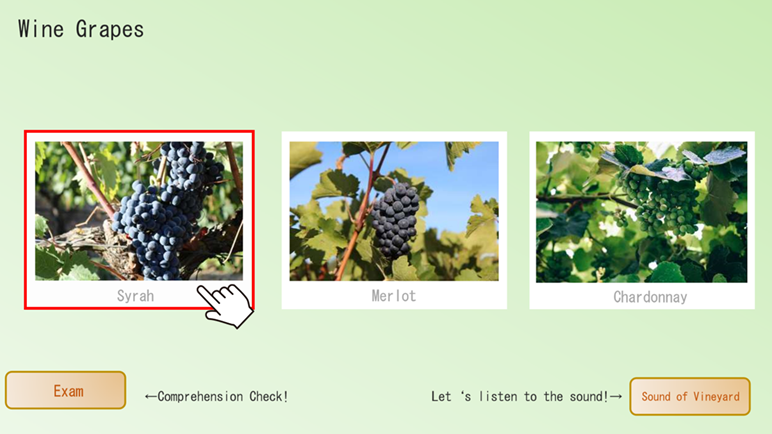
Preview images are displayed.
2. Move your finger from left to right or from right to left to switch preview images.
You can also switch preview images by selecting a thumbnail image. Select "Close" button on the top left of the screen to quit preview display.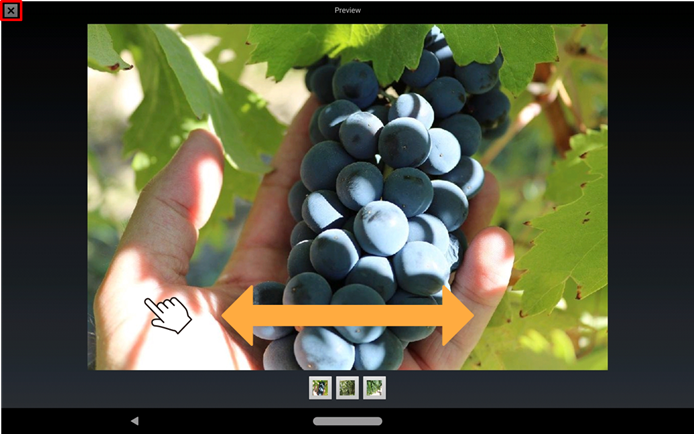
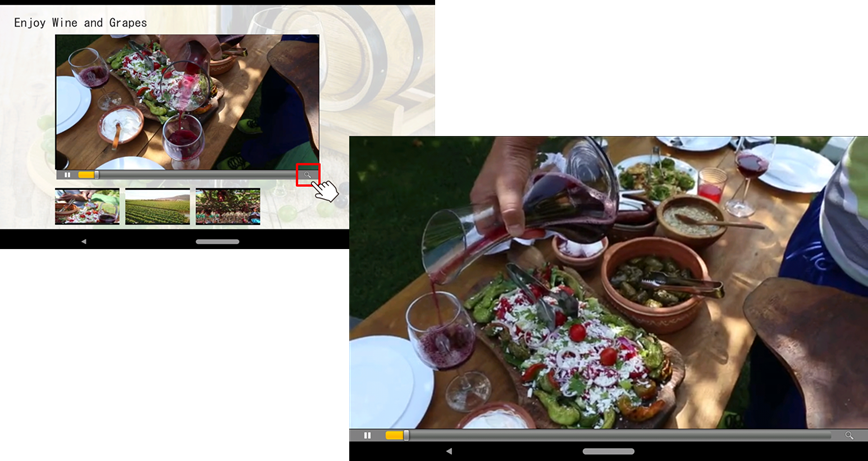
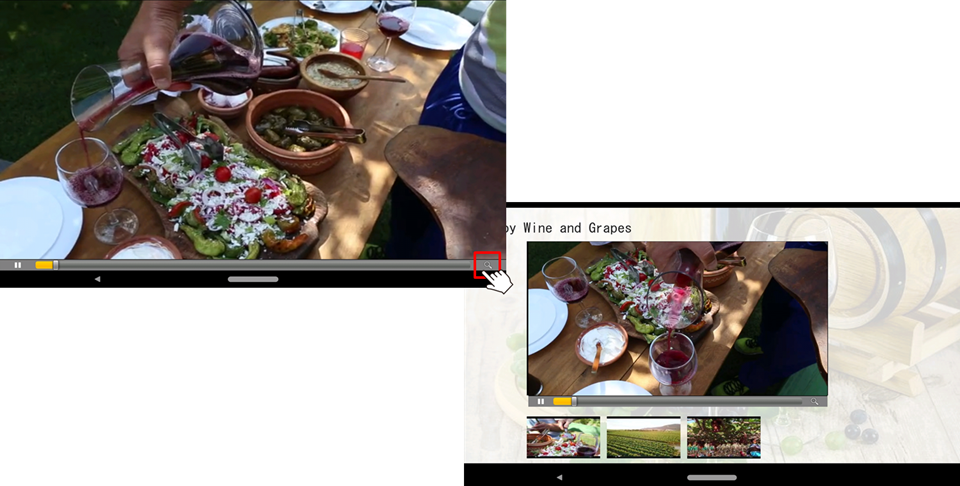
4.5 Viewing Videos
If the content you are viewing has videos on it, then you can play the videos by the following operation. Depending on how the content creator is created, there are two types of playing video, one is to tap the play button to play the video in full screen, and the other is to tap an image and play it on a part of the screen area. Also, you can download and watch videos or watch them by streaming. An Internet connection is required to play videos in content set for streaming.
4.5.1 Play the video in a Designated Area on a Page
On a content page which the "Switching Video" is set, select one of the pictures on the page. The following image shows 3 small pictures, and they work as the buttons to play the video which is assigned for each button. Tap on one of them to start playing a video on the playing area at the center of the page.
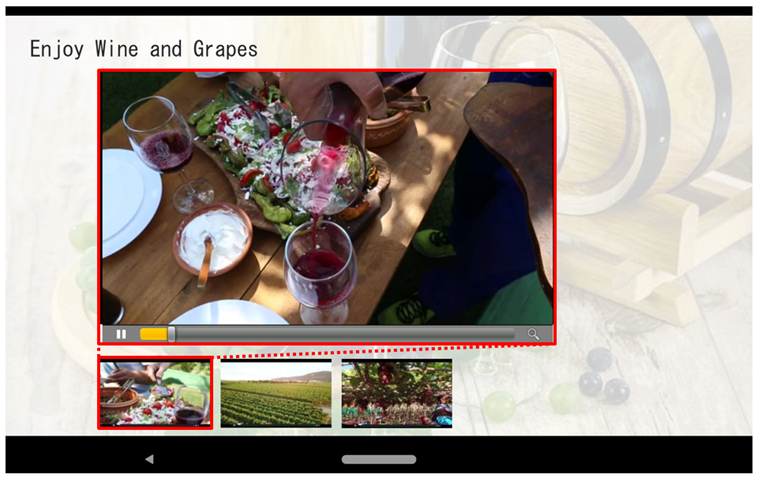 If you chose the button next to the previous one, it also starts playing another video at the playing area at the center of the page.
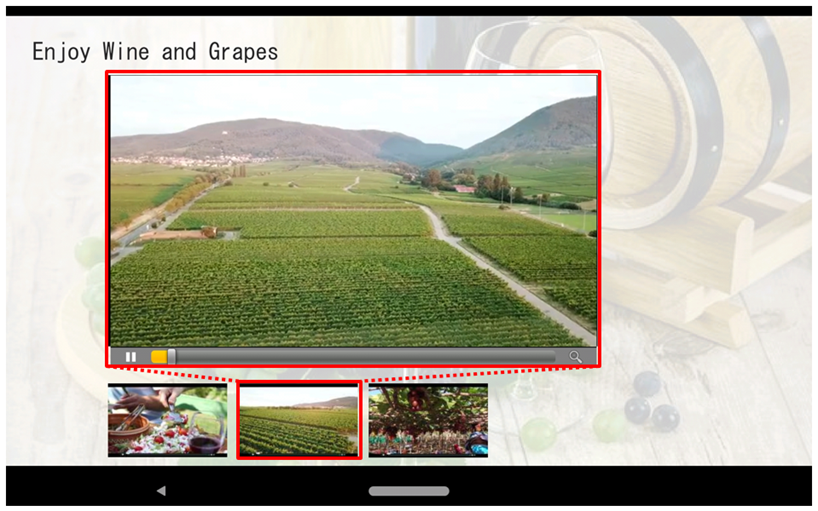
4.5.2 Play the Video in the Full Screen Mode
Tap on the "Full Screen" button placed on the video playing area to play the video on the Full Screen mode.
Tap on the "Exit Full Screen" button placed on the video playing area to return to the content page.
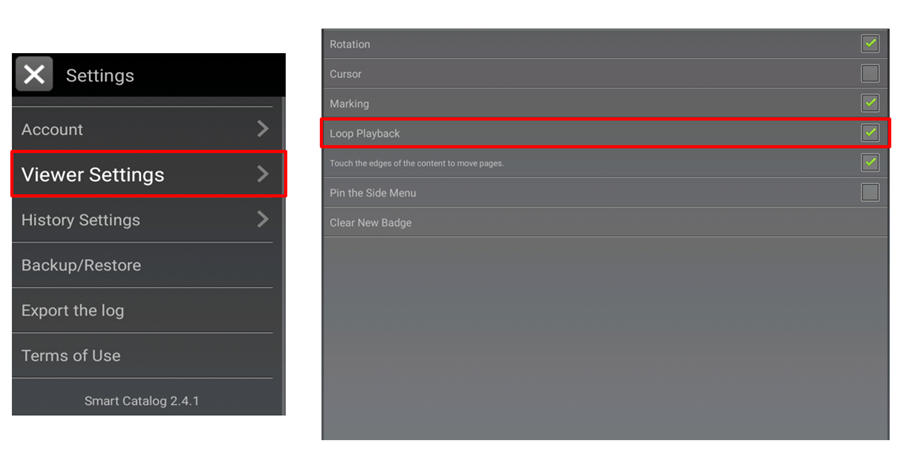
4.5.3 Loop Playback Setting for Video
You can set whether or not to play the video over and over again. On the [New Content] or [My Library] screen, tap the "Settings" button and turn "ON" the check box for the "Video Loop Playback", then once playback is finished, it repeats the playback from the beginning. If you turn it "OFF", it plays the video only once and will not play repeatedly. By default, it is configured as "ON".
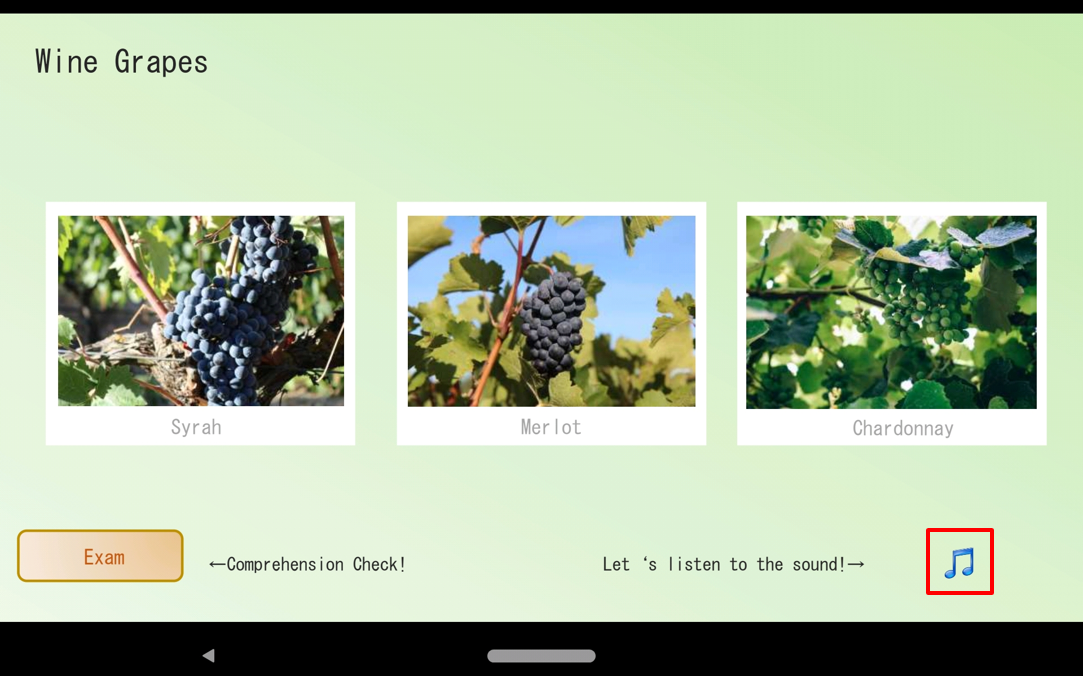
4.6 Playing Music
When the music or audio files are authored for the content, you can play it while viewing the content.
1. On the viewer screen of the content, select the "Play Audio"  button.
The music is played.
Memo
- If the music is set for a content and it requires to tap the button to start playing the music, then tap the play button to start playing.
- Music registered to a specific page stops if you move to a different page while it is playing. Music registered to the entire content keeps playing even if you move to a different page.
- If the music is set for a content as the content BGM, then the music starts automatically when you open the content and it keeps playing until you close the content.
4.7 Jump to the Linked Websites
When a website link button is registered to the content, you can display the corresponding website using a web browser on your device.
1. On the viewer screen of the content, select the button to link to the website. The website is displayed.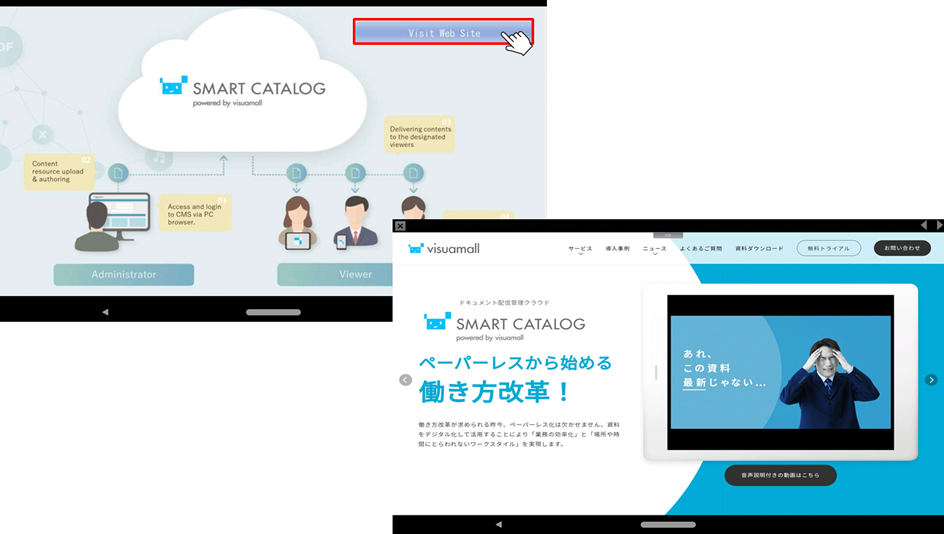
Memo
Websites are displayed on the Android device standard web browser (e.g. Google Chrome) or dedicated browser for SMART CATALOG depending on how the content is authored.
2. To go back to the content from the website, select the  (Close) button.
4.8 Jump to a Different Content
When a button to link multiple contents is registered to the content, you can jump to the specified page of a different content.
1. On the viewer screen of the content, select the button to link to a different content. Then the designated content is displayed.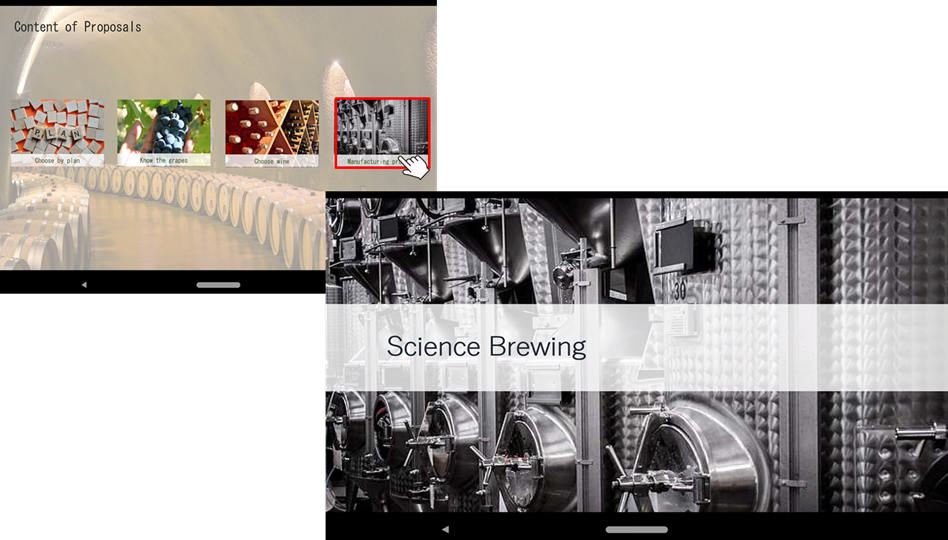
To go back to the previous content, press the "Back" button of the Android device.
If the destination content has not been downloaded
If the destination content has not been downloaded, the details screen of the destination content is displayed and you can directly download the content.
1. On the viewer screen of the content, select the button to link between contents. Then the confirmation for download is displayed.
2. Select [Confirmation].
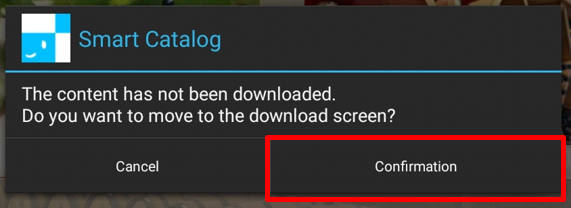
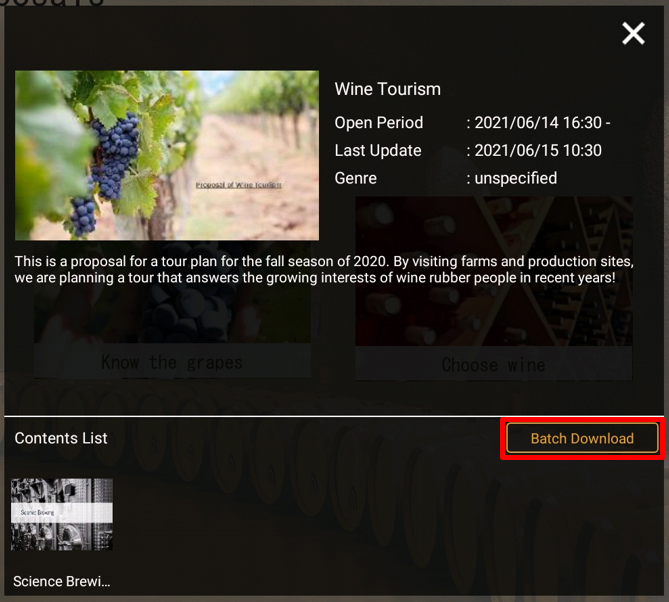
The [Content Detail] screen is displayed.
3. After selecting the content to download, its details will be displayed, select the "Download" button. You can also select the "Batch Download" button to download the related contents that have not been downloaded at once.
4.9 Rotate a 3D Animation
When 3D animation is registered to the content, you can use and display 3D animation. Slide the image up, down, or sideways on the screen to display it as 3D animation.
1. If you find the "3D Animation" icon on the content, make a long-tap on the screen, and swipe your finger to rotate the 3D animation. 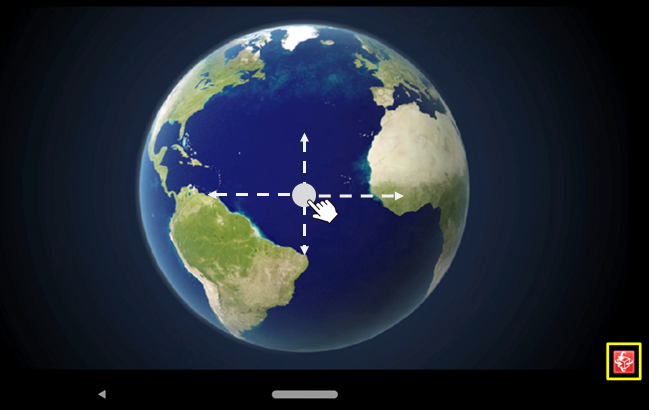
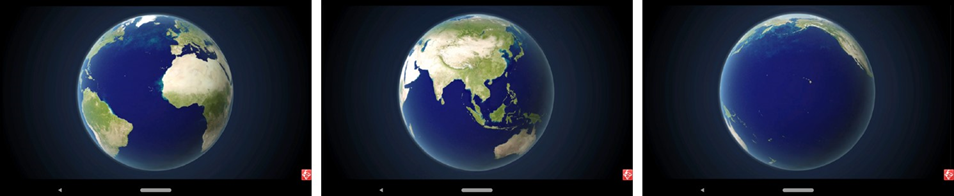
2. The smoothness of the rotation depends on how many pictures are used for the 3D. The maximum is 15*15.
4.10 Displaying HTML Content
If HTML content is registered to content, the HTML content can be displayed using the browser function of the device.
1. On the viewer screen of the content, select the button to link to the HTML content.
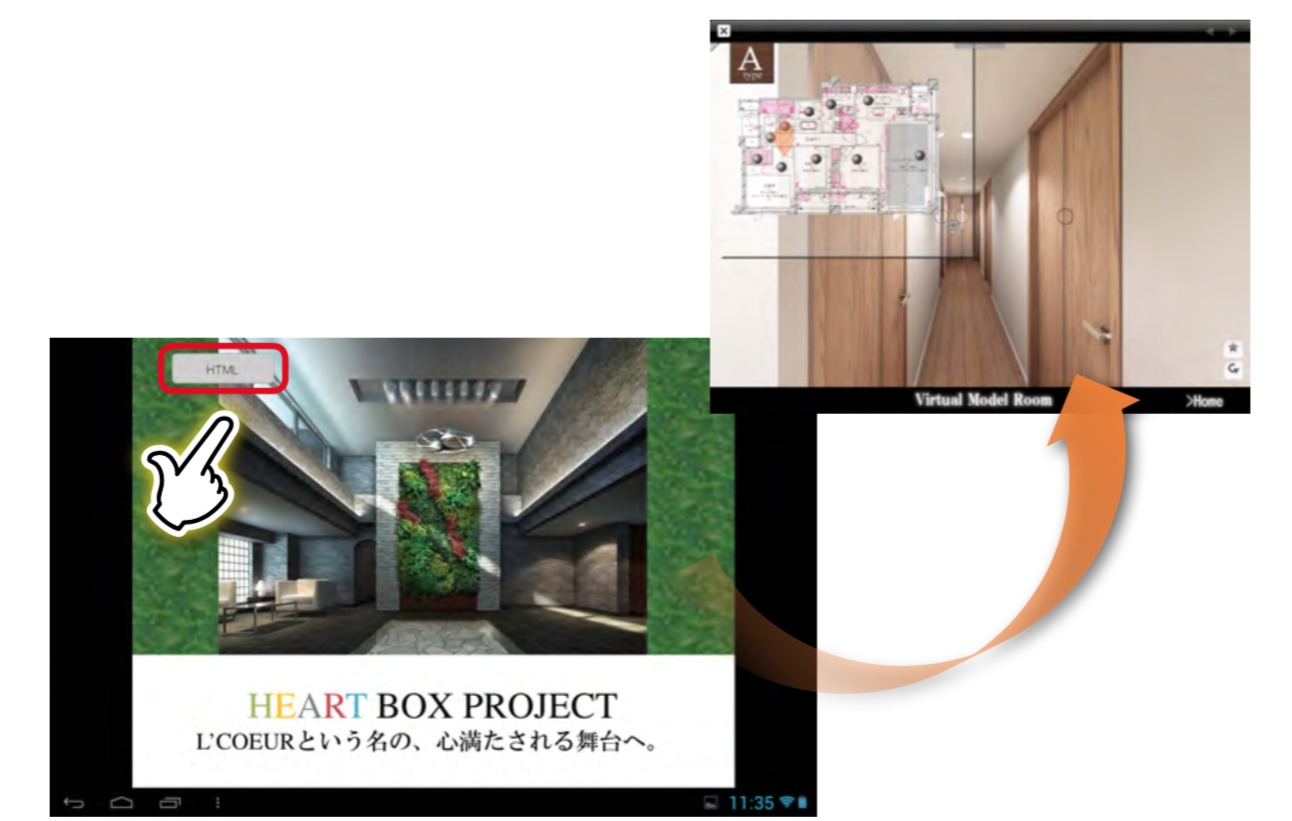
The HTML content is displayed on the dedicated browser for SMART CATALOG.
2 To quit displaying the HTML content, select the  (Close) button.
Hint
Difference between the  (Back/Forward) button on websites and
  (Close) button of SMART CATALOG

When website is specified as a link destination from SMART CATALOG, you can view websites on SMART CATALOG.
You can move to a website using the  (Back/Forward) button on the operation menu as well.
 Move to the website you viewed previously.
 Move to the website you last viewed.
To go back to the content of SMART CATALOG from a website, press the  (Close) button on the operation menu.
4.11 Answering a Questionnaire
If a questionnaire is set in a content, you can answer it and send the answer to the administrator.
1. If you find a button of a questionnaire on a content, click the button, then the questionnaire form is opened.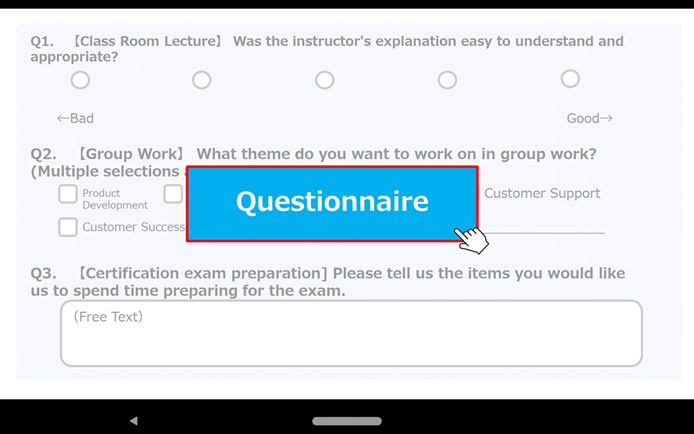
The questionnaire is displayed on the right side of the screen or full screen, depending on how the questionnaire is set by the editor.
2. Select or enter the answer to the questionnaire.
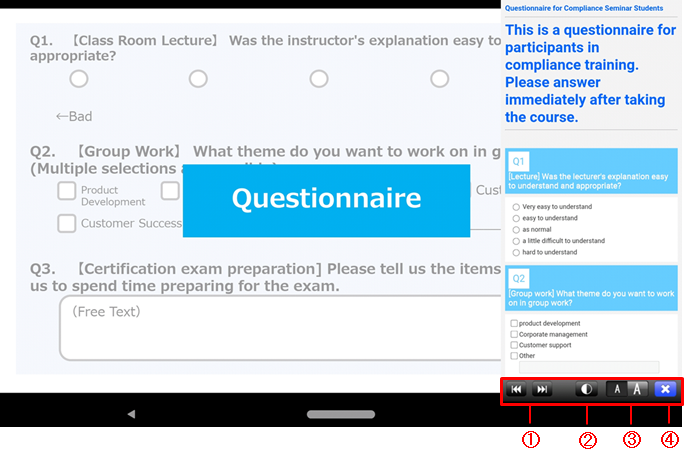
Display of the questionnaire form can be changed using the buttons shown below the questionnaire.
| ① | This button moves the position of the form. If the form hides the part of the content you want to view, then use this button to move the form position. Left end or right end of the screen is available as the position. When the questionnaire is shown as "Full Screen", then these buttons are hidden. | |
| ② |
|
This button adjusts the transparency of the questionnaire form. If you want to view the content while opening the form, then adjust the transparency of the form by using this button. If you click this button, then the scroll bar shows. It has 0 to 100 as the level. 0:100% transparent, 100:100% opaque |
| ③ | This button switches the size (large or small) of the text on the questionnaire form. | |
| ④ | This button closes the questionnaire form. |
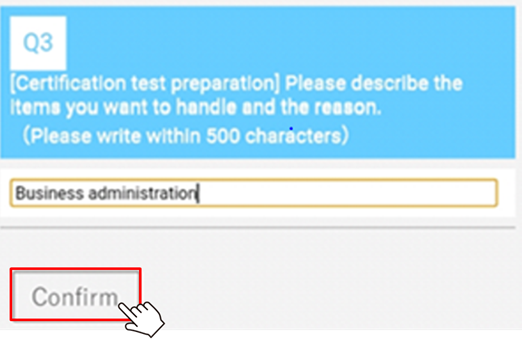
3. After answering the questionnaire, select the “Confirm” button at the bottom of the questionnaire displayed.
Then, a confirmation is displayed.
4. Confirm the information entered and tap the “Send” button. To change the answer, tap the “Back” button.
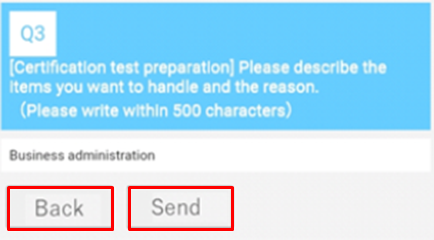
The answer for the questionnaire is sent to the content management system. If the answer is sent when you are off-line, the answer will be sent when the connection status becomes online.
5 Select the "Close" ![]() button to exit from the questionnaire.
button to exit from the questionnaire.
・Questionnaires are displayed in different styles and colors depending on how it is authored.
・For questionnaires of "answer once only", tapping the link button of the questionnaire will display "This questionnaire has already been answered." after once you have answered it.
4.12 Copying Texts
You can copy text on the pages of a content. You can paste it to other applications such as memo input bar on a web page.
1. Tap anywhere on the screen, and open the operation menu. From the operation menu, select "Text Copy" ![]() button.
button.
2. The entire text on the page is copied on the memo pad. So select the text you want to copy, and tap "Copy" button.
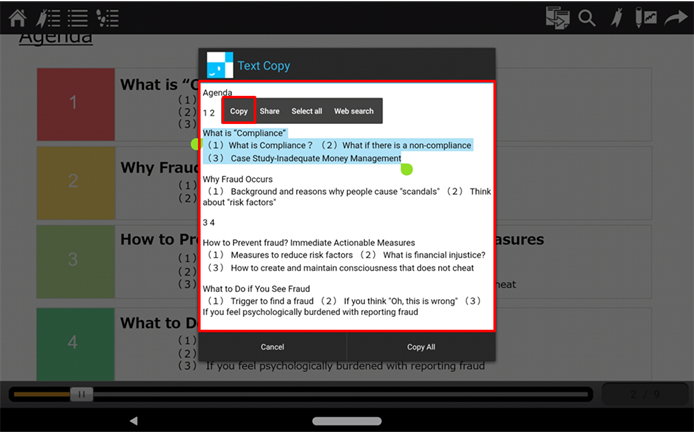
3. Paste the text on the copy destination.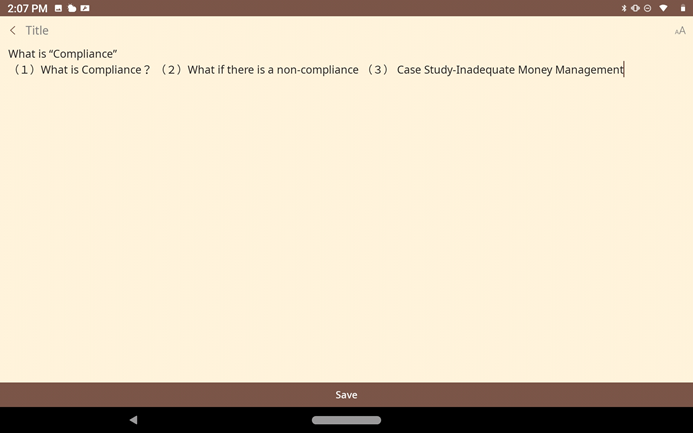
Hint
To copy all texts in the content, select "Copy All" ![]() button.
button.
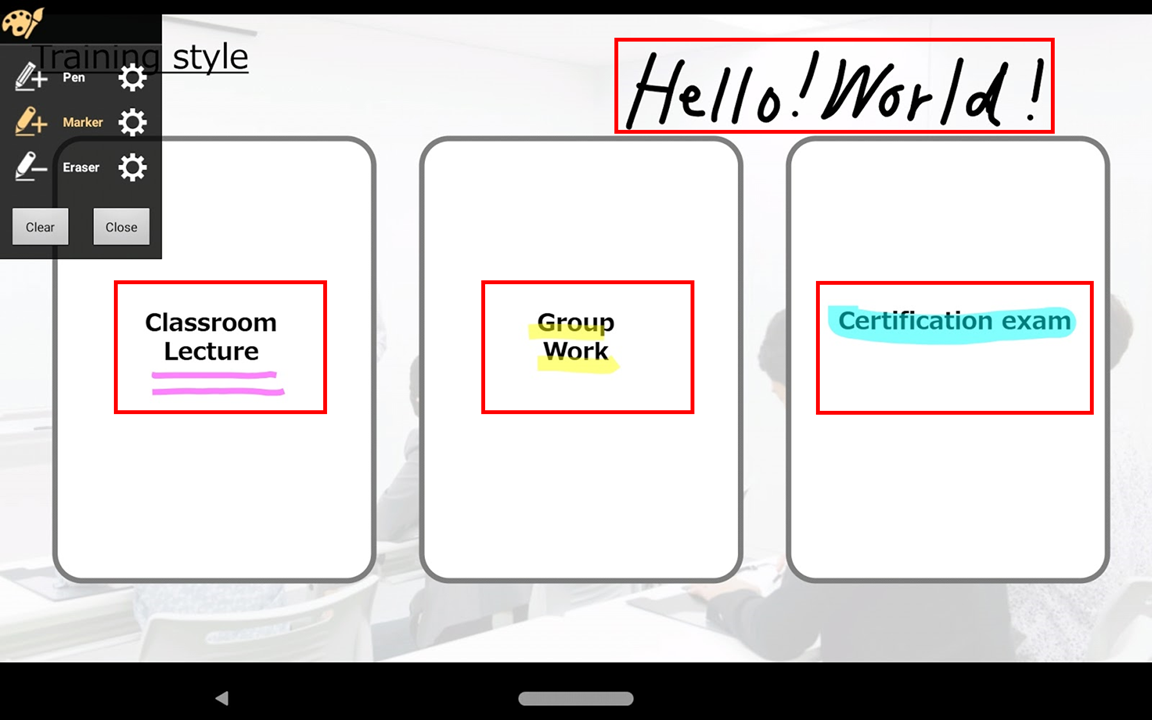
4.13 Highlighting Texts
Before you use "Marking" function, please check the "Viewer Setting" to make sure the "Marking" function is activated. Tap "Setting" button on [My Library] screen. 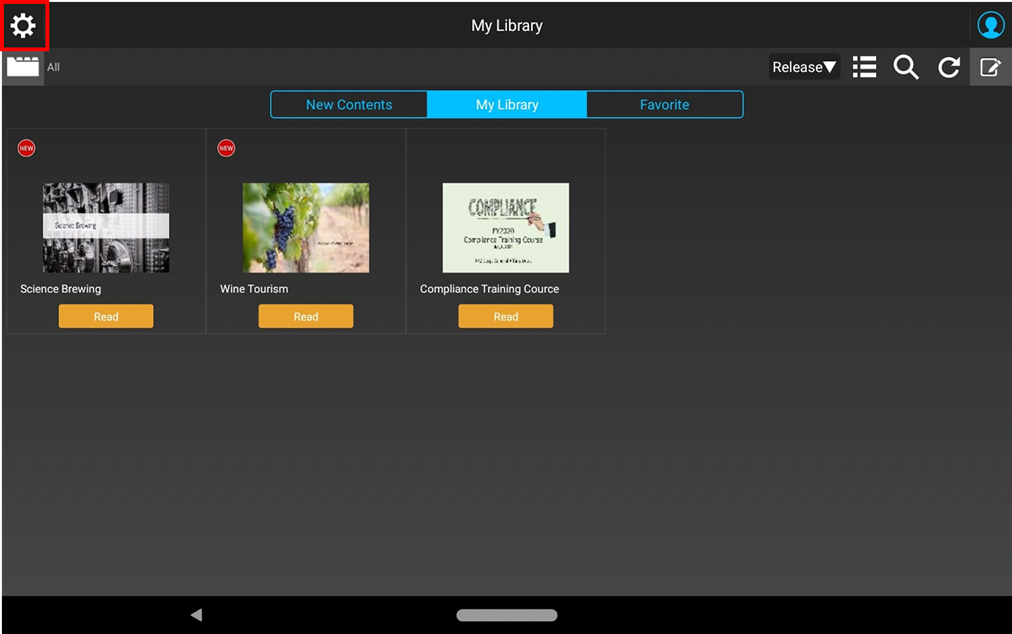 From the list, select "Viewer Settings" and turn the "Marking" on.
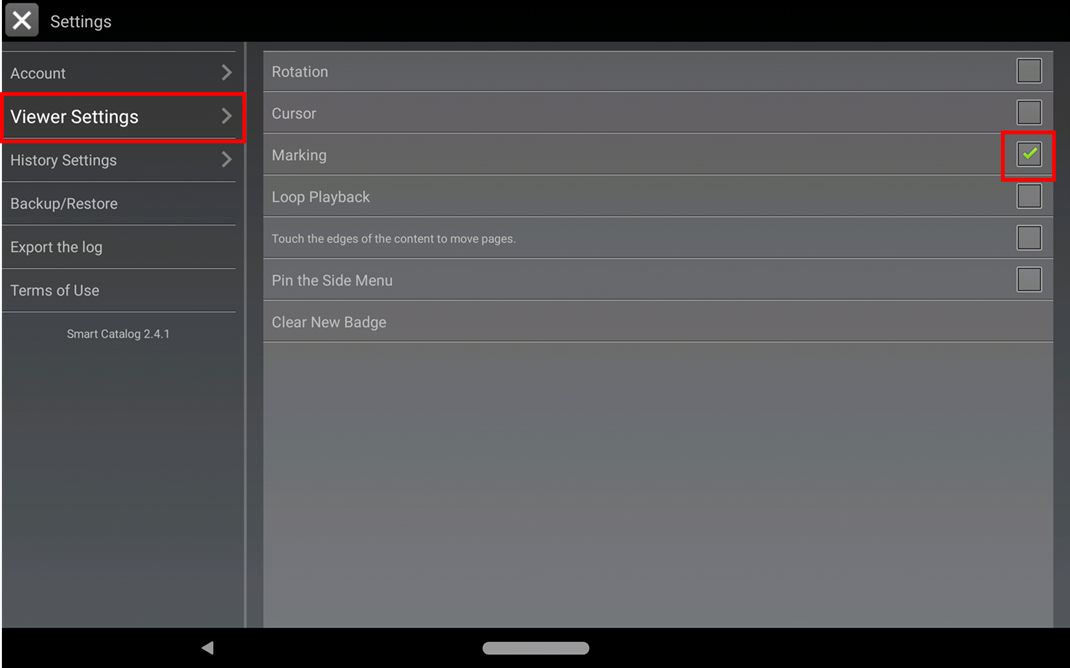
You can highlight text or make a handwriting note on the page by using the handwriting pen.
1. Make a tap anywhere on the screen, and open the operation menu. From the operation menu, select the “Marking” button.
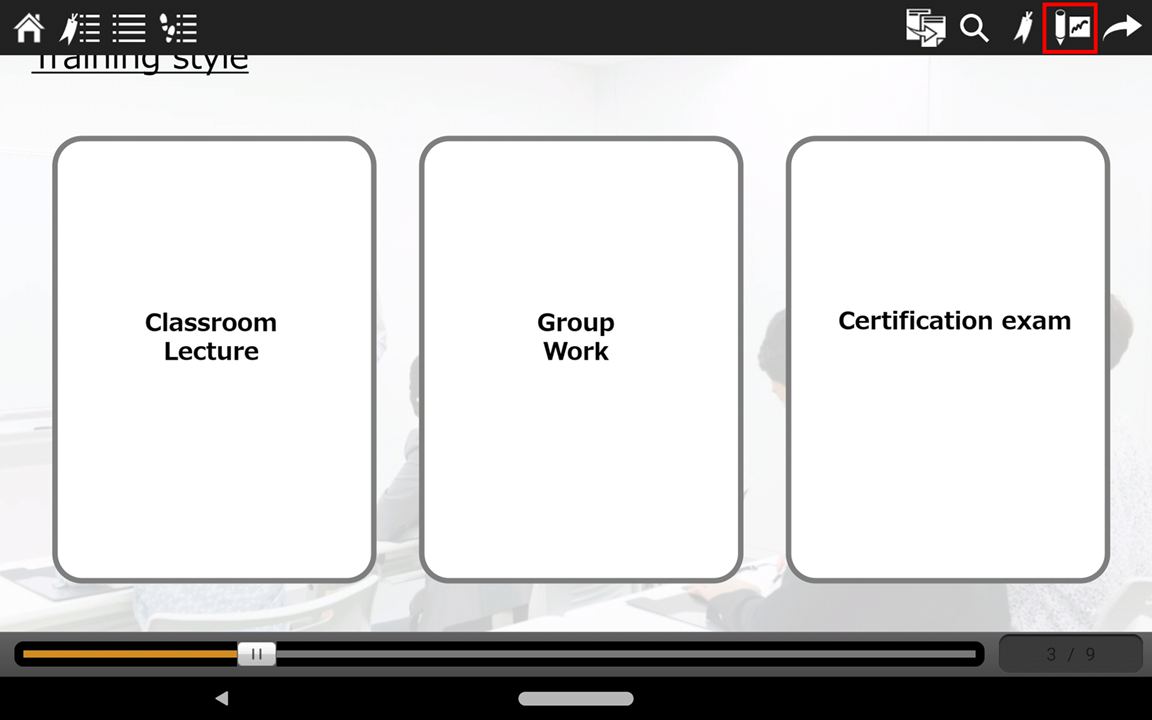
2. Then the menu of "Marking" mode appears. Functions available for "Marking" mode are as listed below.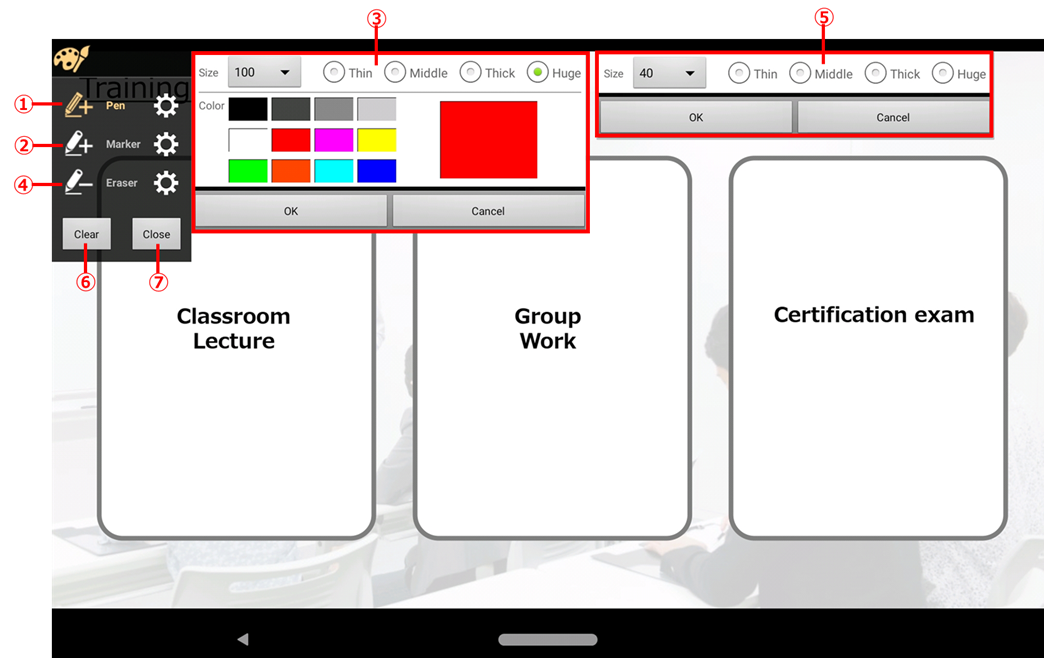
| ① | Pen | If you want to make a handwriting note, select this. The color is opaque. Drag or slide your finger on the content area to make the handwriting. Tap on "Setting" |
|
| ② | Marker | If you want to make a highlight on text, select this. The color is semitransparent. Drag or slide your finger on the content area to make the highlighting. Tap on "Setting" |
|
| ③ | - | Settings | This is the setting menu for ① and ②. You can select the thickness and the color of the pen or marker here. The thickness can be specified by the number; 1:thinest, and 100:thickest. Select as you like and tap "OK" to reflect the preference. |
| ④ | Eraser | If you want to delete handwriting or highlighting you made, select this. Drag or slide your finger on handwriting or highlighting you made to delete them. | |
| ⑤ | - | Settings | This is the setting menu for ③.You can select the size of the eraser here. The size can be specified by the number; 1:thinest, and 100:thickest. |
| ⑥ | Clear | To delete handwriting or highlighting you made, select this. | |
| ⑦ | Close | To exit "Marking" mode, select this. |
When you tap on "Clear" button, the following confirmation shows.
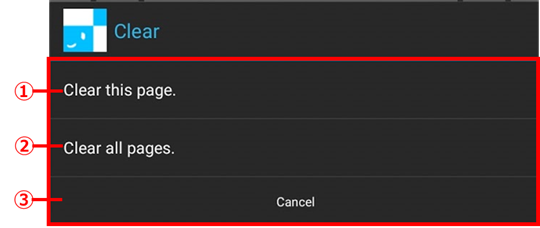
| ① | If you want to clear handwriting or highlighting you made on the page, tap this. |
| ② |
If you want to clear handwriting or highlighting you made on the entire content, tap this. |
| ③ | If you want to continue "Marking" mode, tap this. |
When you tap on "Close" button, the following confirmation shows.
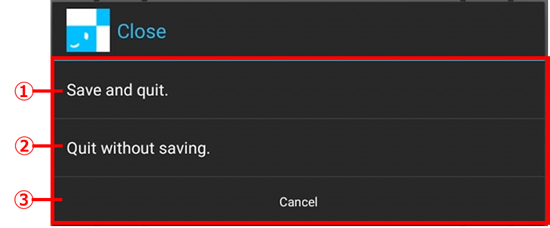
| ① | If you want to save handwriting or highlighting you made on the page and exit "Marking" mode, tap this. |
| ② |
If you want to exit "Marking" mode without saving handwriting or highlighting you made on the page, tap this. |
| ③ | If you want to continue "Marking" mode, tap this. |
3.If you exit from "Marking" mode after saving the handwriting or highlighting you made, then it shows them on the content page. The page with handwriting or highlighting data has "Marking" ![]() icon as below.
icon as below.
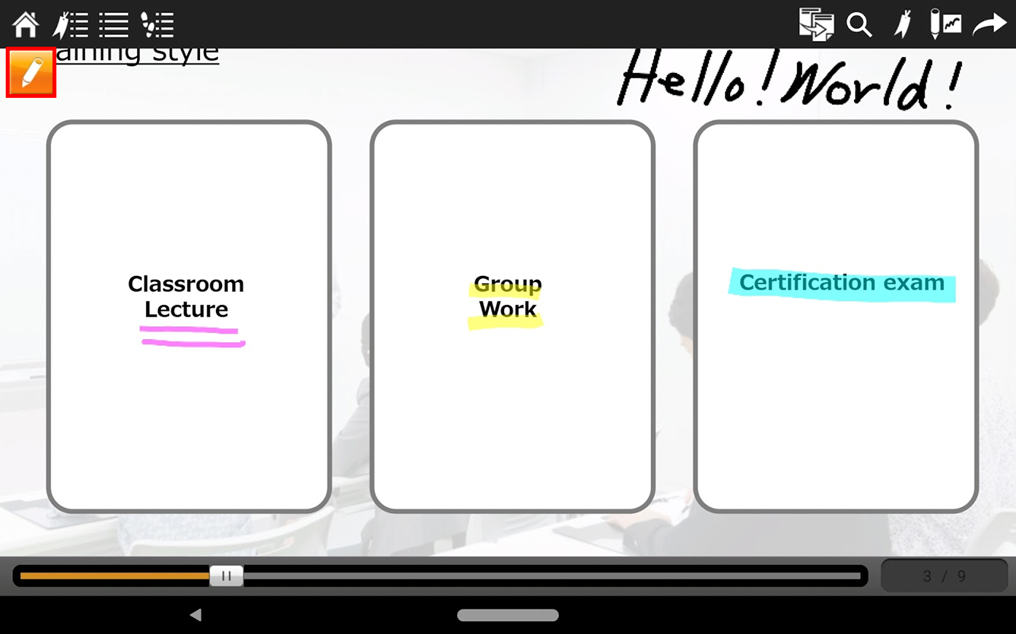 4. If you want to hide the handwriting or highlighting data, then tap "Marking"
 ![]() icon again, then the data is hidden and "Marking" icon turns to be gray
icon again, then the data is hidden and "Marking" icon turns to be gray ![]() .
.